1. Introduction
In today's digital landscape, efficient data transfer is essential for businesses to operate seamlessly. This guide explores how to transfer data using Google Cloud Platform (GCP), offering step-by-step instructions for both the GCP console and Prismscaler methods. Whether you're a seasoned DevOps professional or new to cloud technologies, this article will help you navigate the process.
2. Purpose
The purpose of this guide is to provide comprehensive instructions on transferring data within Google Cloud Platform. By the end of this article, readers will have a clear understanding of how to utilize GCP's tools for data transfer, whether using the GCP console or the Prismscaler option. The guide caters to both individuals with DevOps knowledge and those without, ensuring that regardless of your expertise level, you can effectively transfer data on GCP.
3. What is GCP Data Transfer?
GCP Data Transfer refers to the suite of services and tools provided by Google Cloud Platform to facilitate the movement of data. It offers efficient and secure methods to transfer data, ensuring minimal downtime and maximum data integrity. GCP Data Transfer encompasses multiple approaches, including utilizing the GCP Console and third-party tools like Prismscaler.
4. Creating GCP Transfer Data with GCP Console
Estimated time
This section outlines the process of transferring data using the GCP console. For those with DevOps knowledge, the estimated time for completing this process is 4-5 hours. If you're new to DevOps, you might need 1-2 days to familiarize yourself with the steps. The content covers setting up the necessary credentials, configuring data transfer settings, and monitoring the progress.
The GCP Console provides a user-friendly interface for creating data transfers. Here's a step-by-step guide:
Access GCP Console:
Log in to your GCP account and navigate to the GCP Console.
Choose Source and Destination:
Select the source and destination for your data transfer. This could be between GCP services, across different projects, or from external sources.
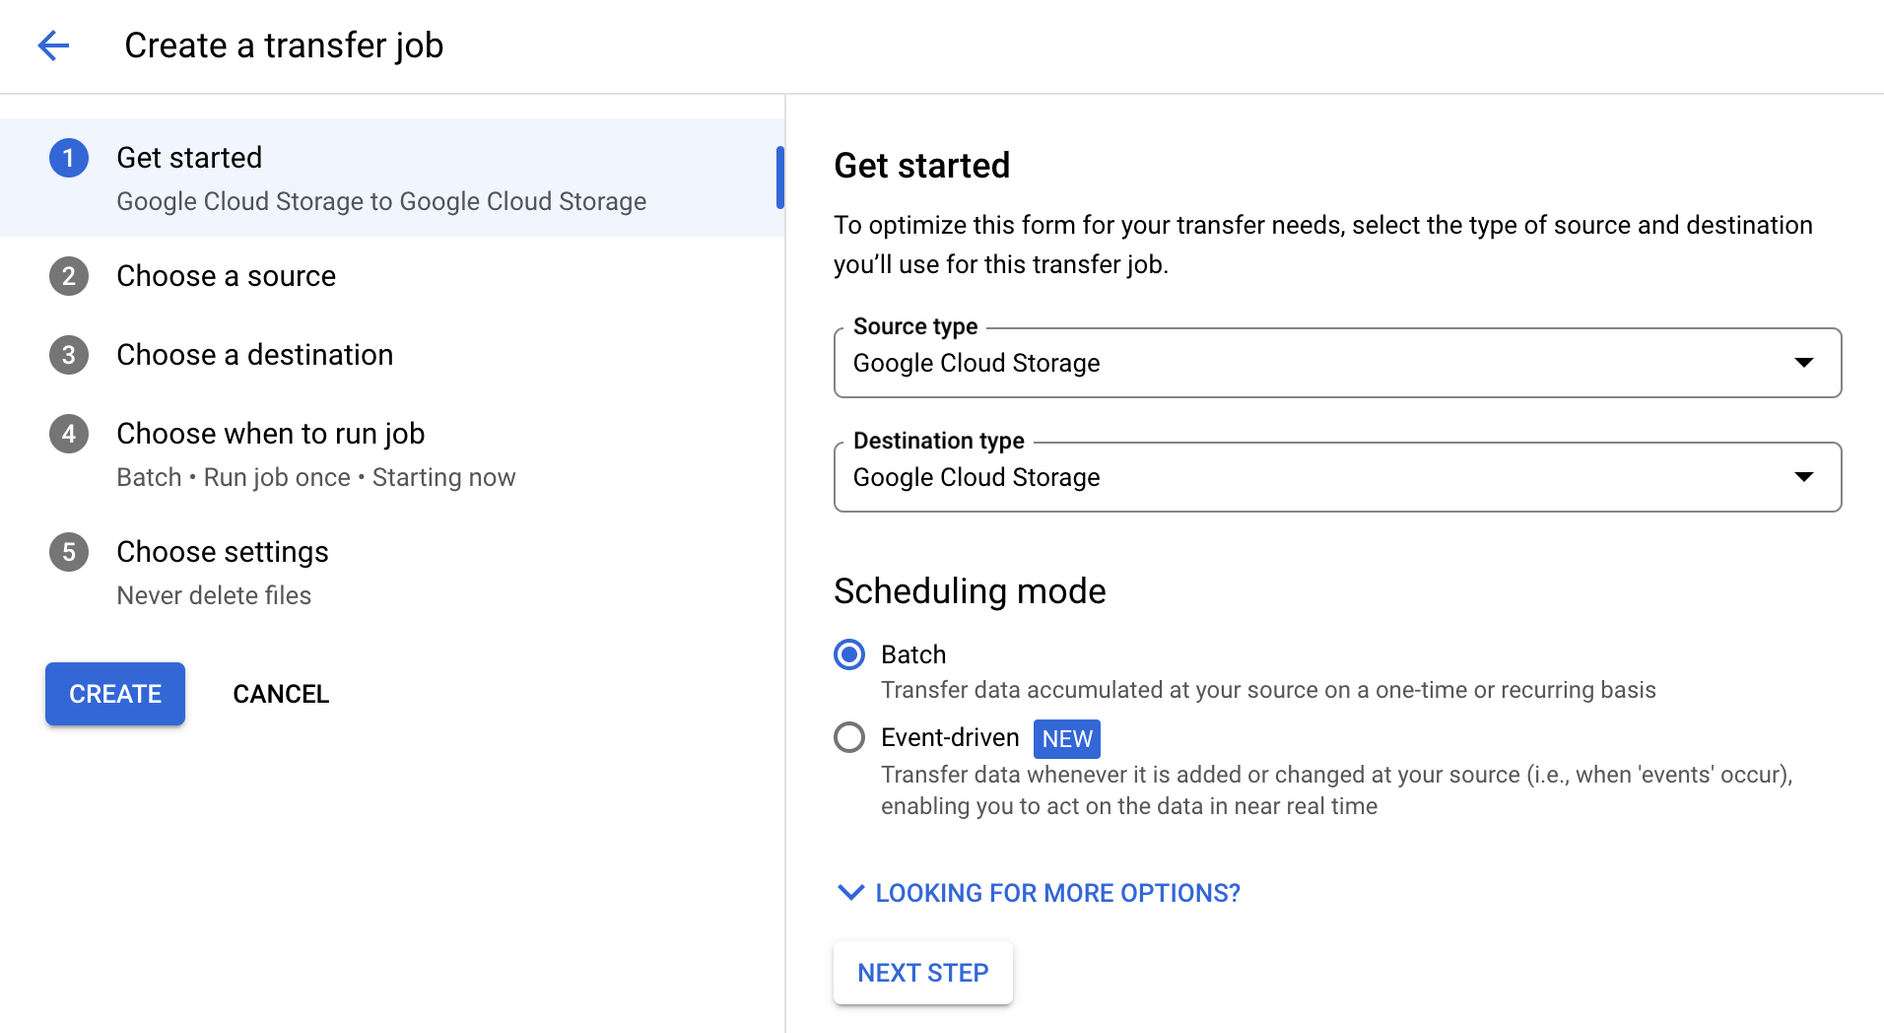 Configure Transfer Settings:
Set transfer parameters such as data frequency, authentication, and encryption options.
Configure Transfer Settings:
Set transfer parameters such as data frequency, authentication, and encryption options.
 Initiate Data Transfer:
Start the data transfer process and monitor its progress through the Console.
Initiate Data Transfer:
Start the data transfer process and monitor its progress through the Console.
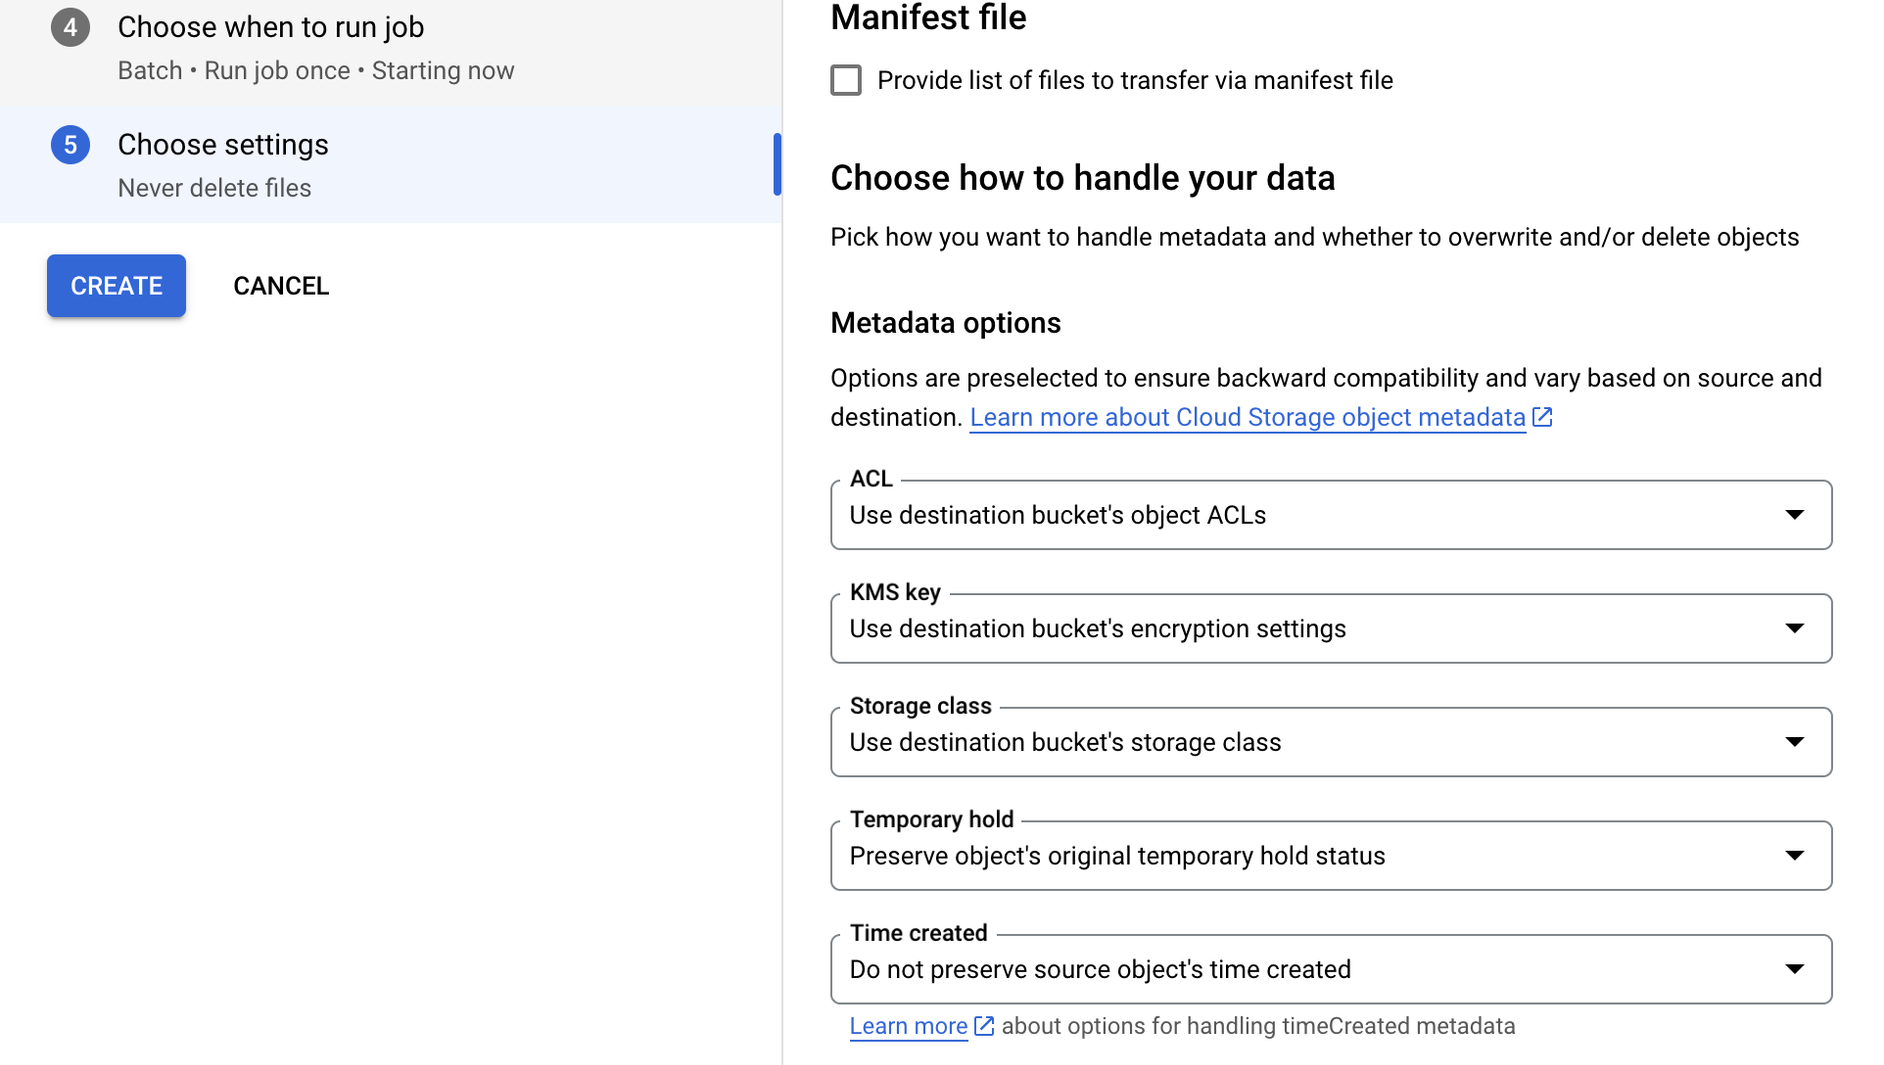
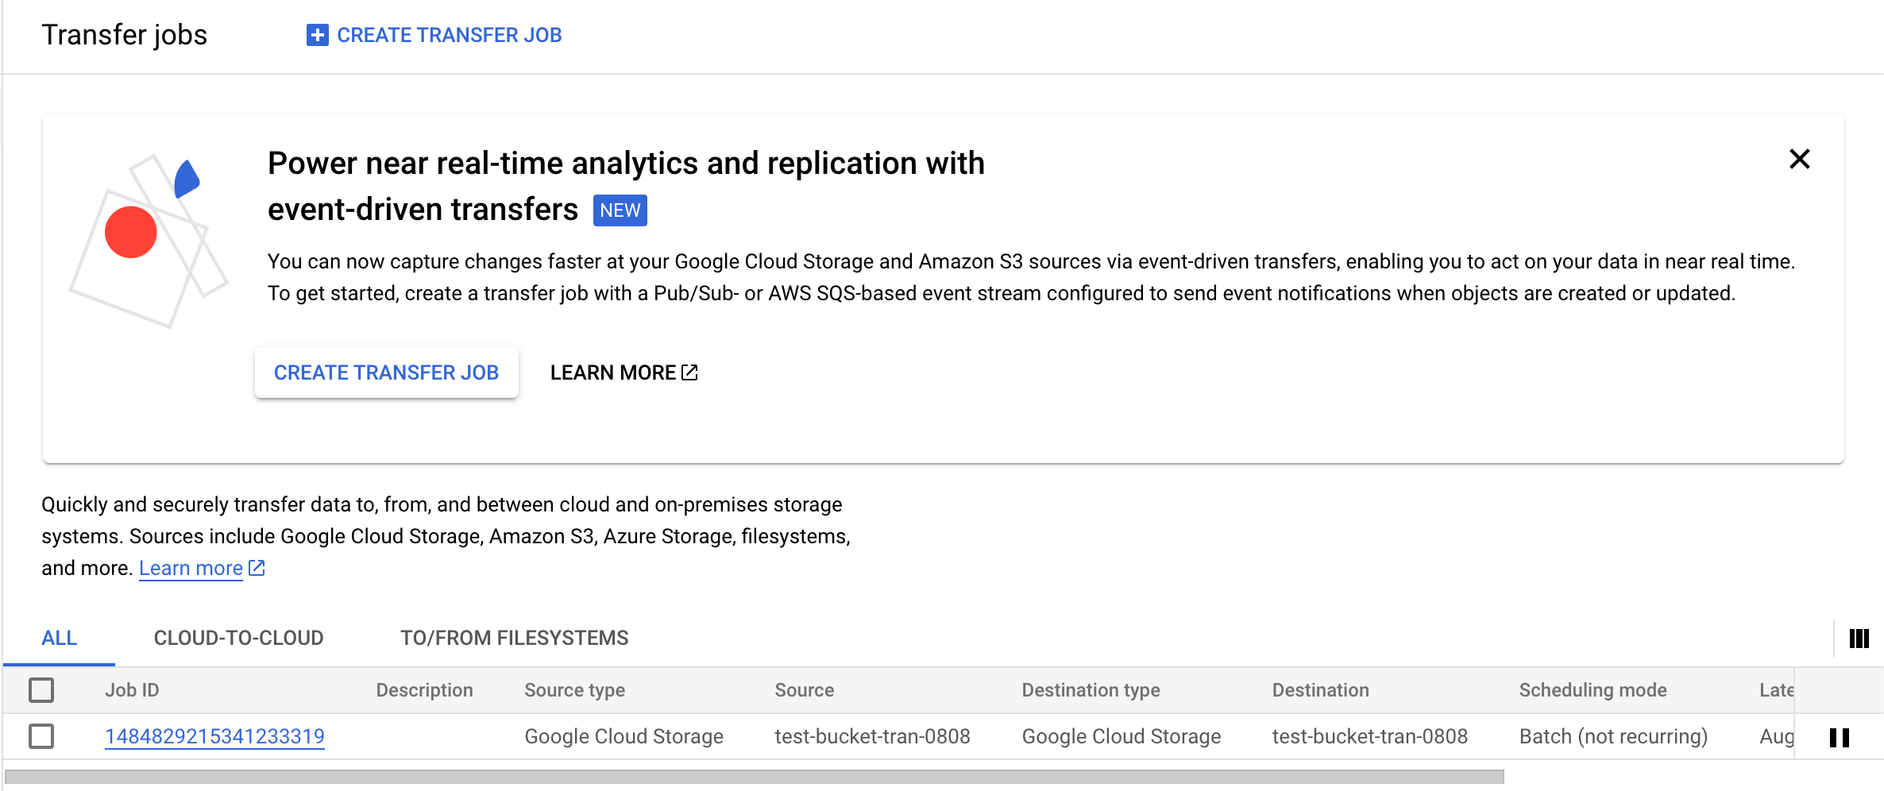 Monitor and Manage:
Use the Console to monitor ongoing transfers, troubleshoot issues, and manage data movement tasks.
Monitor and Manage:
Use the Console to monitor ongoing transfers, troubleshoot issues, and manage data movement tasks.
Configure Transfer Settings:
Set transfer parameters such as data frequency, authentication, and encryption options.
Initiate Data Transfer:
Start the data transfer process and monitor its progress through the Console.
Monitor and Manage:
Use the Console to monitor ongoing transfers, troubleshoot issues, and manage data movement tasks. 5. Creating GCP Transfer Data with Prismscaler
Estimated time
For individuals seeking a quicker data transfer method, this section explains how to use Prismscaler on GCP. Even without DevOps knowledge, the process can be completed in just 5-10 minutes. The content walks through the streamlined steps of initiating data transfer using Prismscaler and highlights its advantages for rapid data migration.
Creating GCP Transfer Data with Prismscaler
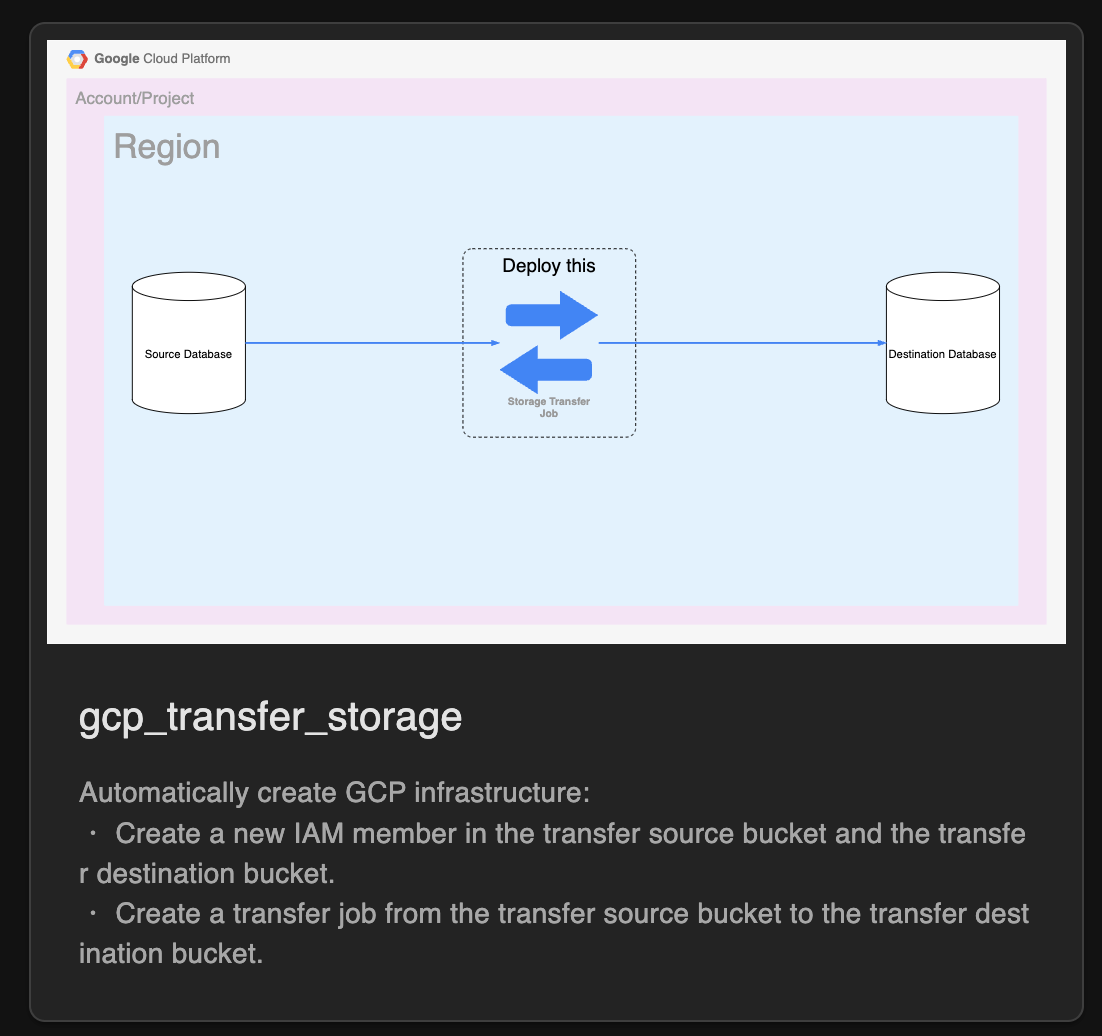
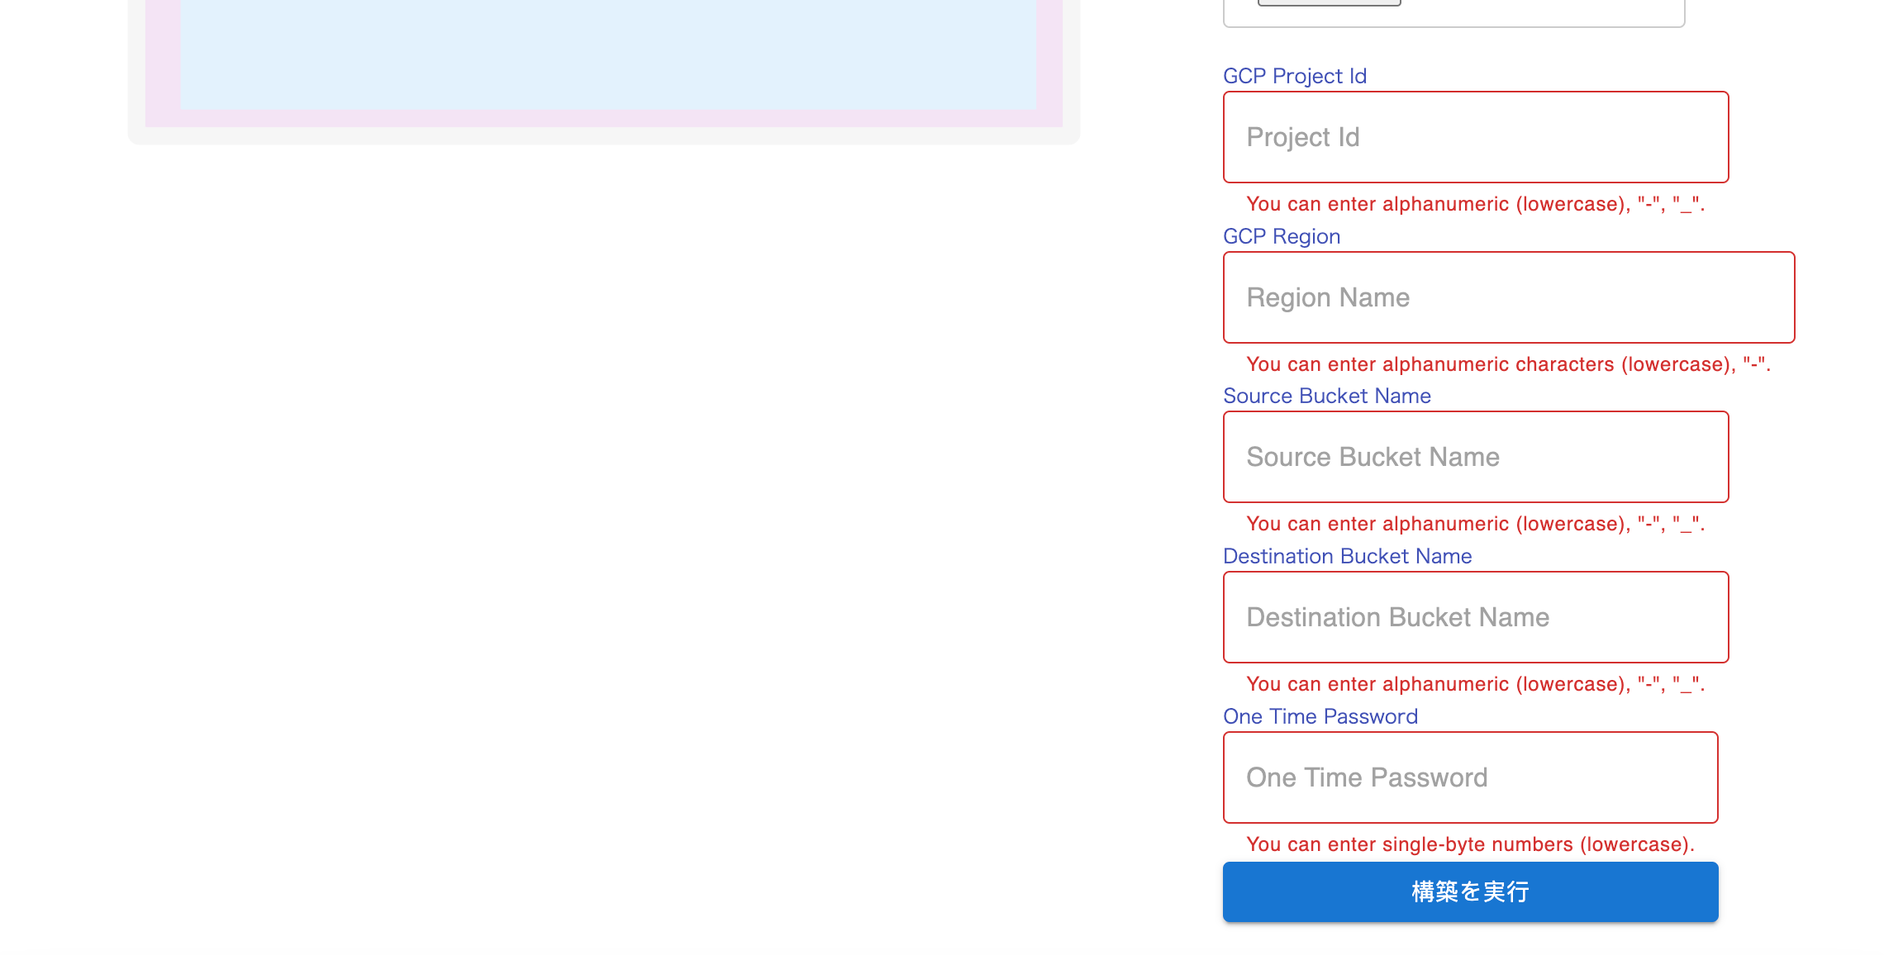
- Login to your prismscaler account
- Choose VM architecture to create
- Input all the necessary info
- Process and wait around 10 mins for the arch to deploy
- Check azure console to complete the architecture.
6. Reference
This section provides a list of references, resources, and links to further information about GCP data transfer, network architecture, and related topics. Readers can use these references to deepen their understanding and explore more advanced concepts.