1. Introduction
2. Purpose
3. What is Azure Storage?
4. Creating Azure VM and Storage with Azure console
- Navigate to Azure Portal and sign in with your Azure account credentials.
- Click "Create a resource" and search for "Virtual Machine."
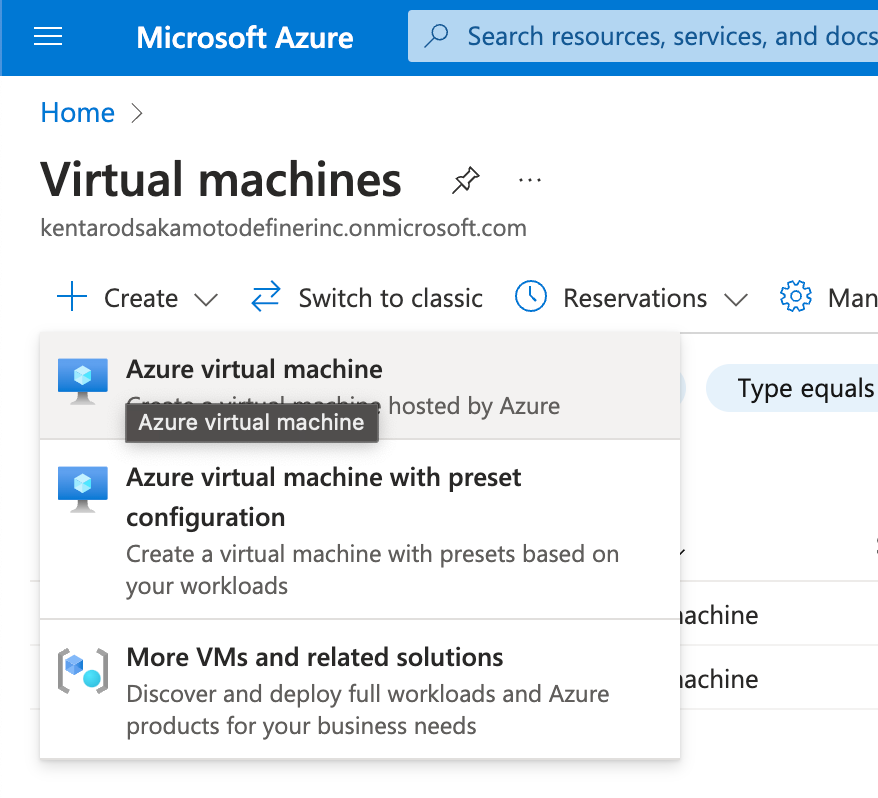
- Choose the VM type (Windows, Linux), and click "Create."
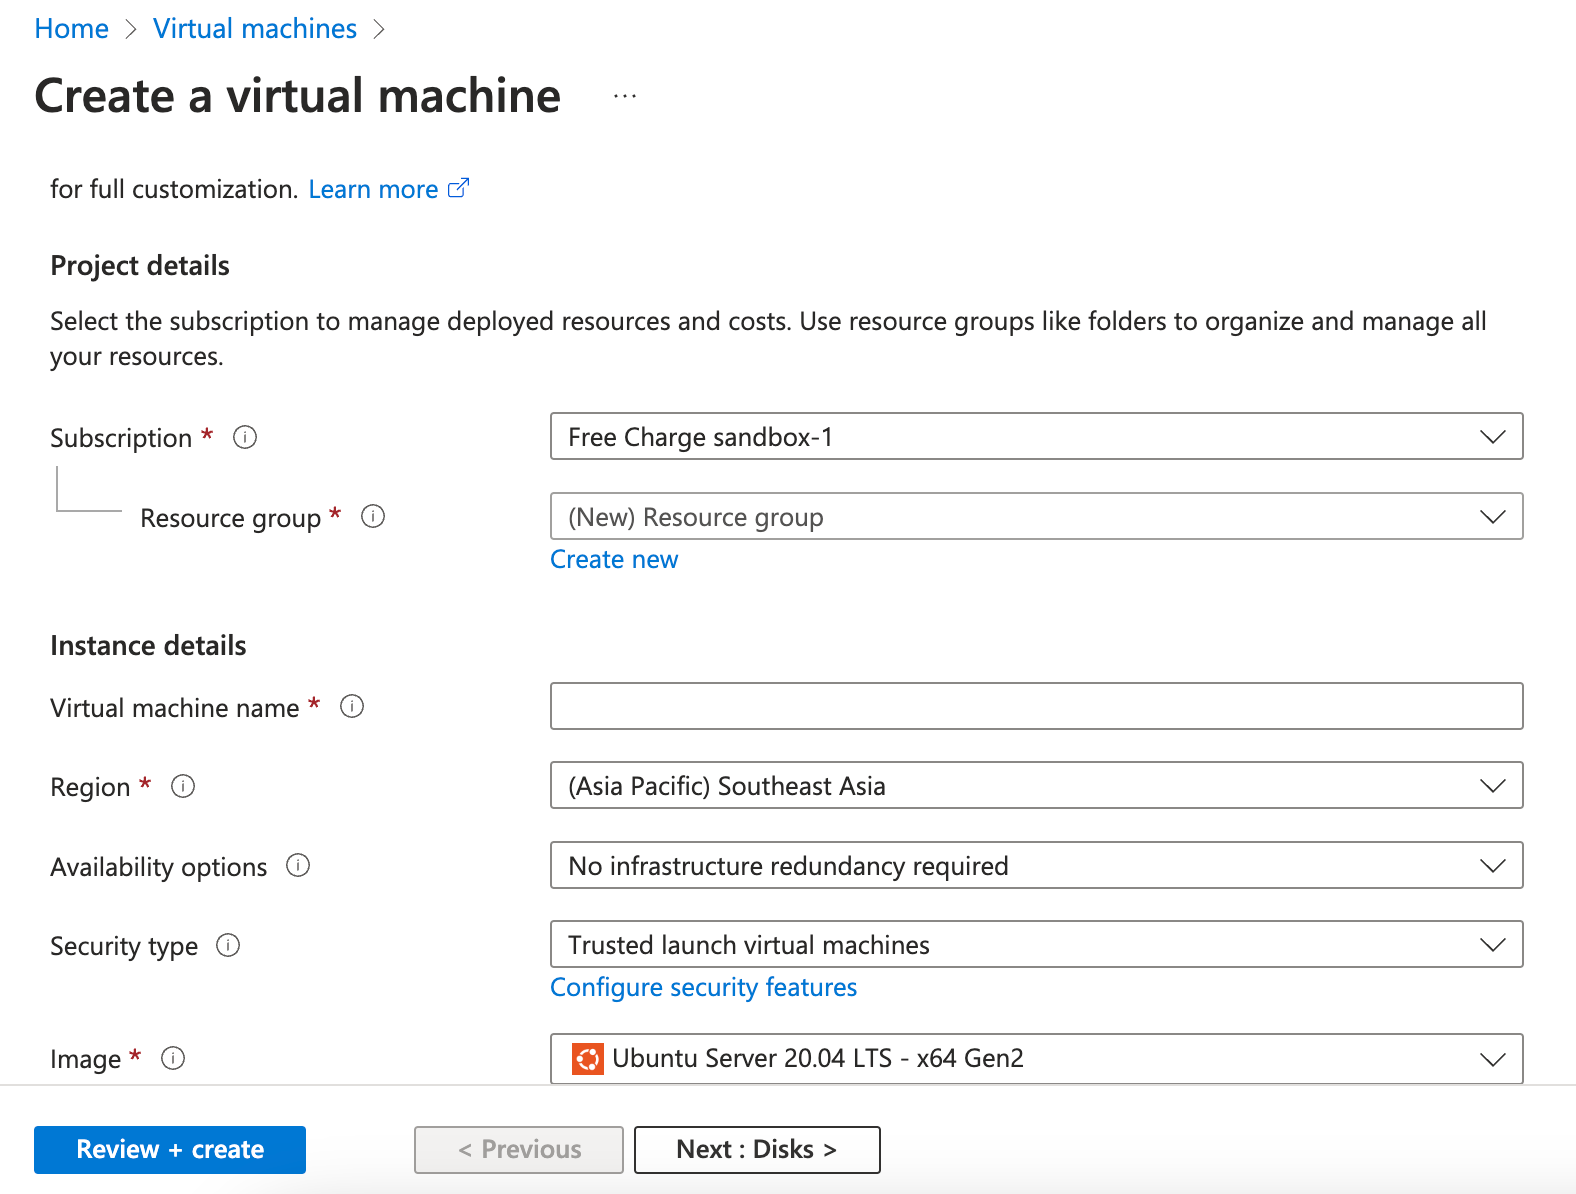
- Configure VM settings:
- Define VM name, choose an existing resource group, or create a new one.
- Select region, image, size, and authentication credentials.
- Configure networking, such as virtual network and subnet.
- Review and click "Create."
 Access Azure VM:
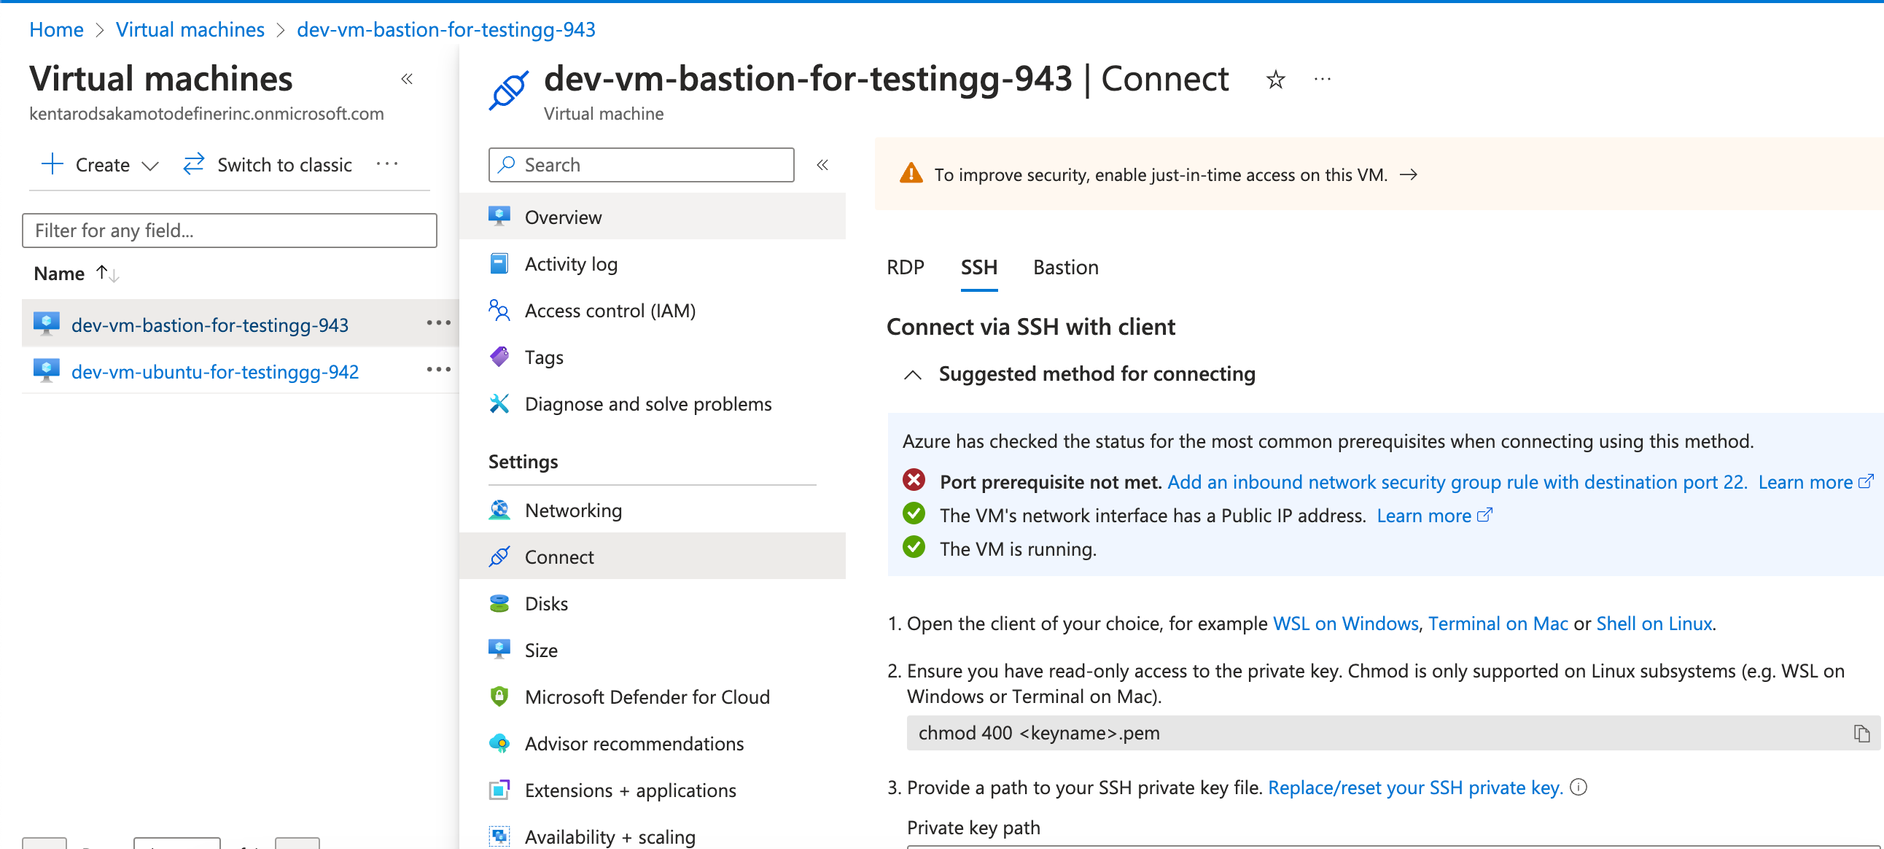
- Once created, locate your VM in the Azure Portal.
- In the VM's overview page, find the "Connect" button.
- Choose an appropriate method (SSH for Linux, RDP for Windows).
- Use the provided command or downloaded RDP file to access the VM.
 Create Azure Storage:
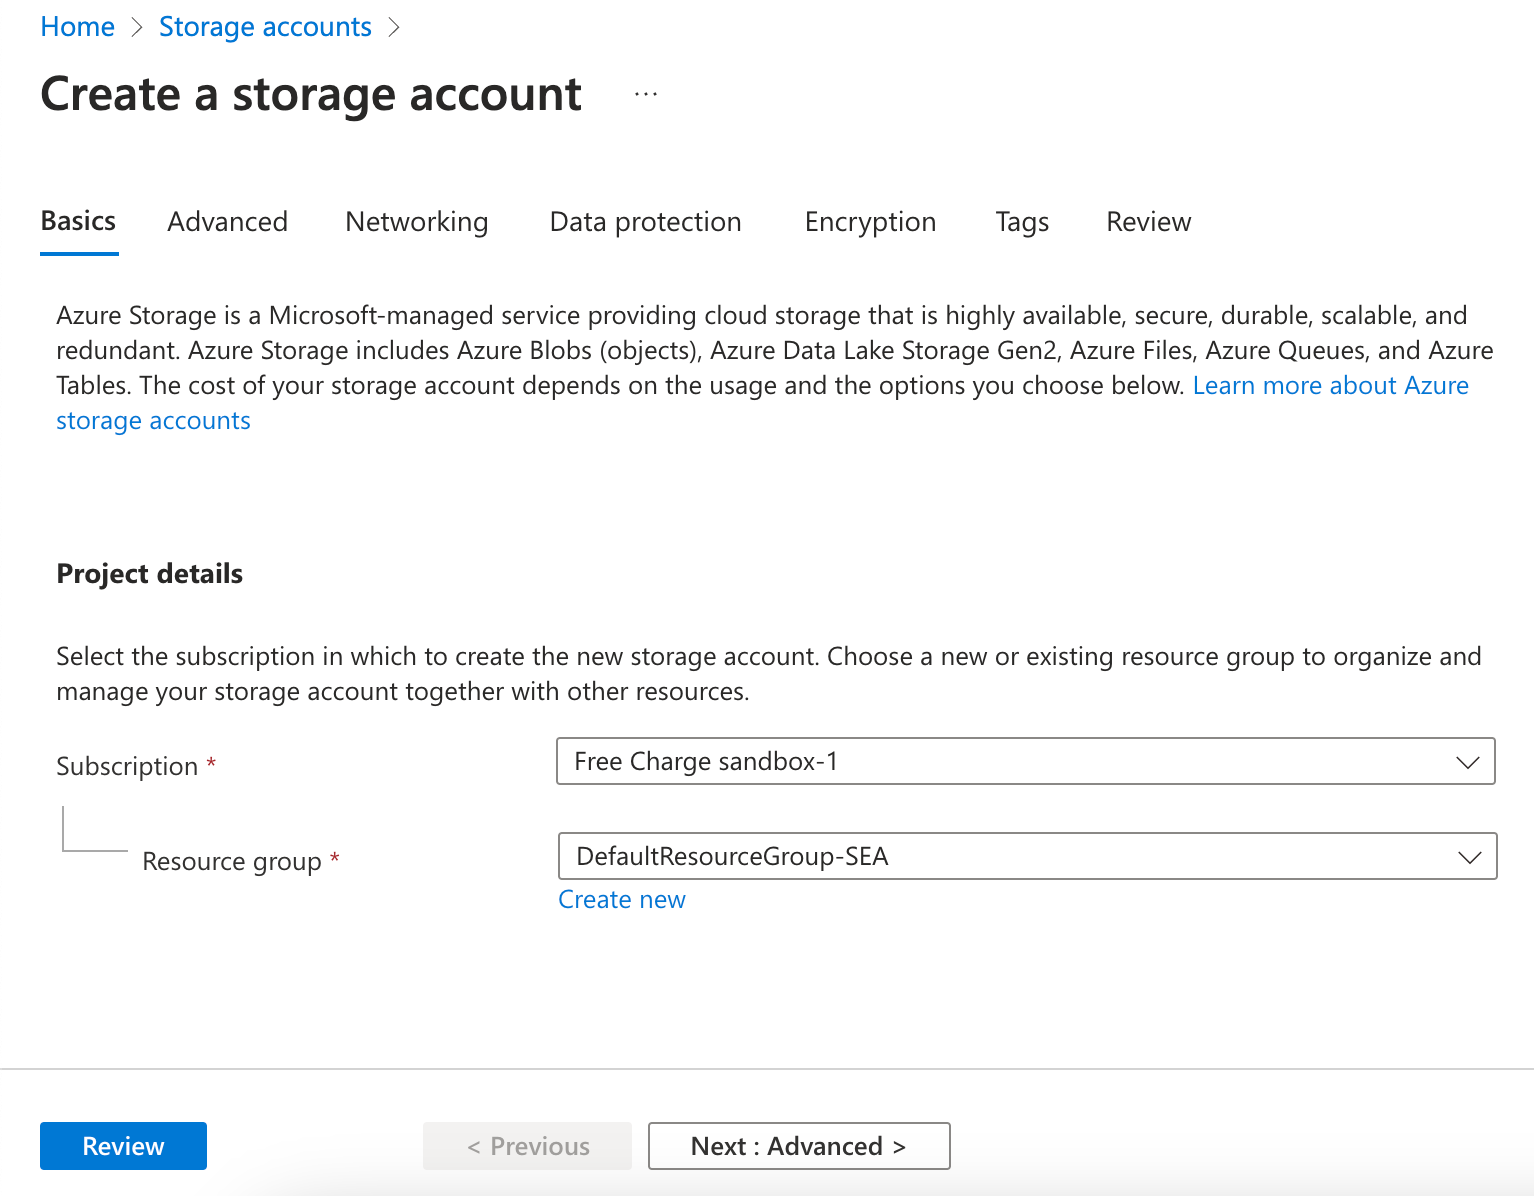
- Click "Create a resource" and search for "Storage account."

- Choose a unique storage account name and select resource group.
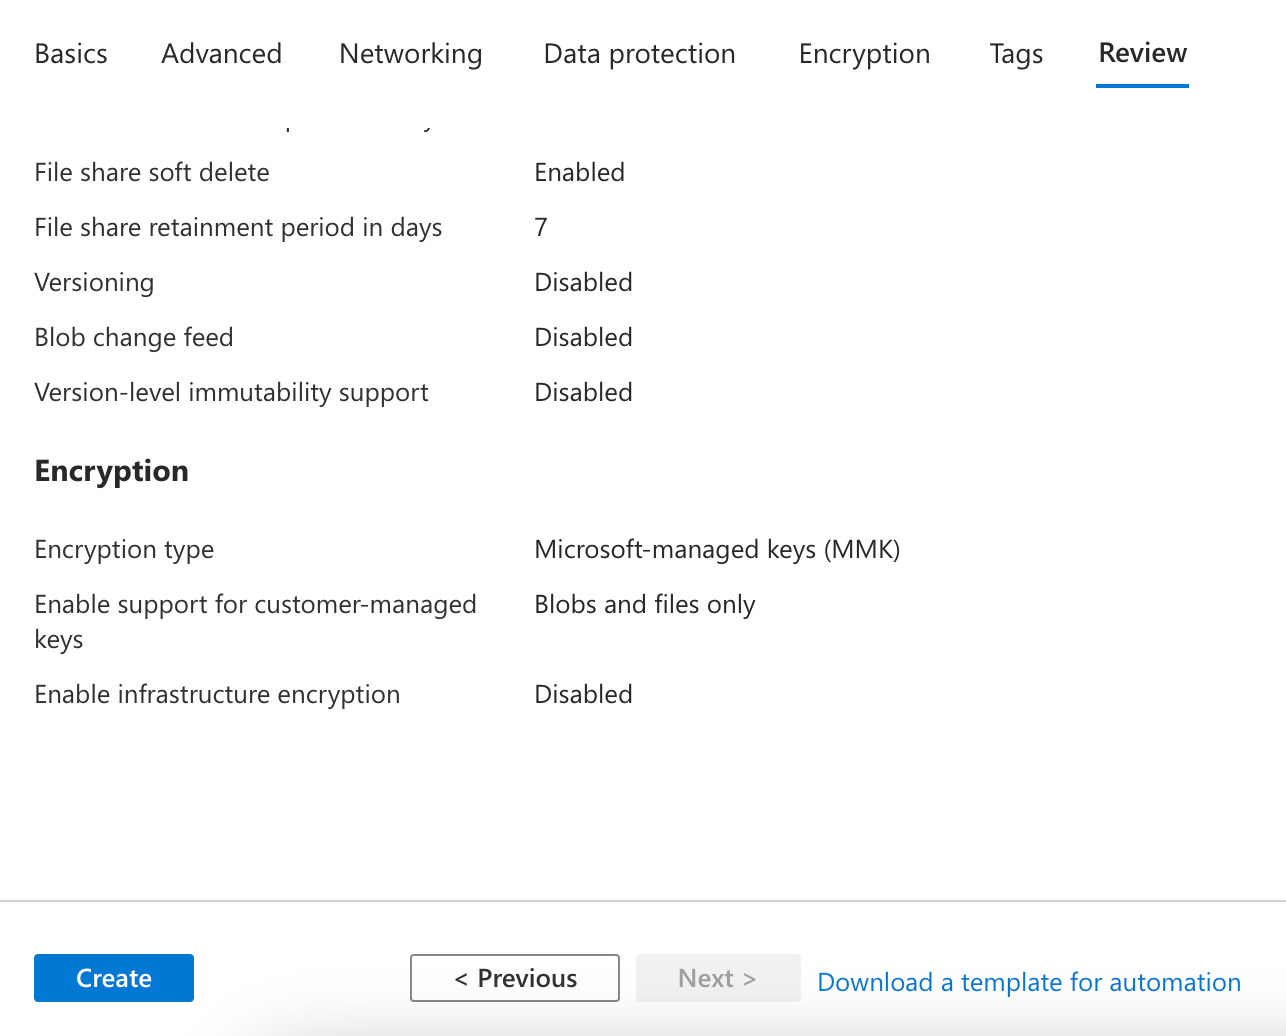
- Choose region, performance, and replication options.
- Configure advanced settings if needed.
- Review and click "Create."
 Access Azure Storage:
- Once the storage account is created, go to its resource page.
- Access keys or connection strings under the "Settings" section.
5. Creating Azure VM and Storage with prismscaler
- Login to your prismscaler account
- Choose VM architecture to create
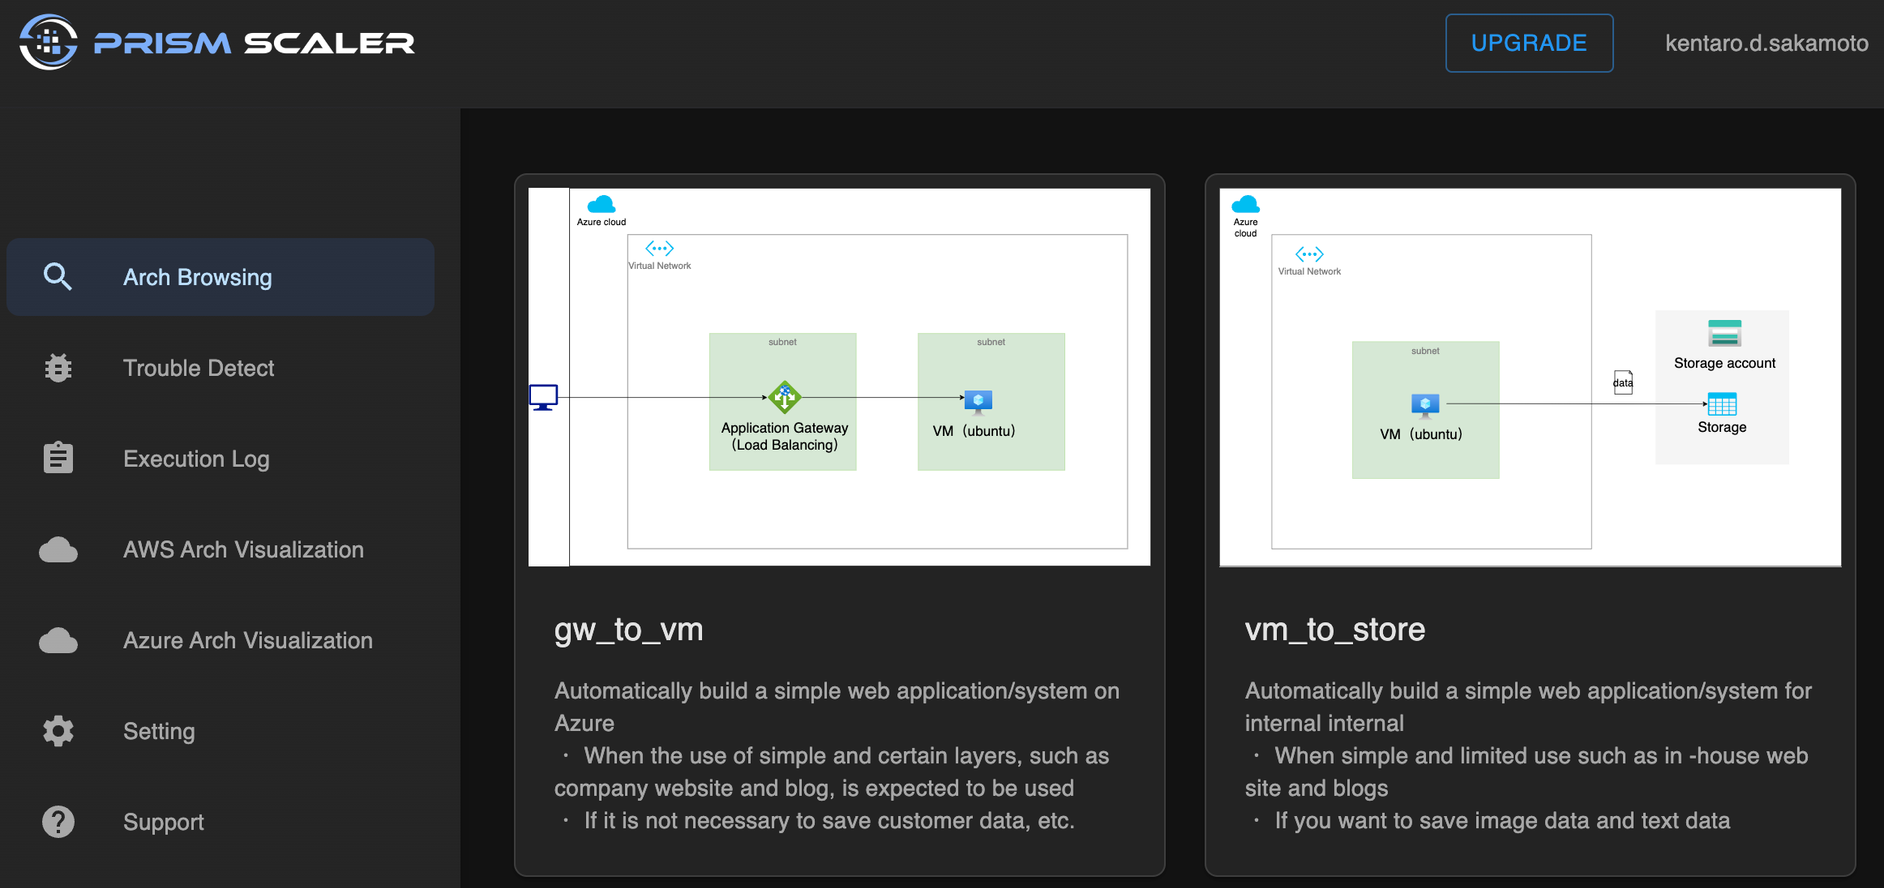
- Input all the necessary info
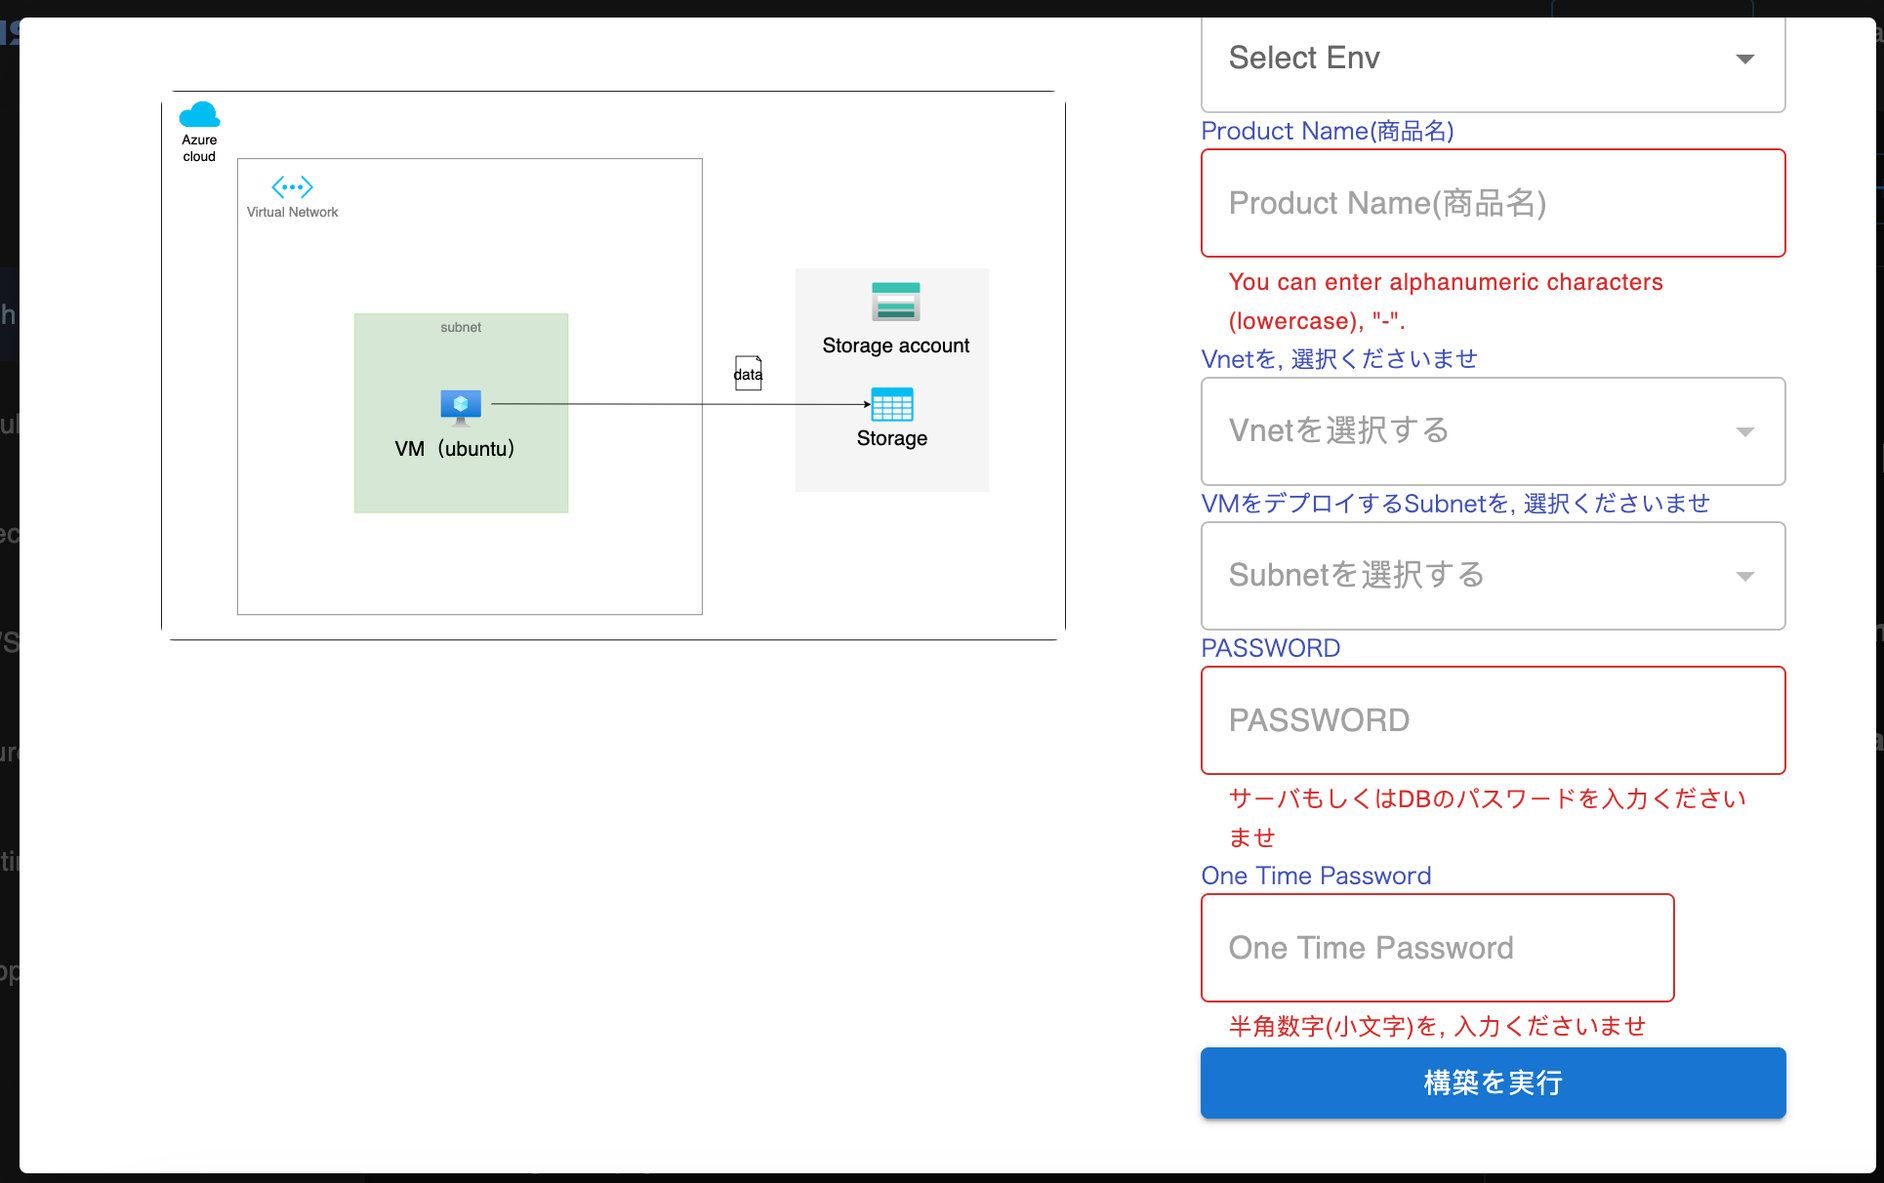
- Process and wait around 10 mins for the arch to deploy
- Check azure console to complete the architecture.
6. Storage policy
- Hot Storage: Optimized for frequently accessed data with higher costs but low-latency retrieval.
- Cool Storage: Suited for infrequently accessed data with lower costs and slightly higher retrieval latency.
- Archive Storage: Ideal for rarely accessed data with the lowest costs and extended retrieval times.
Blob Storage Strategies and Policies
Navigating Blob Storage Policy involves a nuanced understanding of your data and your application's lifecycles:
- Performance Tiers: Tailor your Blob Storage to align with your application's needs. For instance, real-time analytics applications might opt for Hot Storage, while long-term archival data may find a home in Archive Storage.
- Data Retention and Deletion: Define retention policies that match compliance needs. For example, retain customer transaction logs for seven years for regulatory reasons, and delete logs that exceed this threshold.
- Automated Tiering: Set up automated tiering policies that transition data from Hot to Cool, or even to Archive Storage, based on usage patterns. This ensures optimal cost-efficiency.
- Data Classification: Categorize customer transaction logs as critical and product images as non-critical.
- Data Lifecycle: Apply a policy to retain customer transaction logs in Hot Storage for one year for real-time analytics. Transition logs to Cool Storage after a year to optimize costs. Move product images to Archive Storage after six months of inactivity.
- Cost Management: Regularly review data access patterns and adjust tiering policies accordingly to optimize costs.
Conclusion
Azure Blob Storage Policy isn't just about managing data; it's about orchestrating how data serves your applications, insights, and strategies. By mastering Blob Storage's tiers, policies, and best practices, you wield the power to harness Azure's data management capabilities to their fullest. Your data evolves from raw bits to a strategic asset, fueling your cloud-based solutions with efficiency, cost-effectiveness, and insights. Your journey to innovation starts with a well-crafted Blob Storage Policy, transforming your data into a driving force that propels your cloud endeavors to new horizons.