1. Introduction
2. Purpose
3. What is AWS VPC network?
- Virtual Private Cloud (VPC): A VPC is a logically isolated section of the AWS cloud where you can launch AWS resources in a virtual network that you define. Within a VPC, you can customize your IP address range, create subnets, and configure routing tables and network gateways. This allows you to create isolated network environments for different applications and workloads.
- Subnets: Subnets are subdivisions of a VPC's IP address range. They provide segmentation within a VPC, enabling you to isolate resources and apply different network access control policies. Subnets can be public or private, with public subnets typically having routes to the internet and private subnets routing traffic through Network Address Translation (NAT) gateways or instances.
- Security Groups: Security groups act as virtual firewalls for your AWS resources. They control inbound and outbound traffic by specifying rules that allow or deny traffic based on protocol, port, and source/destination IP addresses. Security groups are associated with instances, and changes to their rules take effect immediately.
- Route Tables: Route tables define the routes for subnet traffic. You can associate different route tables with different subnets, allowing you to control how traffic flows within your VPC and to external destinations.
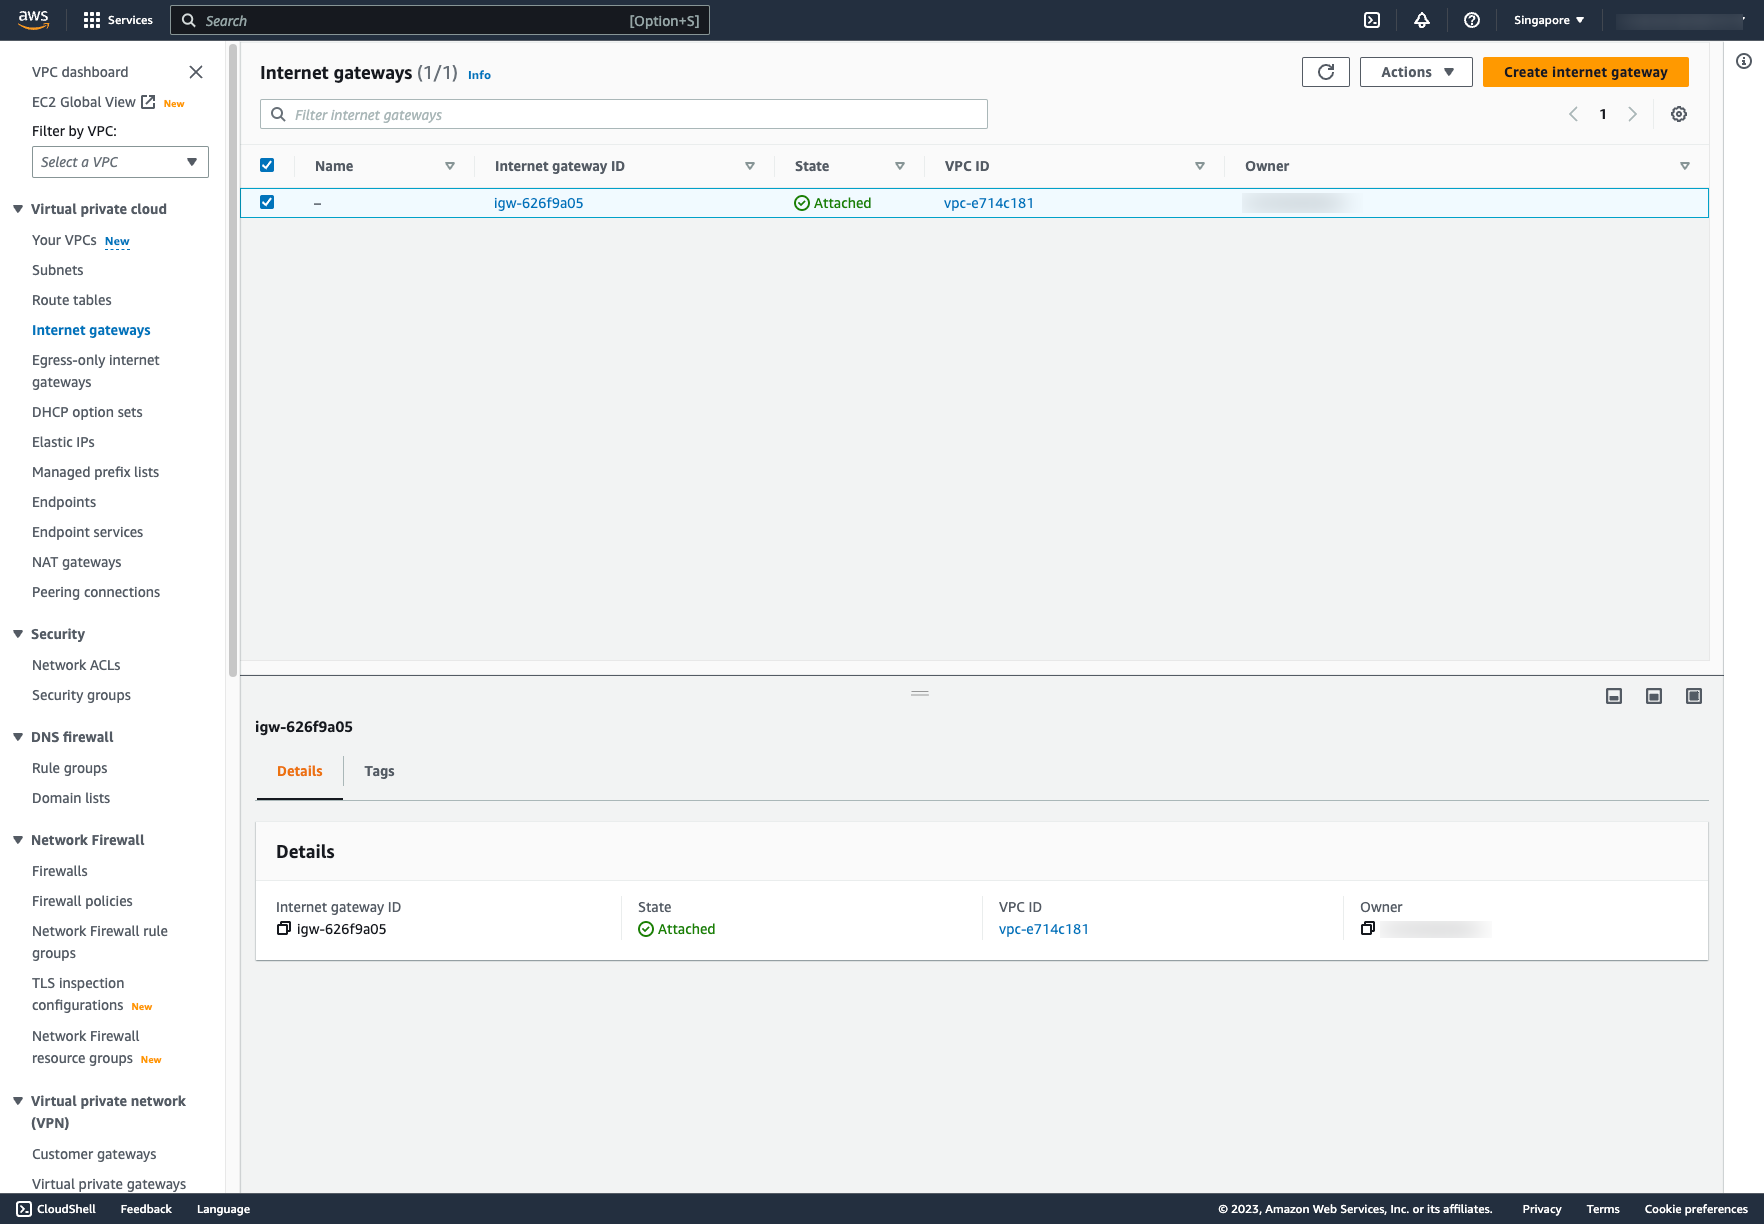
- Internet Gateway: An internet gateway enables communication between instances in your VPC and the internet. It facilitates outbound traffic from instances in public subnets and allows incoming traffic initiated from the internet to reach resources in public subnets.
- NAT Gateway/NAT Instance: NAT gateways or instances provide instances in private subnets with access to the internet for software updates, patches, etc., while preventing unsolicited inbound traffic from reaching those instances.
4. Creating AWS network with AWS console
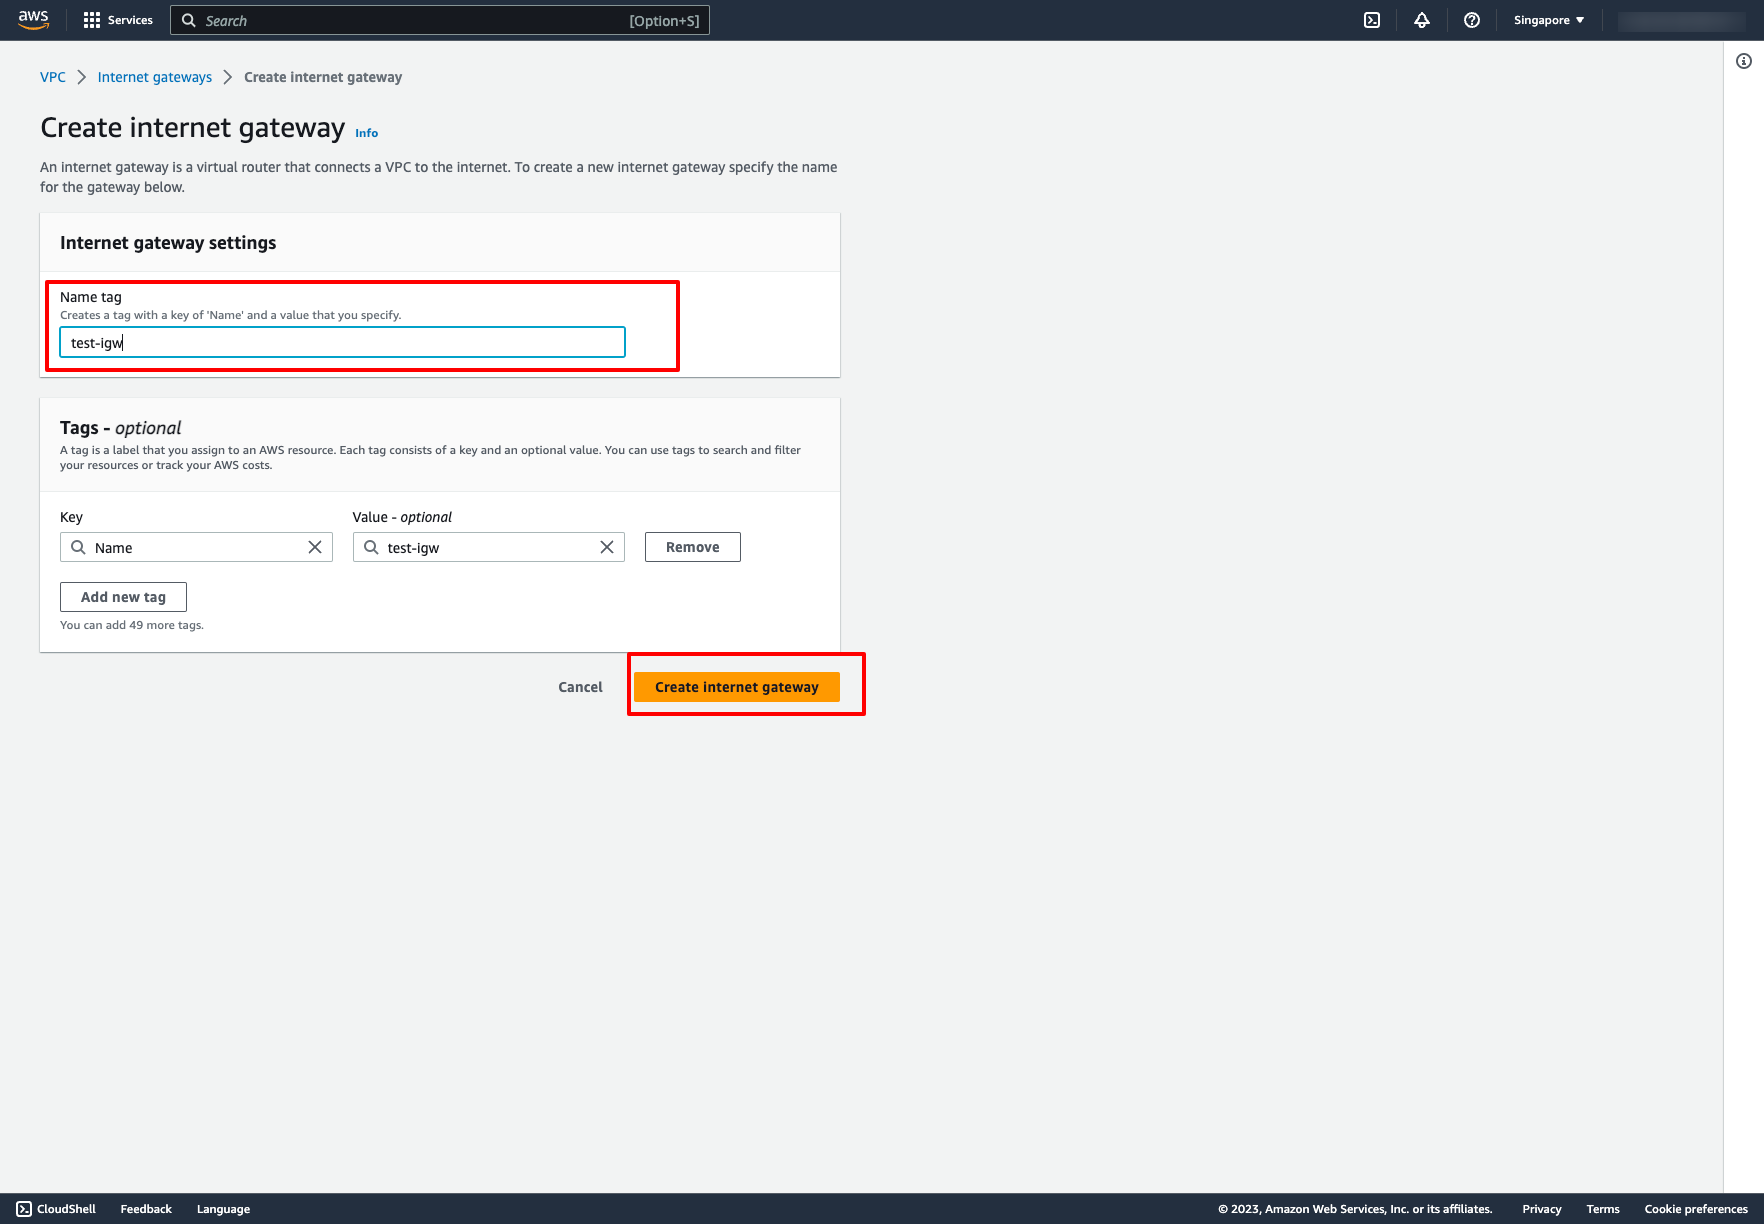
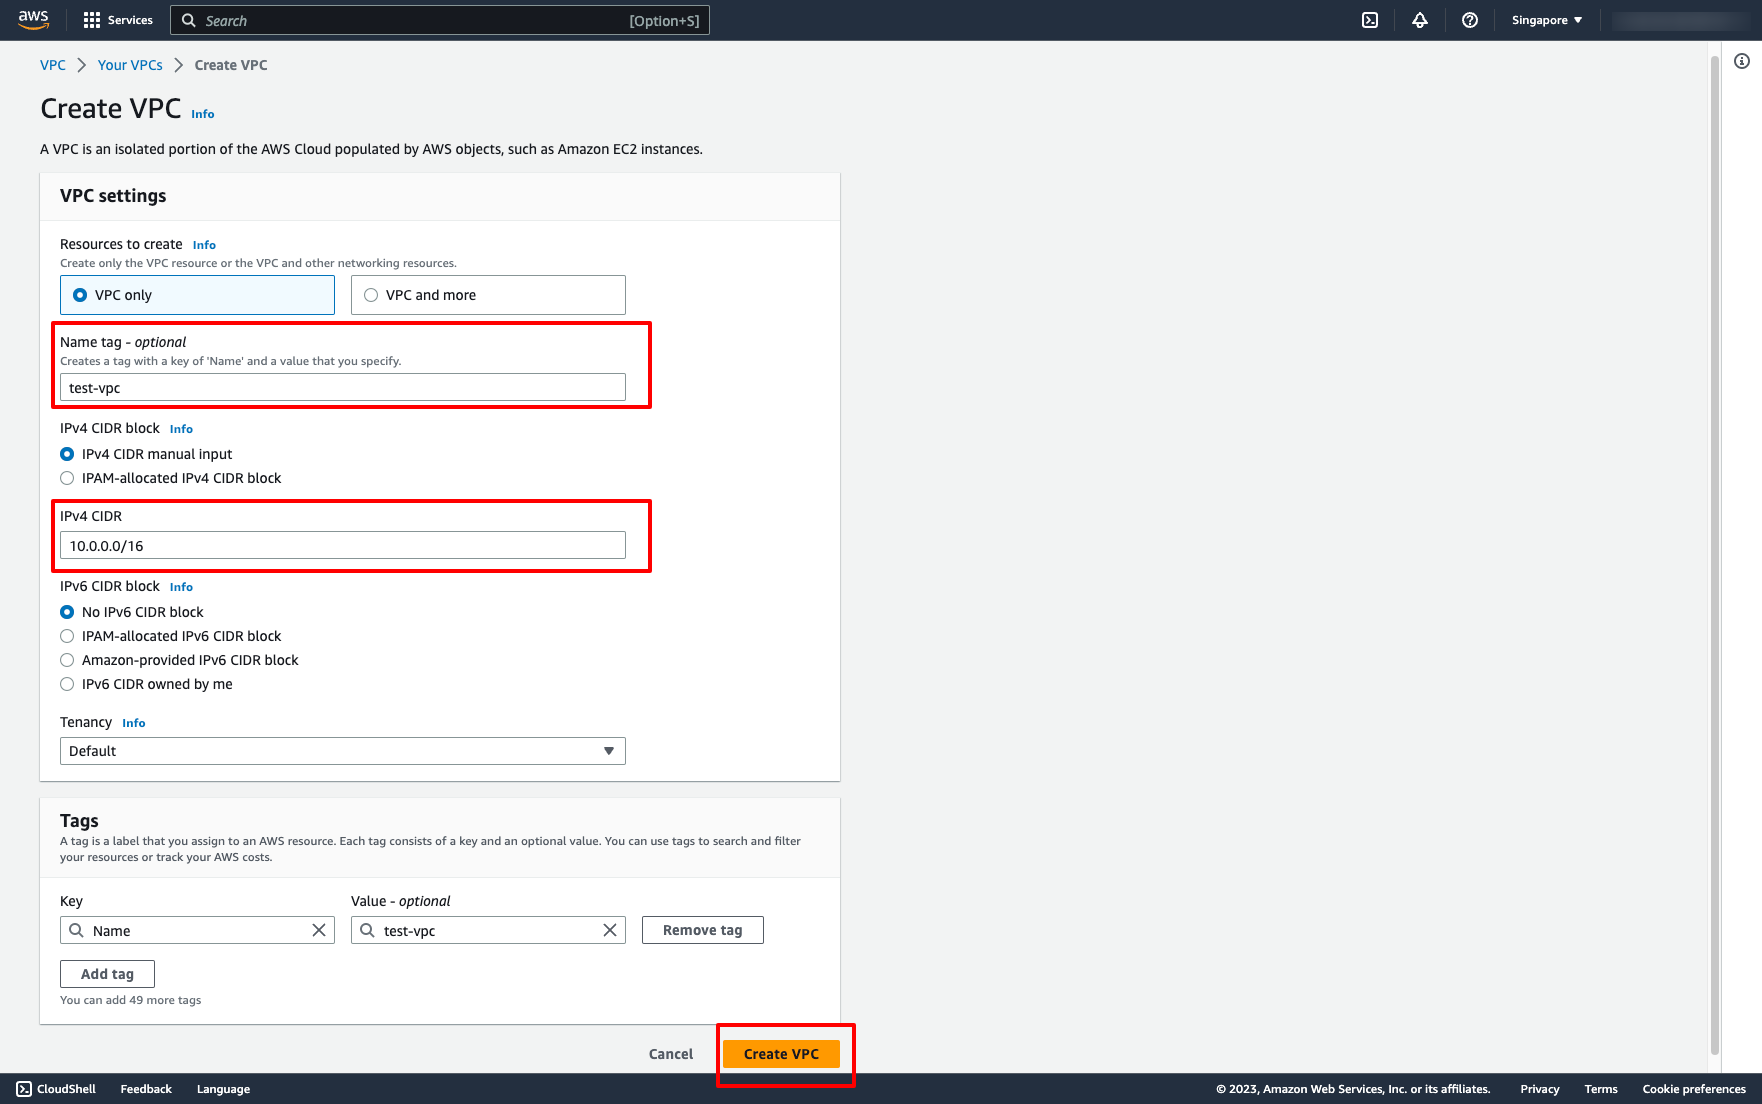 Enter your VPC name, place blank if you don’t need name it.
Enter the IPv4 CIDR for your VPC.
Then, click to “Create VPC”.
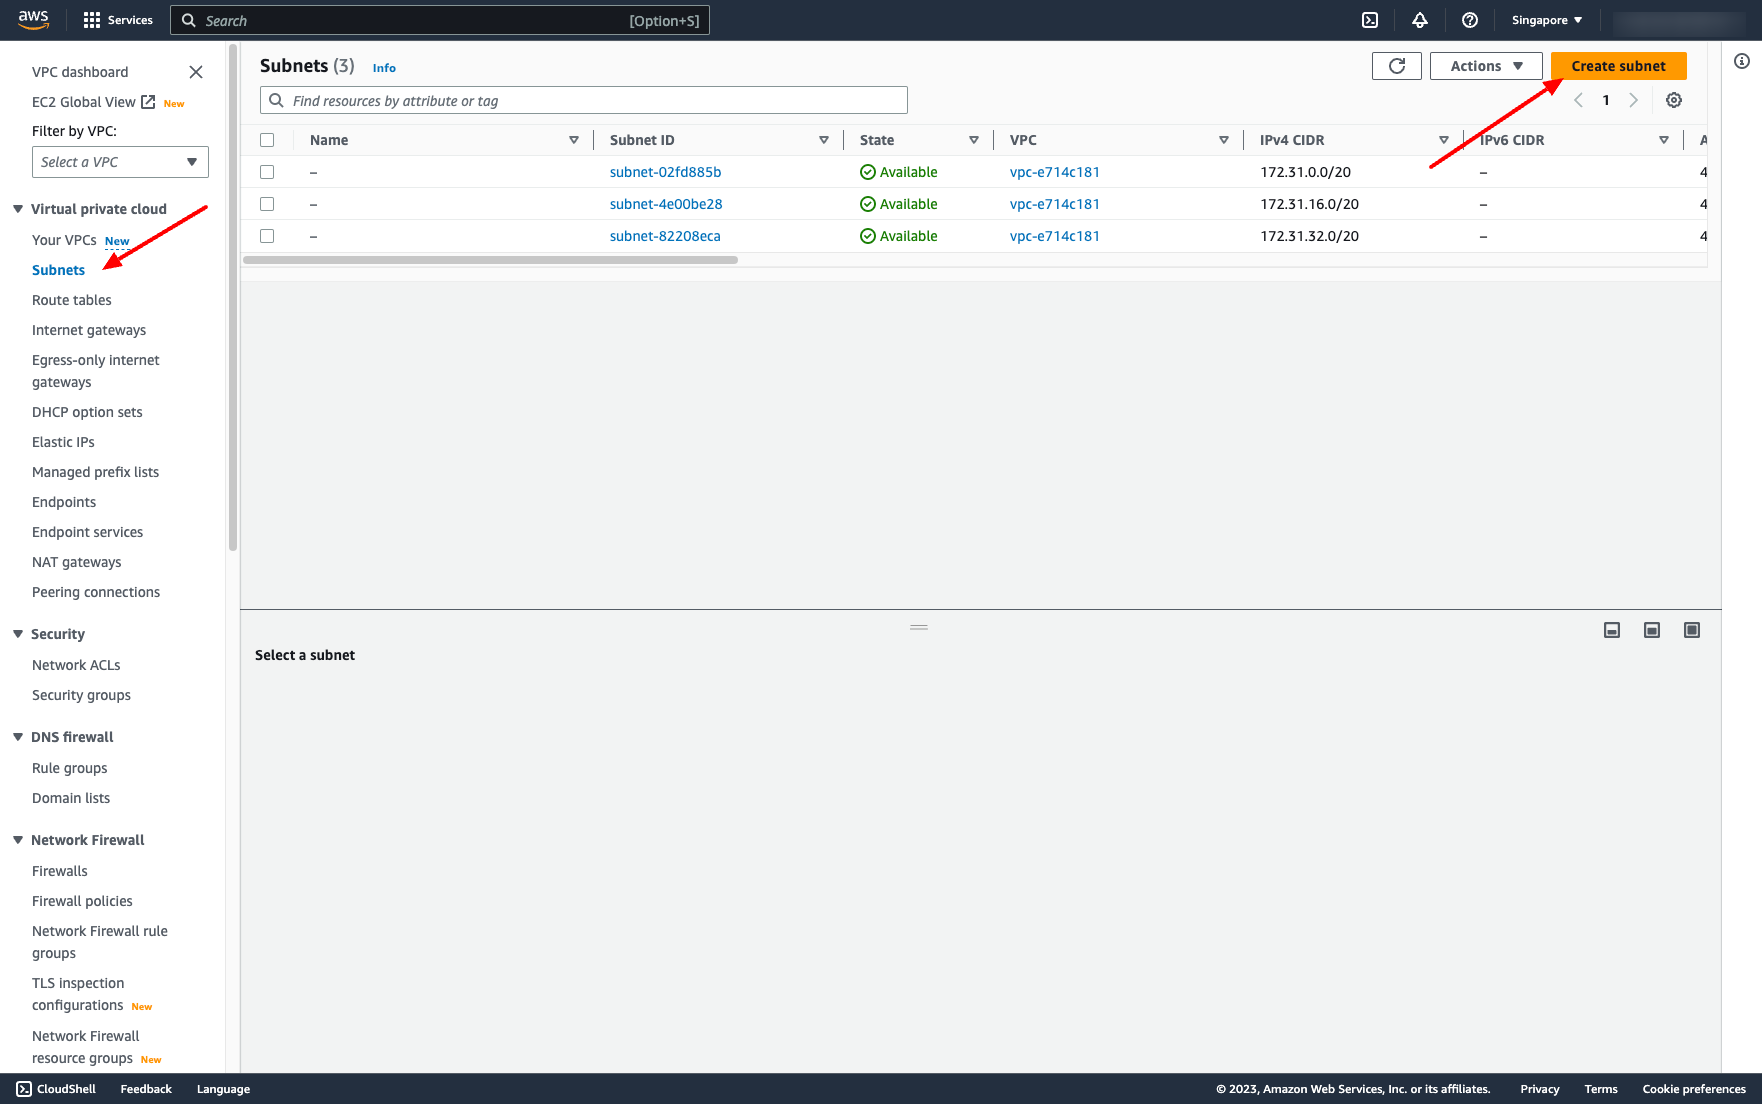
Step 2. Create Subnets:
We need some subnets in the VPC. Let’s create them in Subnets dashboard.
Go to Subnets → Choose “Create subnet”:
Enter your VPC name, place blank if you don’t need name it.
Enter the IPv4 CIDR for your VPC.
Then, click to “Create VPC”.
Step 2. Create Subnets:
We need some subnets in the VPC. Let’s create them in Subnets dashboard.
Go to Subnets → Choose “Create subnet”:
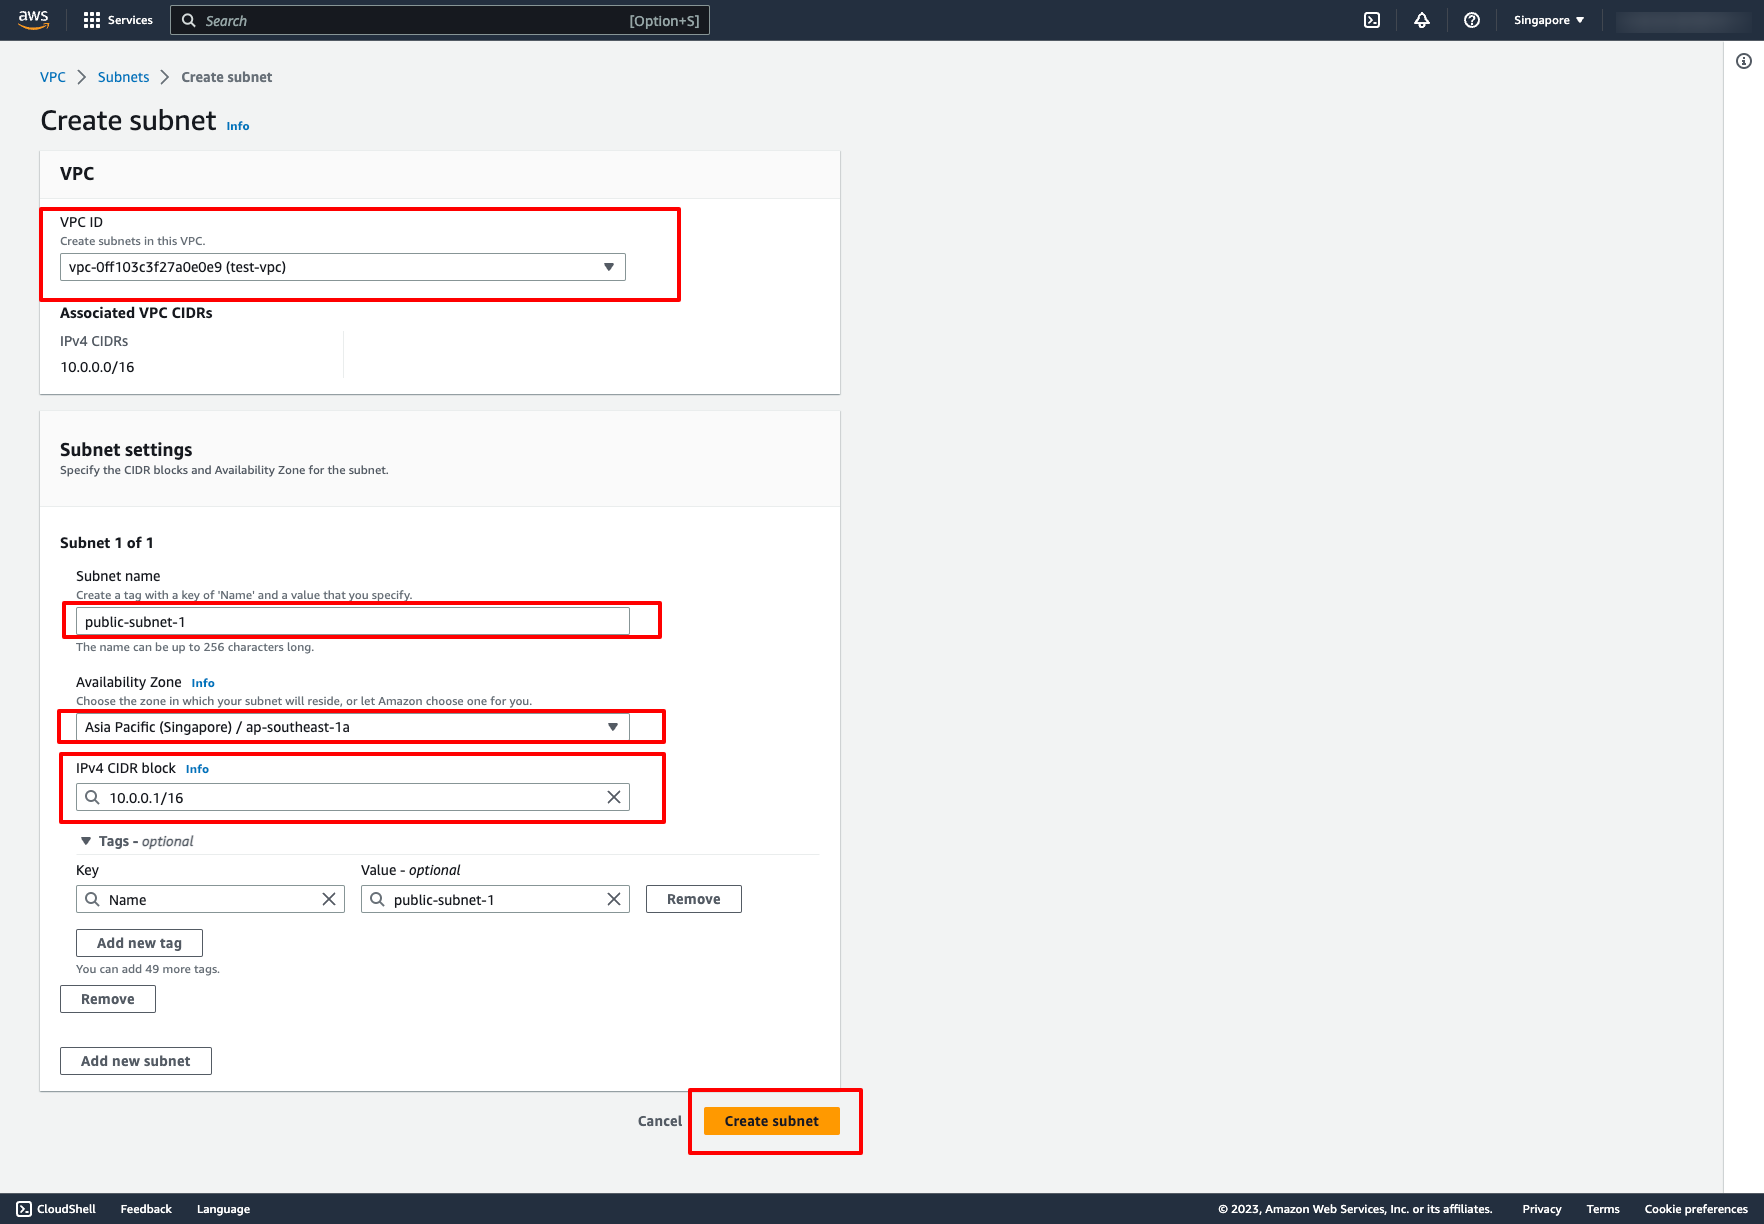 Optionally, you can create many subnets on this screen by clicking to “Add new subnet” button.
Then, click to “Create subnet”.
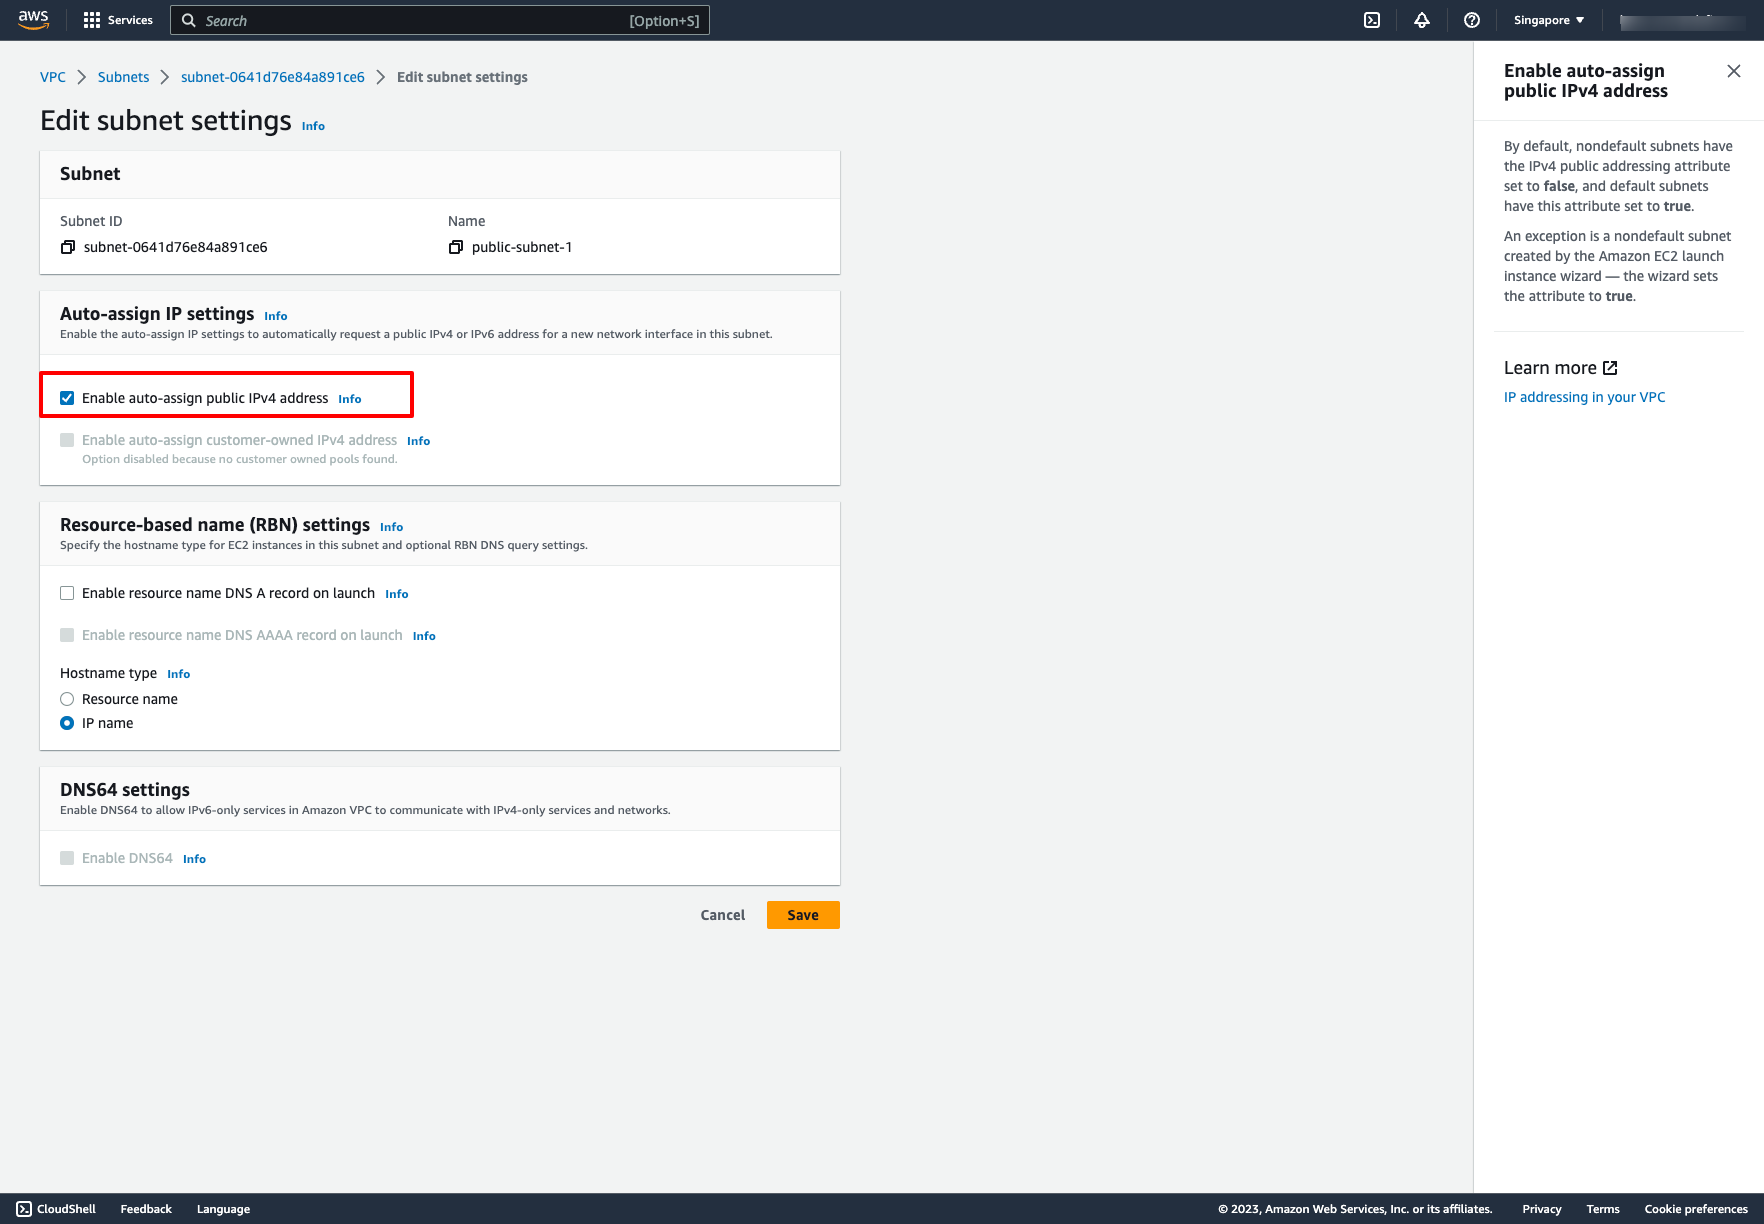
By default, Enable auto-assign public IPv4 address for subnets is false, that means those subnets we created above are private subnets. We have to set Enable auto-assign public IPv4 address to true if we want a subnet to be public.
Go to a subnet → Choose “Edit subnet settings” → Enable auto-assign IP setting like this:
Optionally, you can create many subnets on this screen by clicking to “Add new subnet” button.
Then, click to “Create subnet”.
By default, Enable auto-assign public IPv4 address for subnets is false, that means those subnets we created above are private subnets. We have to set Enable auto-assign public IPv4 address to true if we want a subnet to be public.
Go to a subnet → Choose “Edit subnet settings” → Enable auto-assign IP setting like this:
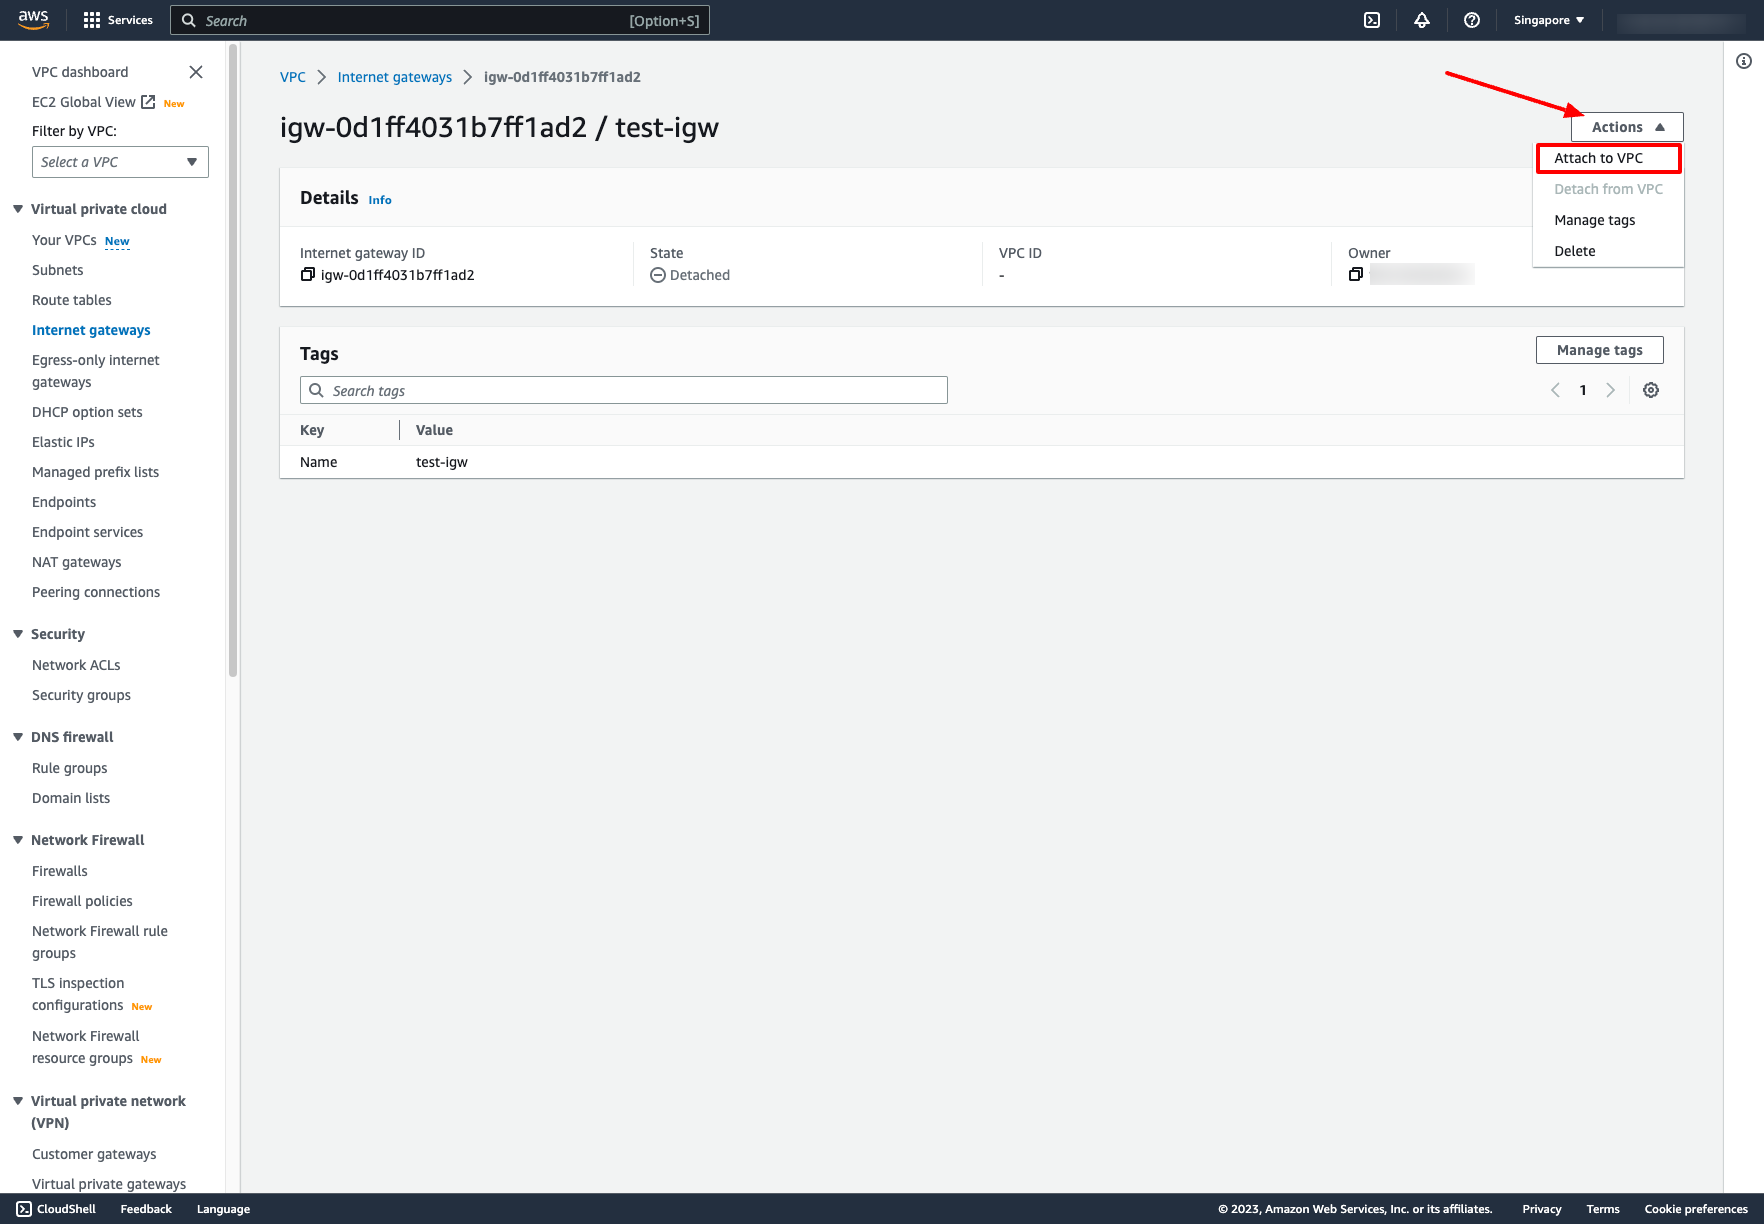
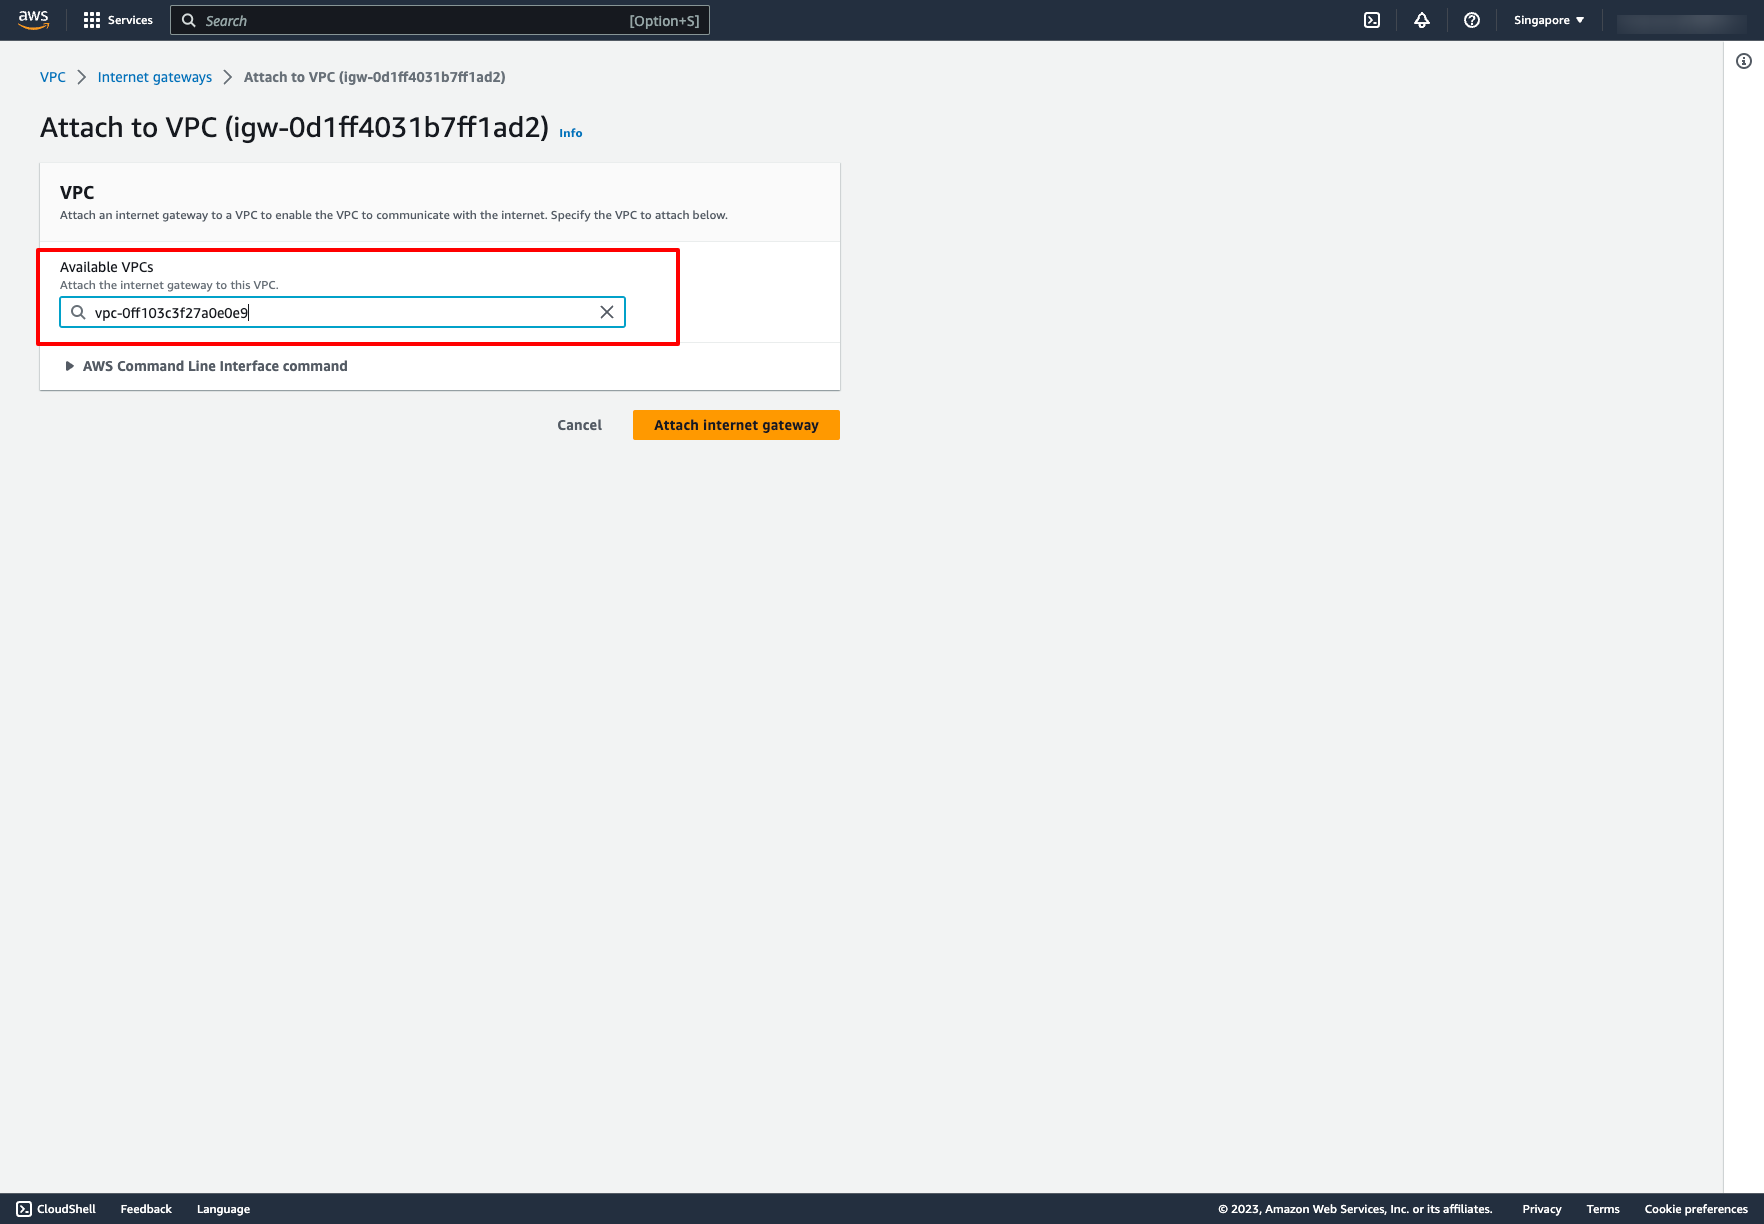
Attach Internet Gateway to a VPC: Choose Attach to VPC → Choose your VPC:
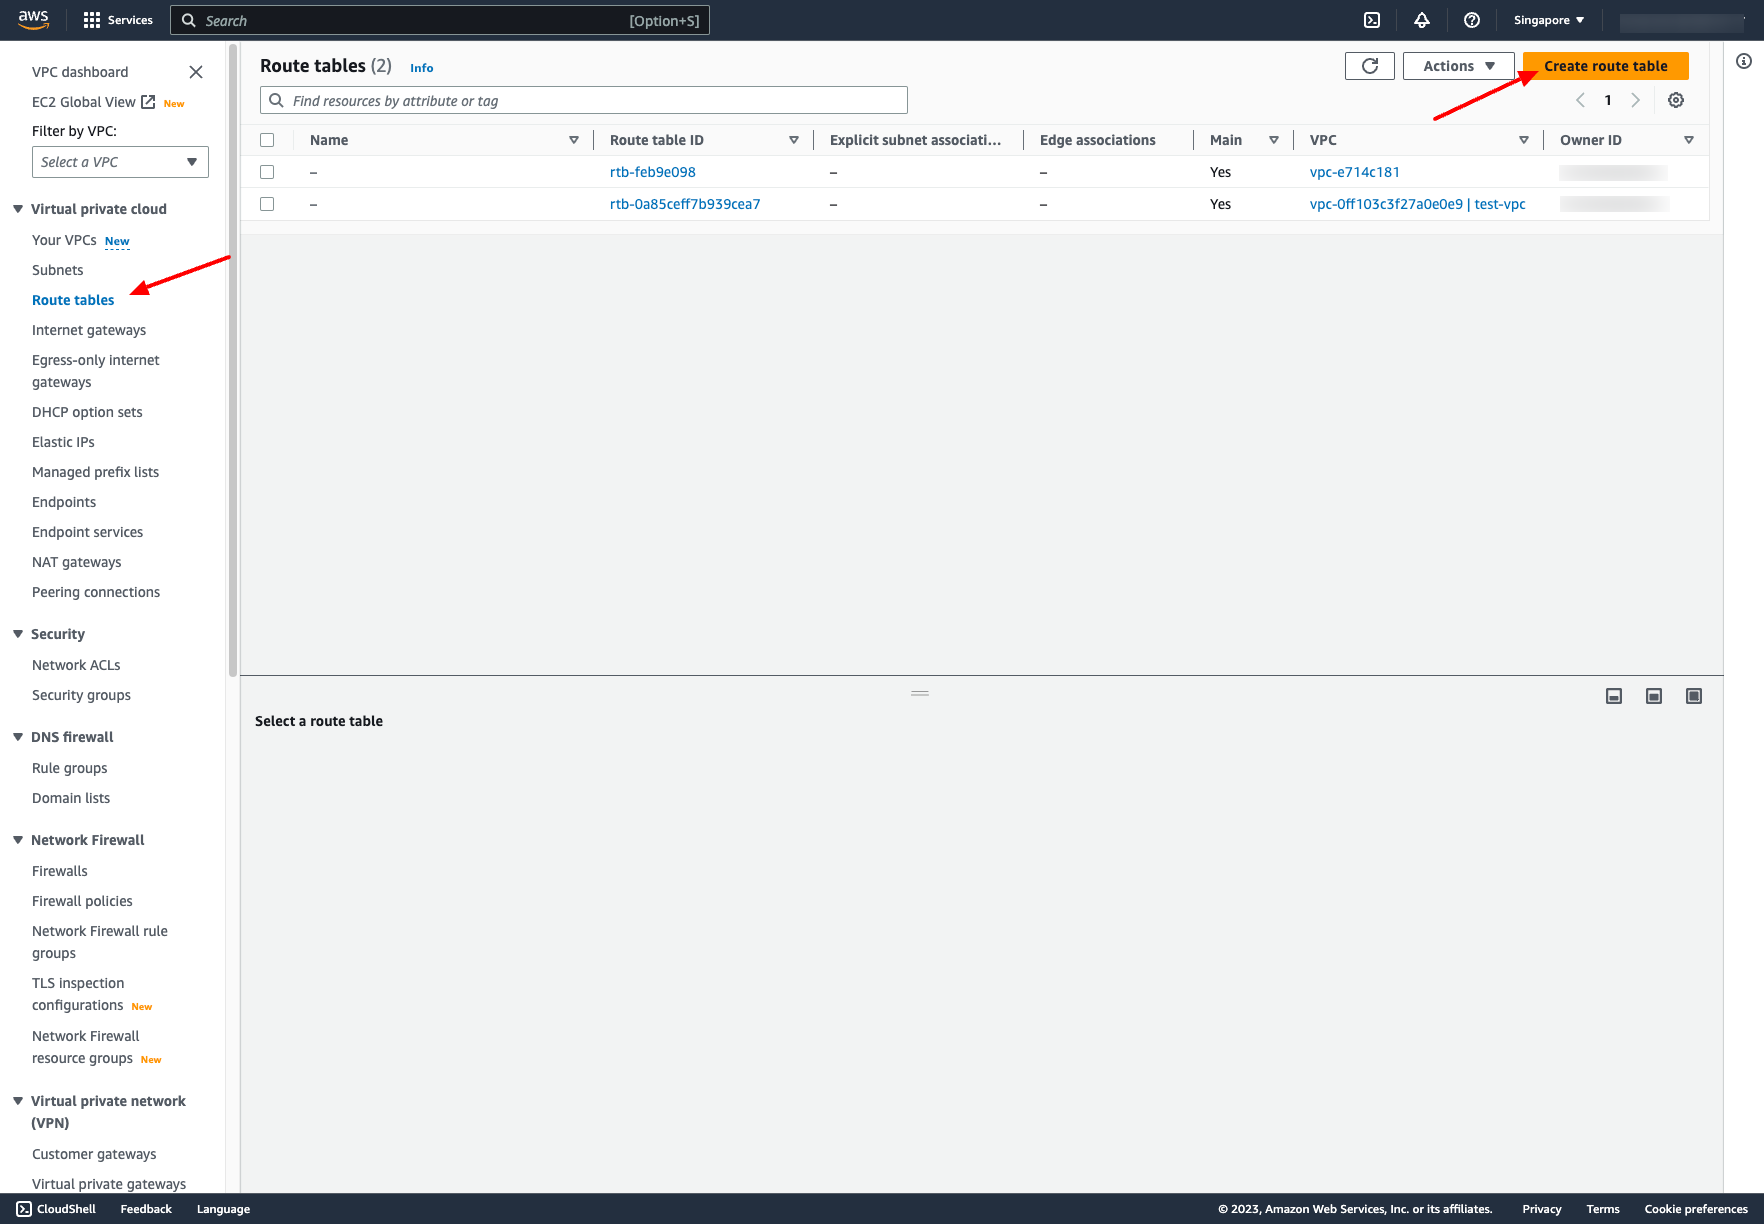
 Then, we also need Route table that defines the routes for subnet traffic. We want our public-subnet-1 can communication with Internet, we need a route table that associates to our subnet and routes to Internet Gateway.
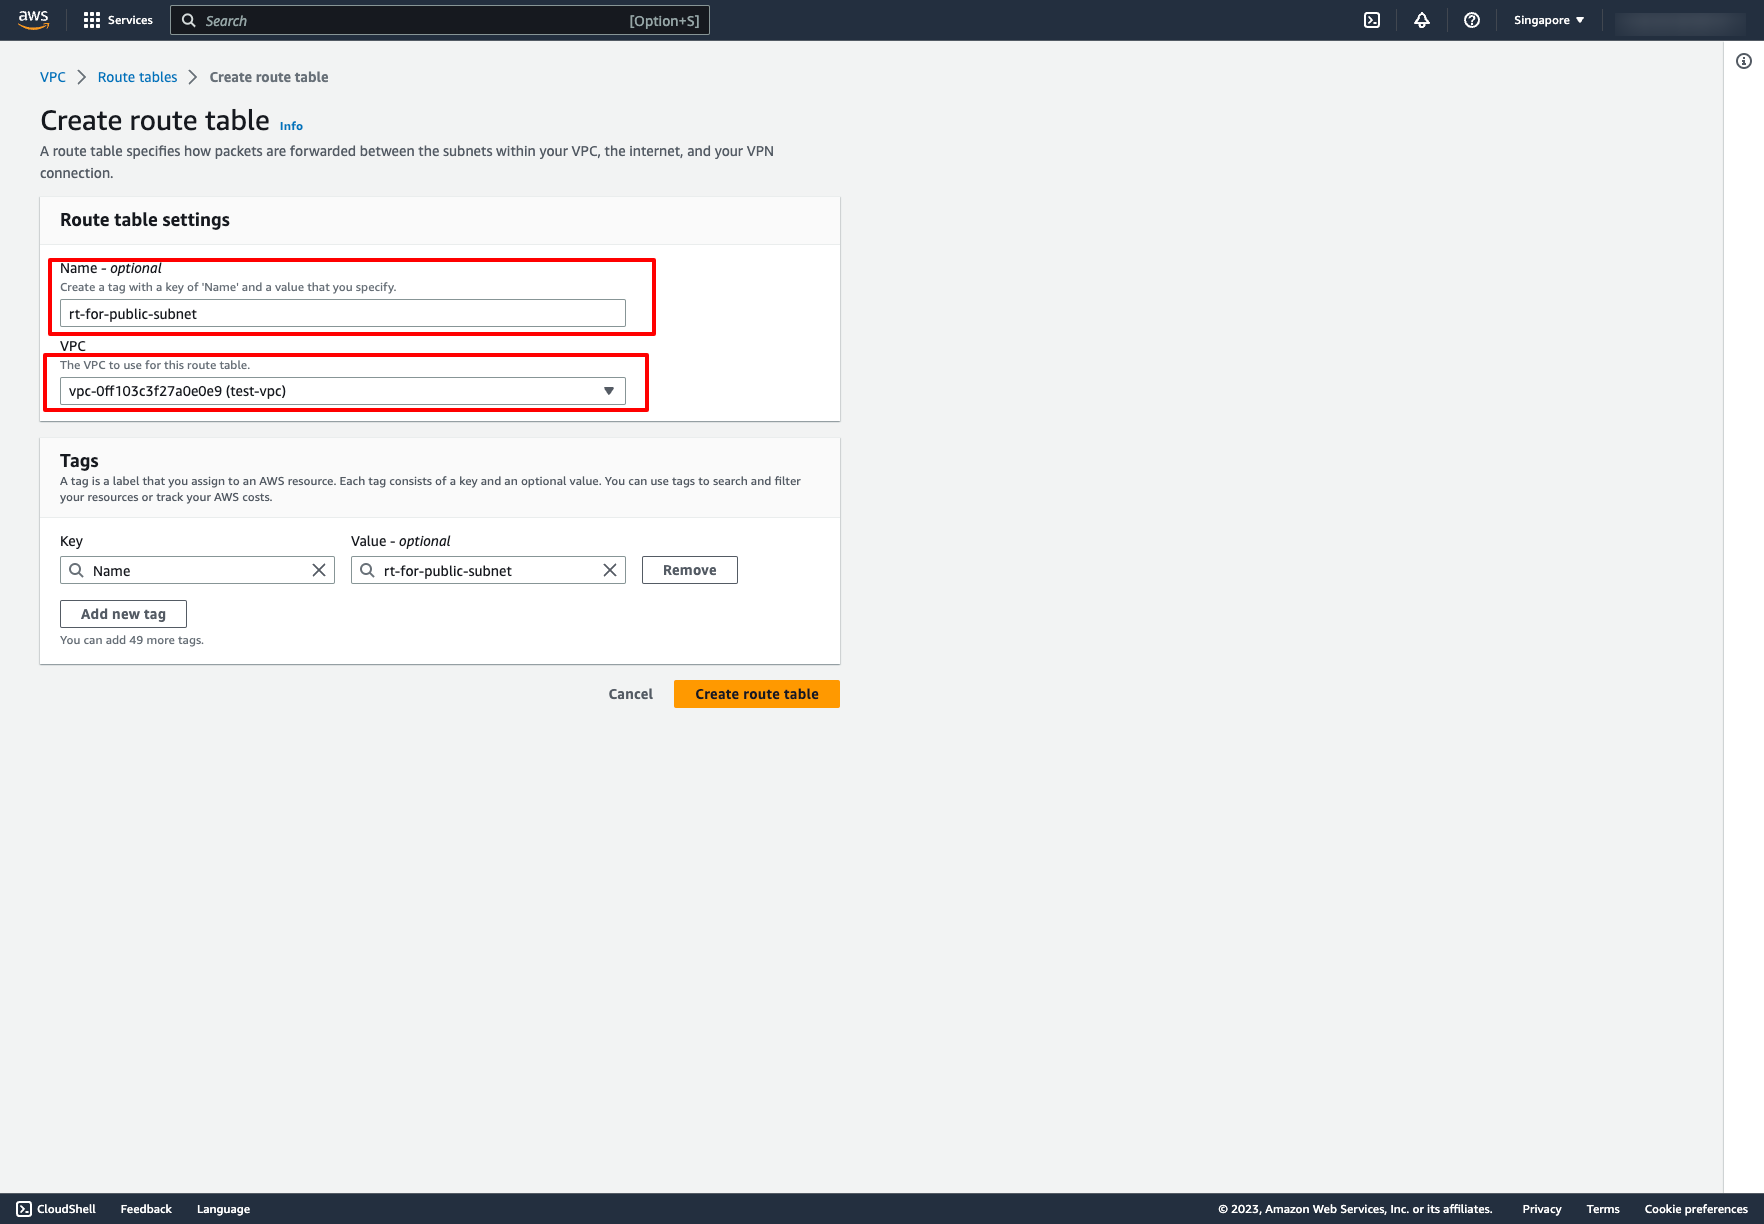
Go to Route table → Choose “Create route table” → Choose VPC of that route table:
Then, we also need Route table that defines the routes for subnet traffic. We want our public-subnet-1 can communication with Internet, we need a route table that associates to our subnet and routes to Internet Gateway.
Go to Route table → Choose “Create route table” → Choose VPC of that route table:
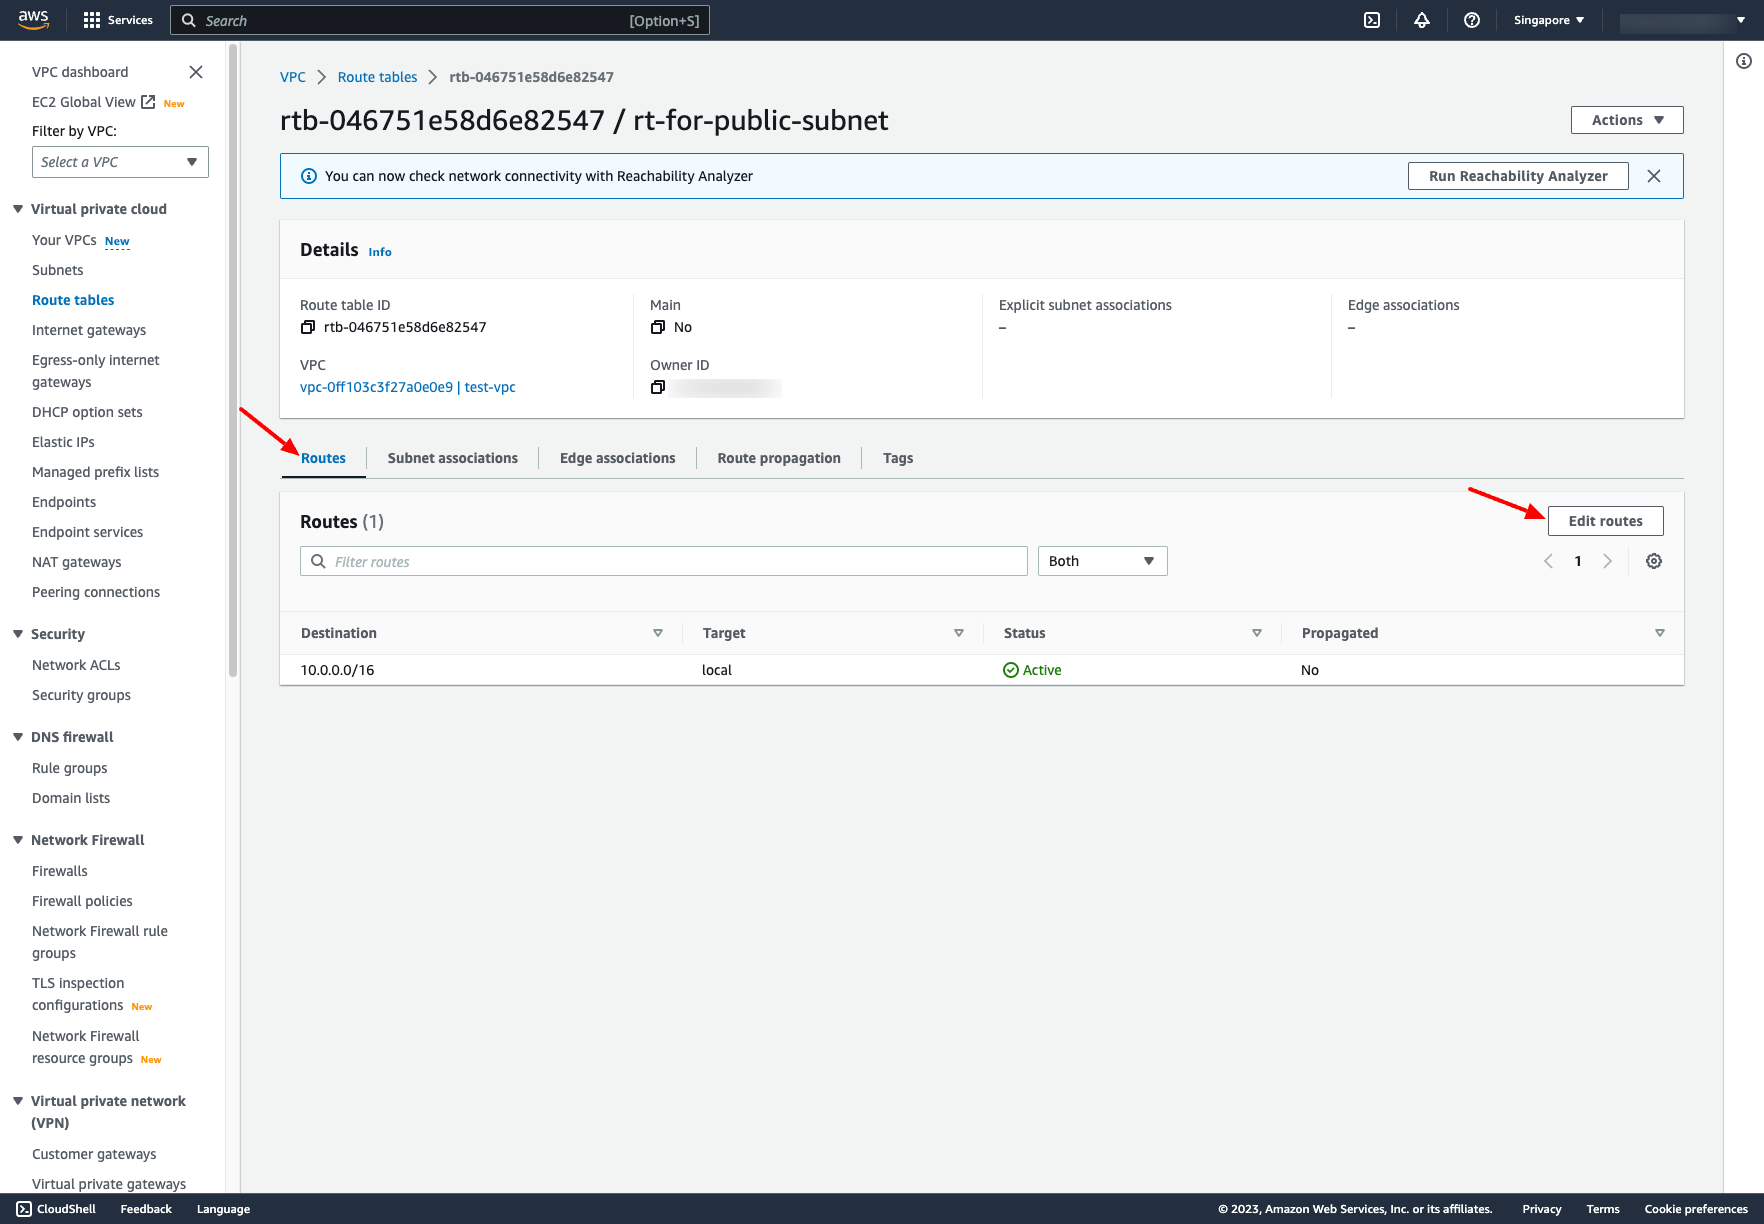
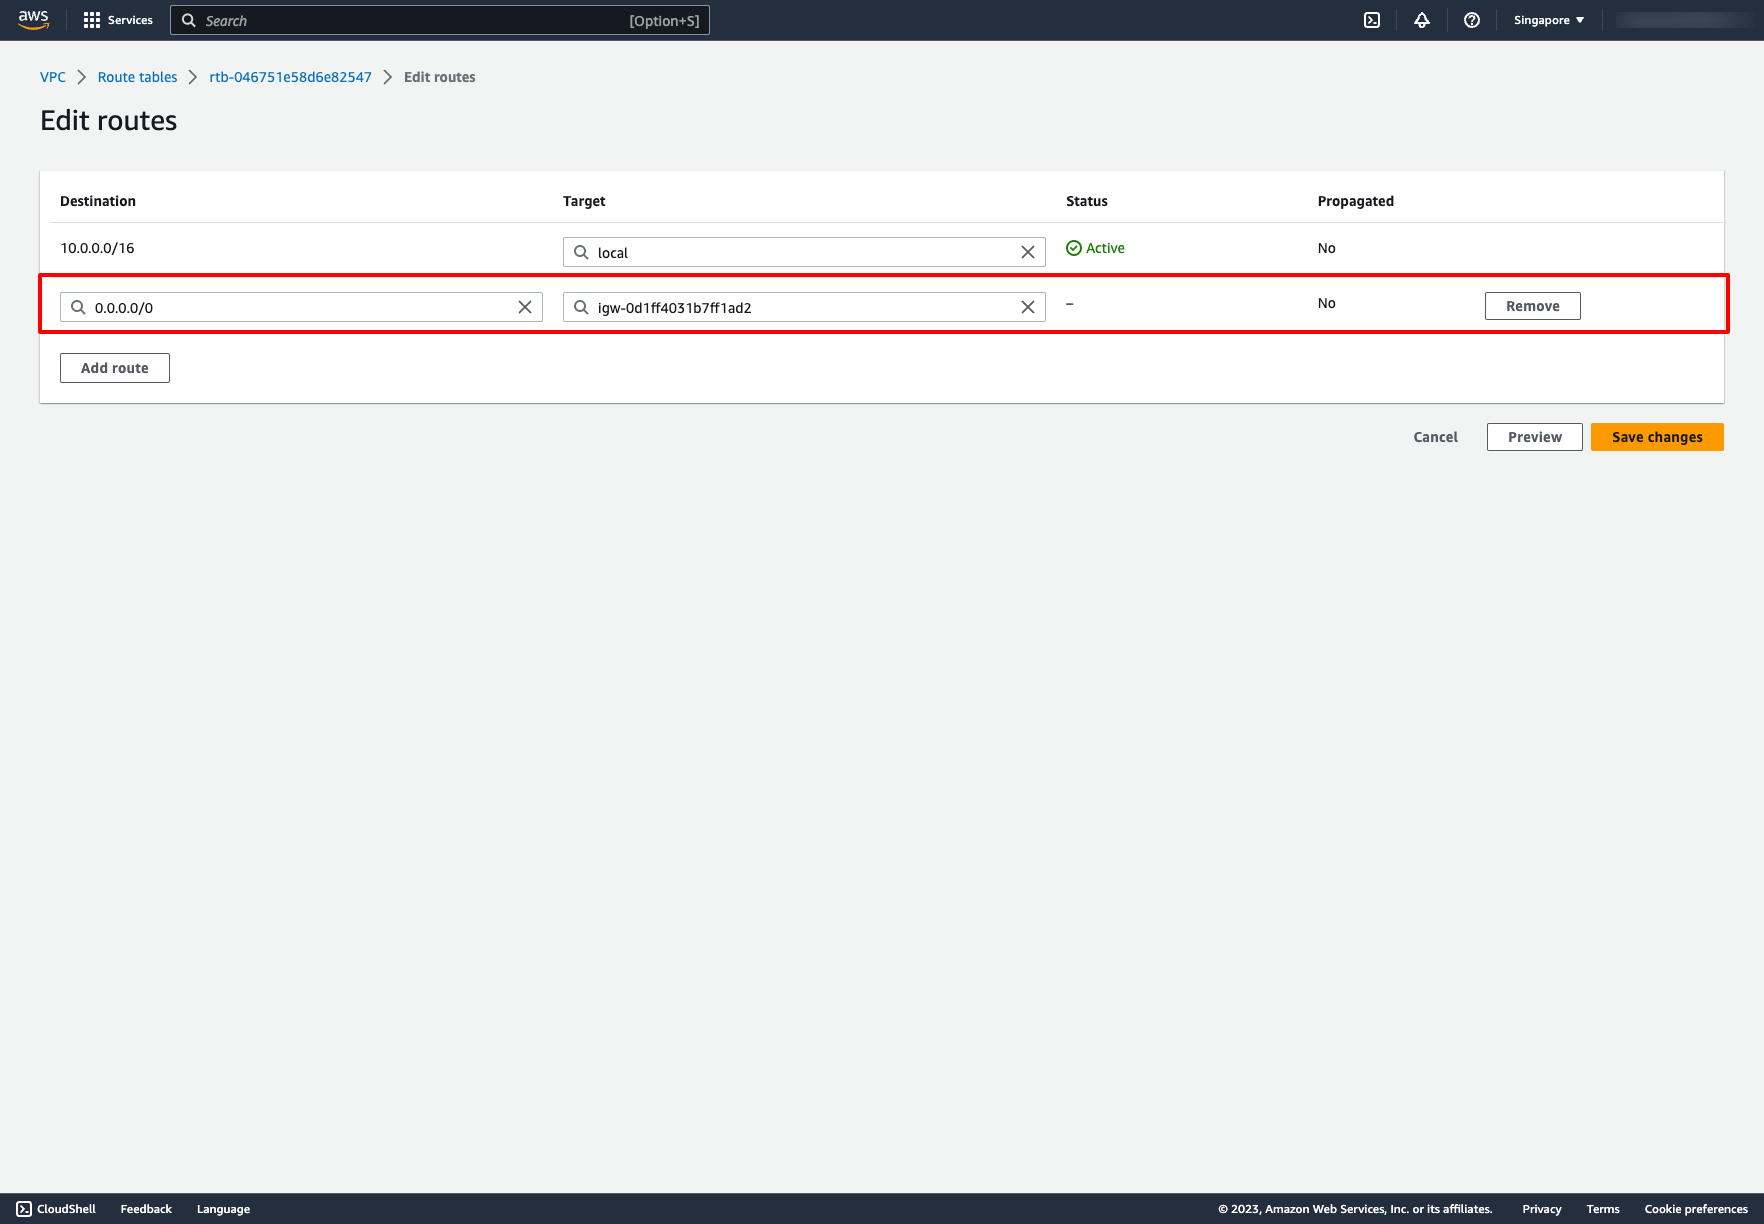
Add route to Internet gateway for that route table: Add the before Internet Gateway to Target:
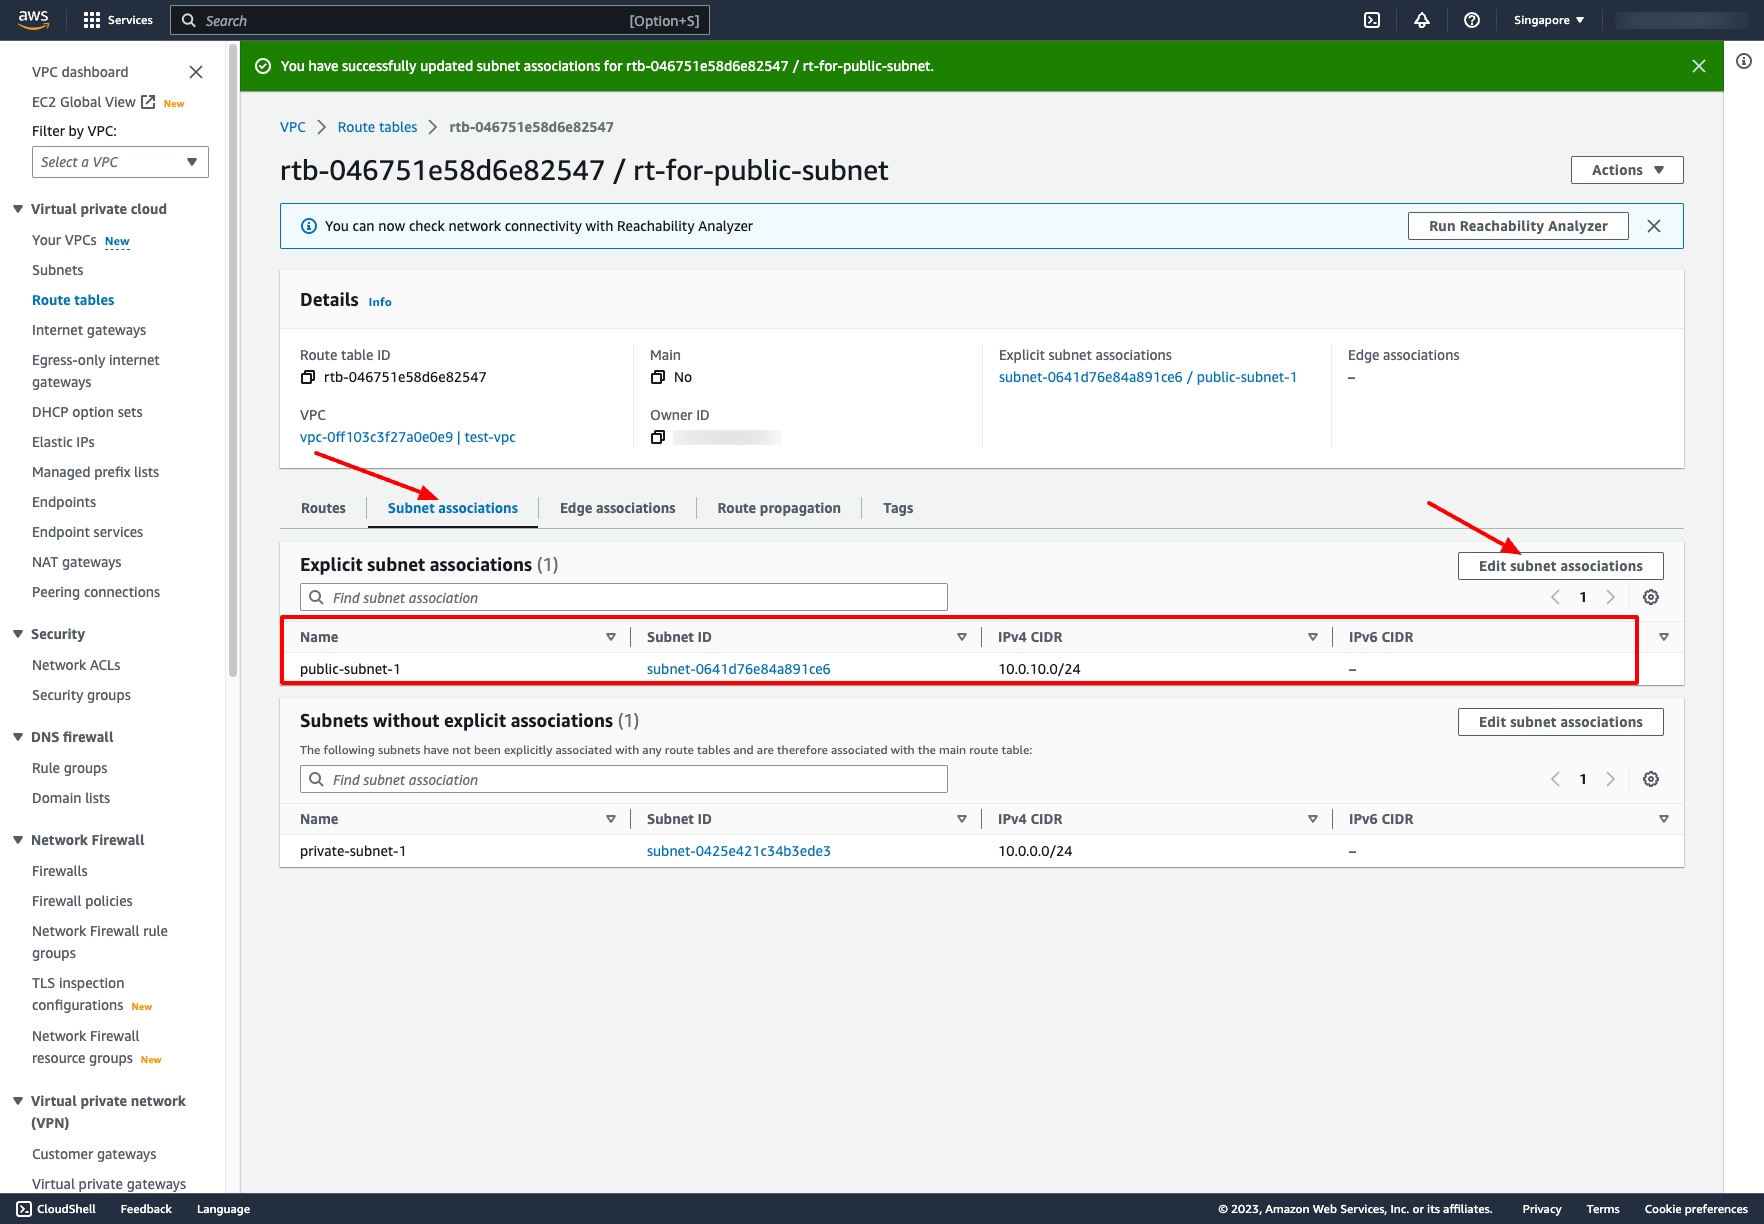
 Associate public subnet to the route table:
 How about the private subnet? What will we do when we want the resources can access to the Internet but still preventing unsolicited inbound traffic? The answer is NAT gateway. You can use a NAT gateway so that instances in a private subnet can connect to services outside your VPC but external services cannot initiate a connection with those instances.
Similar to the previous actions, first we also need a route table for private subnets. Please create another route table and associate private subnet to it.
About the route for this route table, we need a NAT gateway instead of Internet gateway.
Go to NAT gateways dashboard → Choose “Create NAT gateway” → Enter these information:
How about the private subnet? What will we do when we want the resources can access to the Internet but still preventing unsolicited inbound traffic? The answer is NAT gateway. You can use a NAT gateway so that instances in a private subnet can connect to services outside your VPC but external services cannot initiate a connection with those instances.
Similar to the previous actions, first we also need a route table for private subnets. Please create another route table and associate private subnet to it.
About the route for this route table, we need a NAT gateway instead of Internet gateway.
Go to NAT gateways dashboard → Choose “Create NAT gateway” → Enter these information:
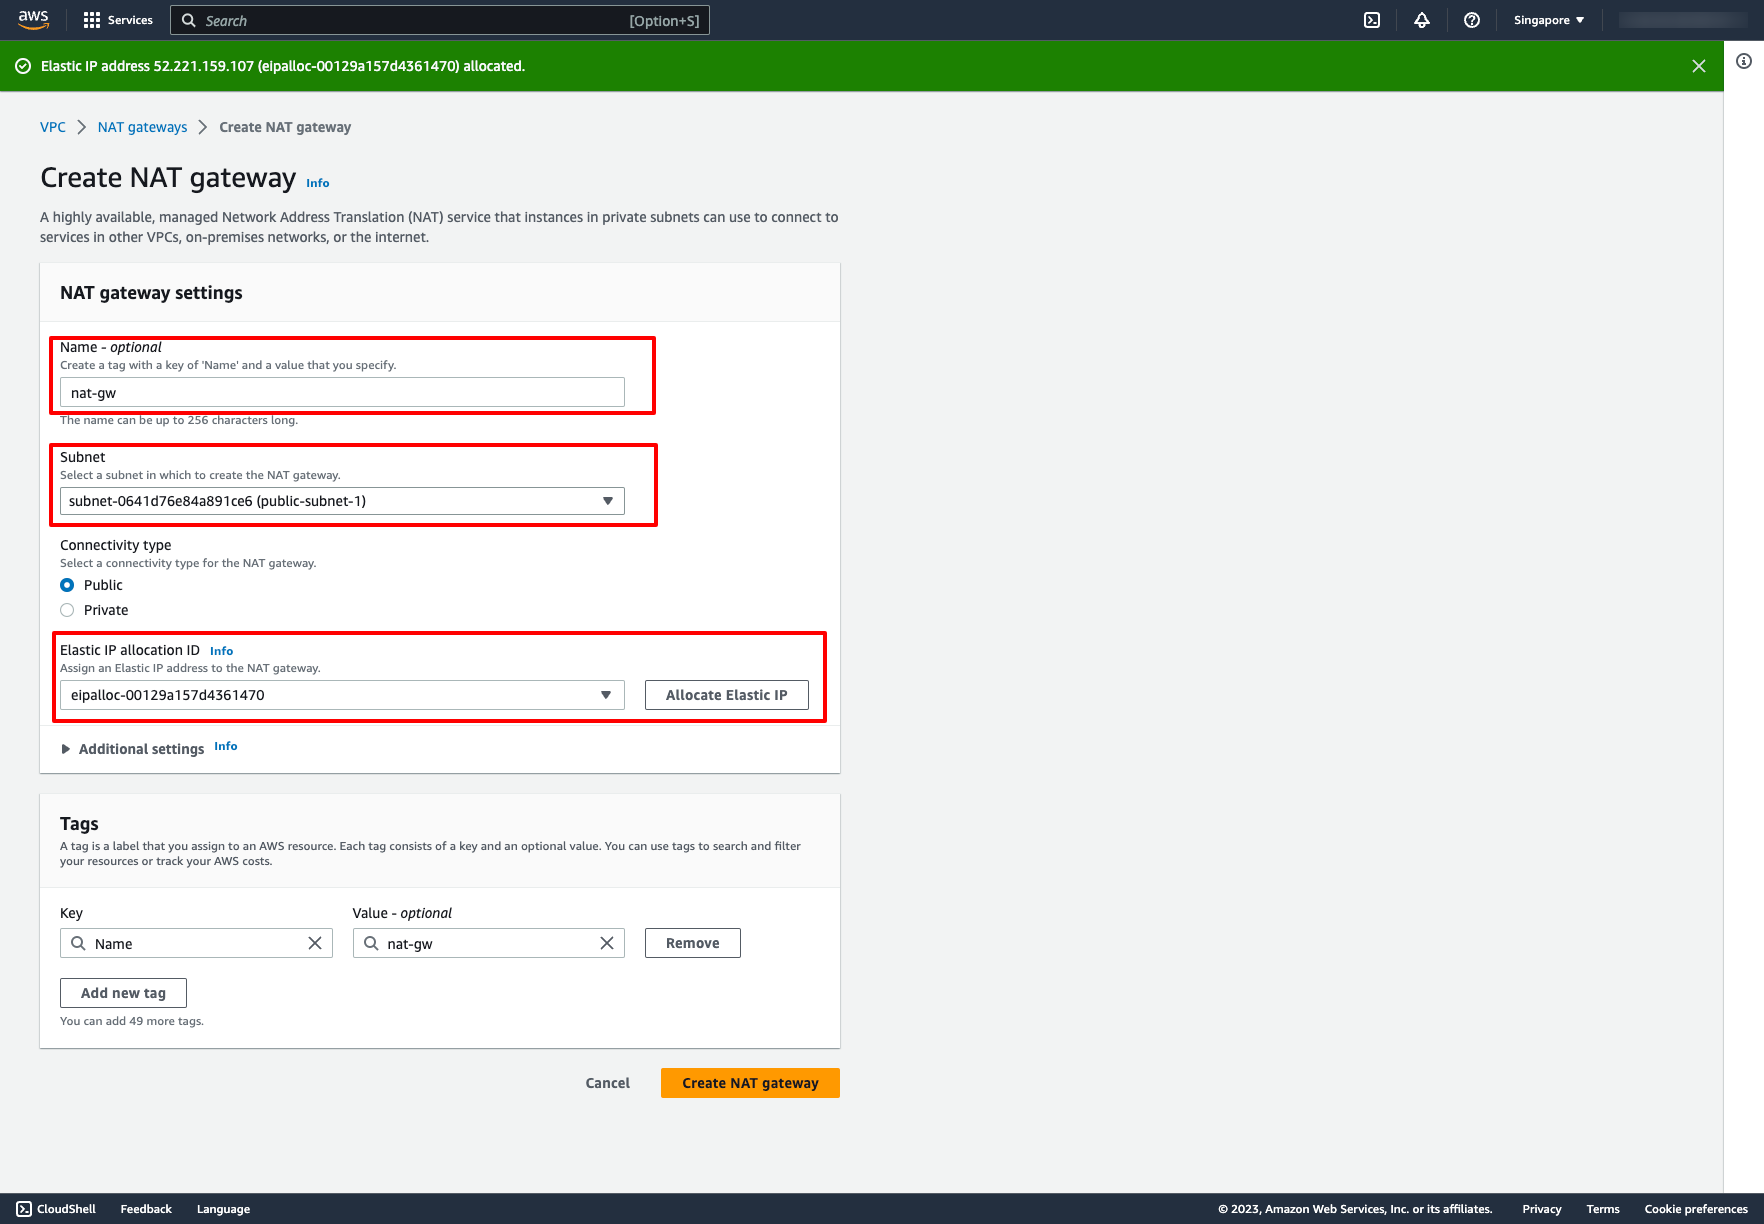 You create a public NAT gateway in a public subnet and must associate an elastic IP address with the NAT gateway at creation. So please choose your public subnet in Subnet dropdown and choose an Elastic IP, if you don’t have any Elastic IP, you can click to “Allocate Elastic IP”.
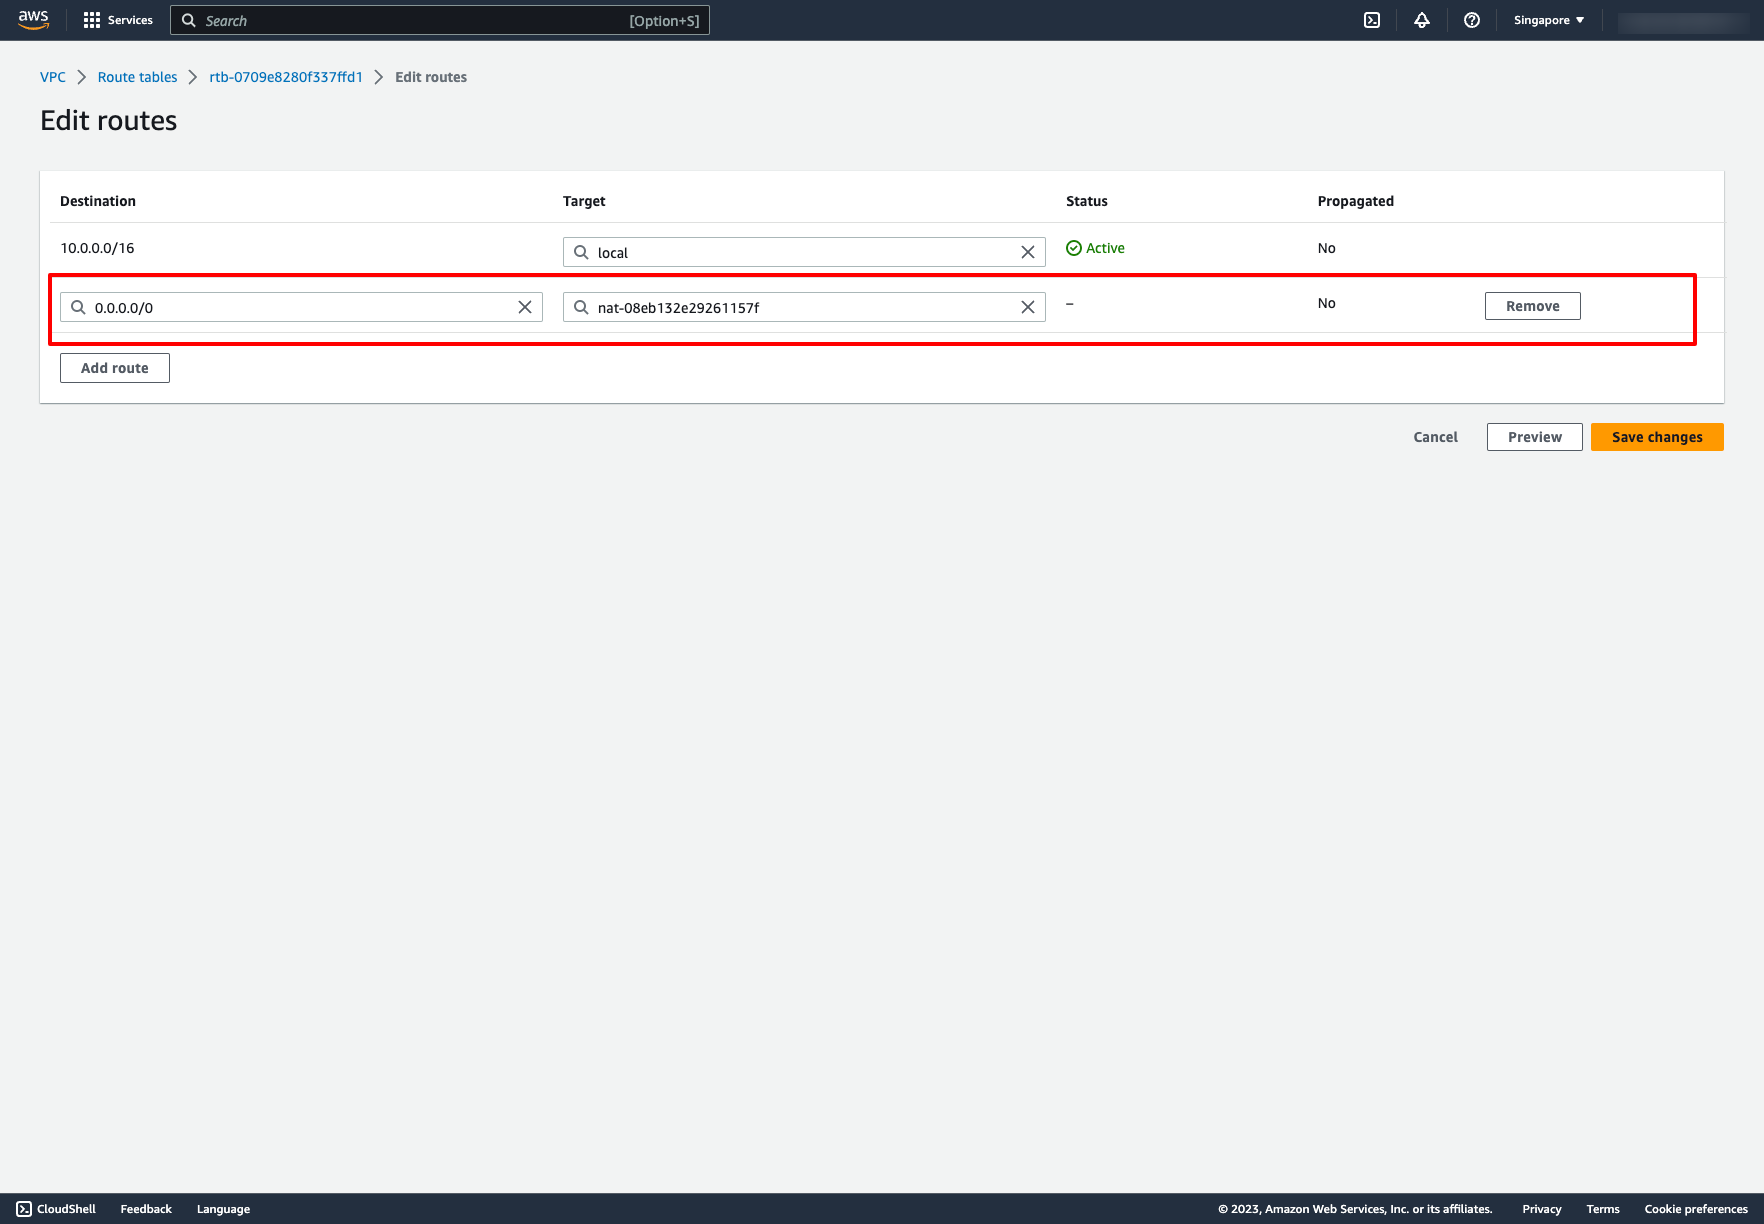
Back to the private route table, now we can add a new route to NAT gateway for it:
You create a public NAT gateway in a public subnet and must associate an elastic IP address with the NAT gateway at creation. So please choose your public subnet in Subnet dropdown and choose an Elastic IP, if you don’t have any Elastic IP, you can click to “Allocate Elastic IP”.
Back to the private route table, now we can add a new route to NAT gateway for it:
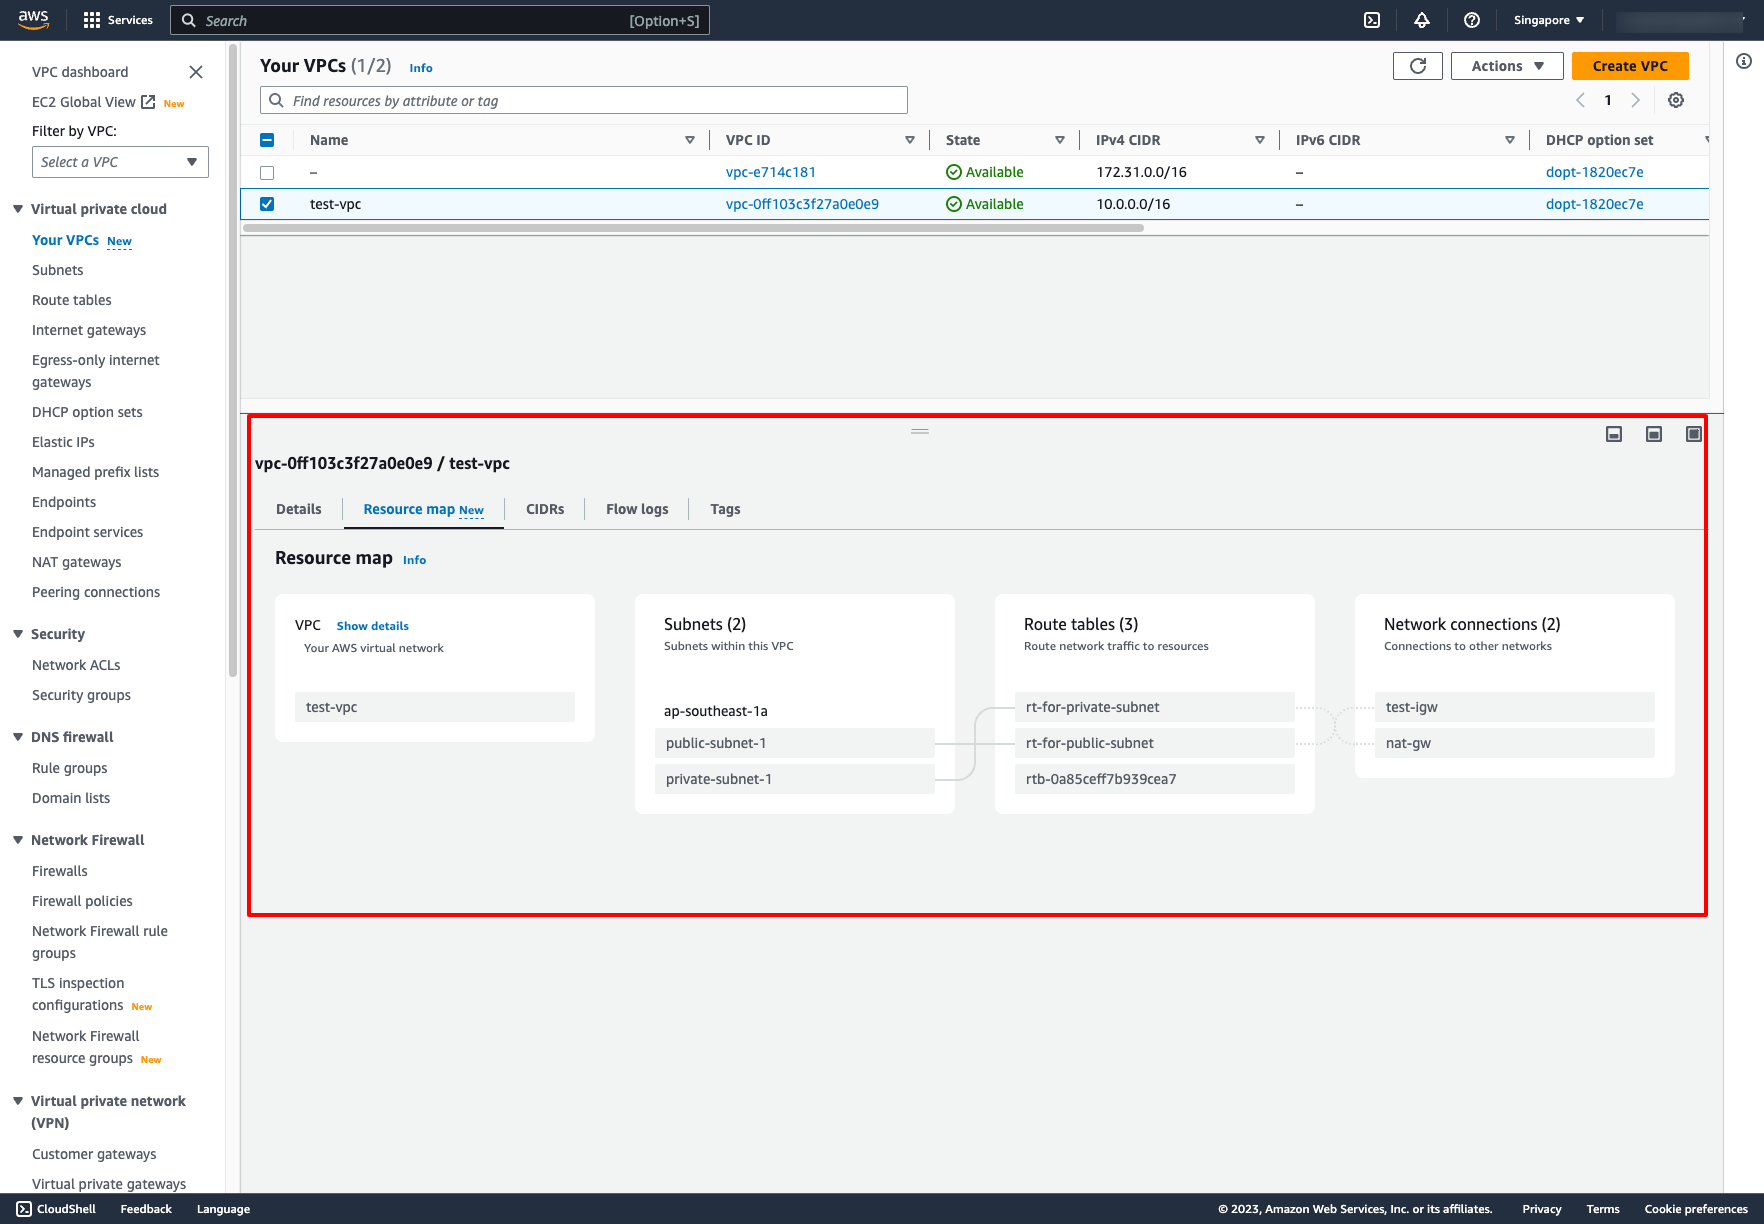
Now, re-check the result in Resource map tab, we have a simple network in AWS:
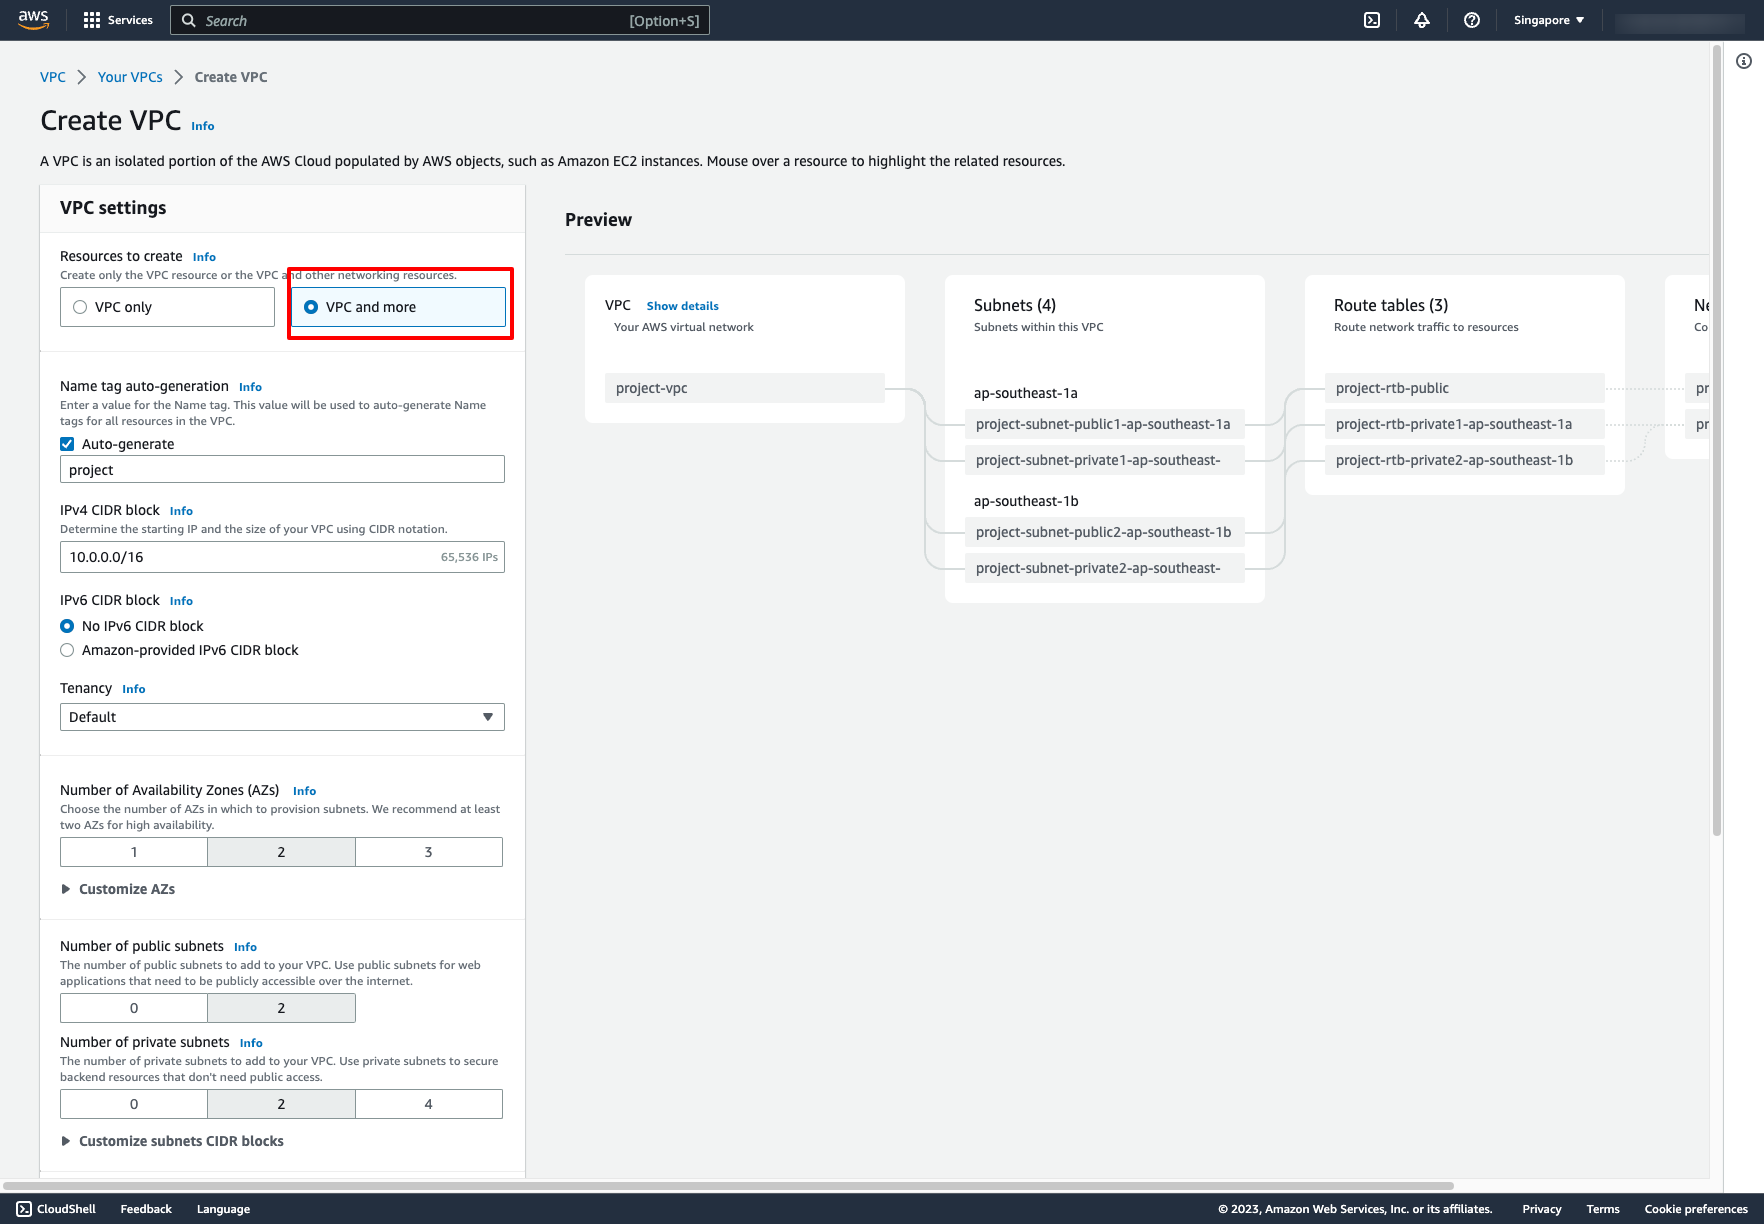
 VPC and more option in VPC creation:
This option allow us can create VPC and other service like subnets, route tables, Internet gateway and NAT gateway in one step.
VPC and more option in VPC creation:
This option allow us can create VPC and other service like subnets, route tables, Internet gateway and NAT gateway in one step.
Estimated time: 4-5 hours (with DevOps knowledge)
Estimated time: 2-3 days (without DevOps knowledge)
5. Creating AWS network with Prismscaler
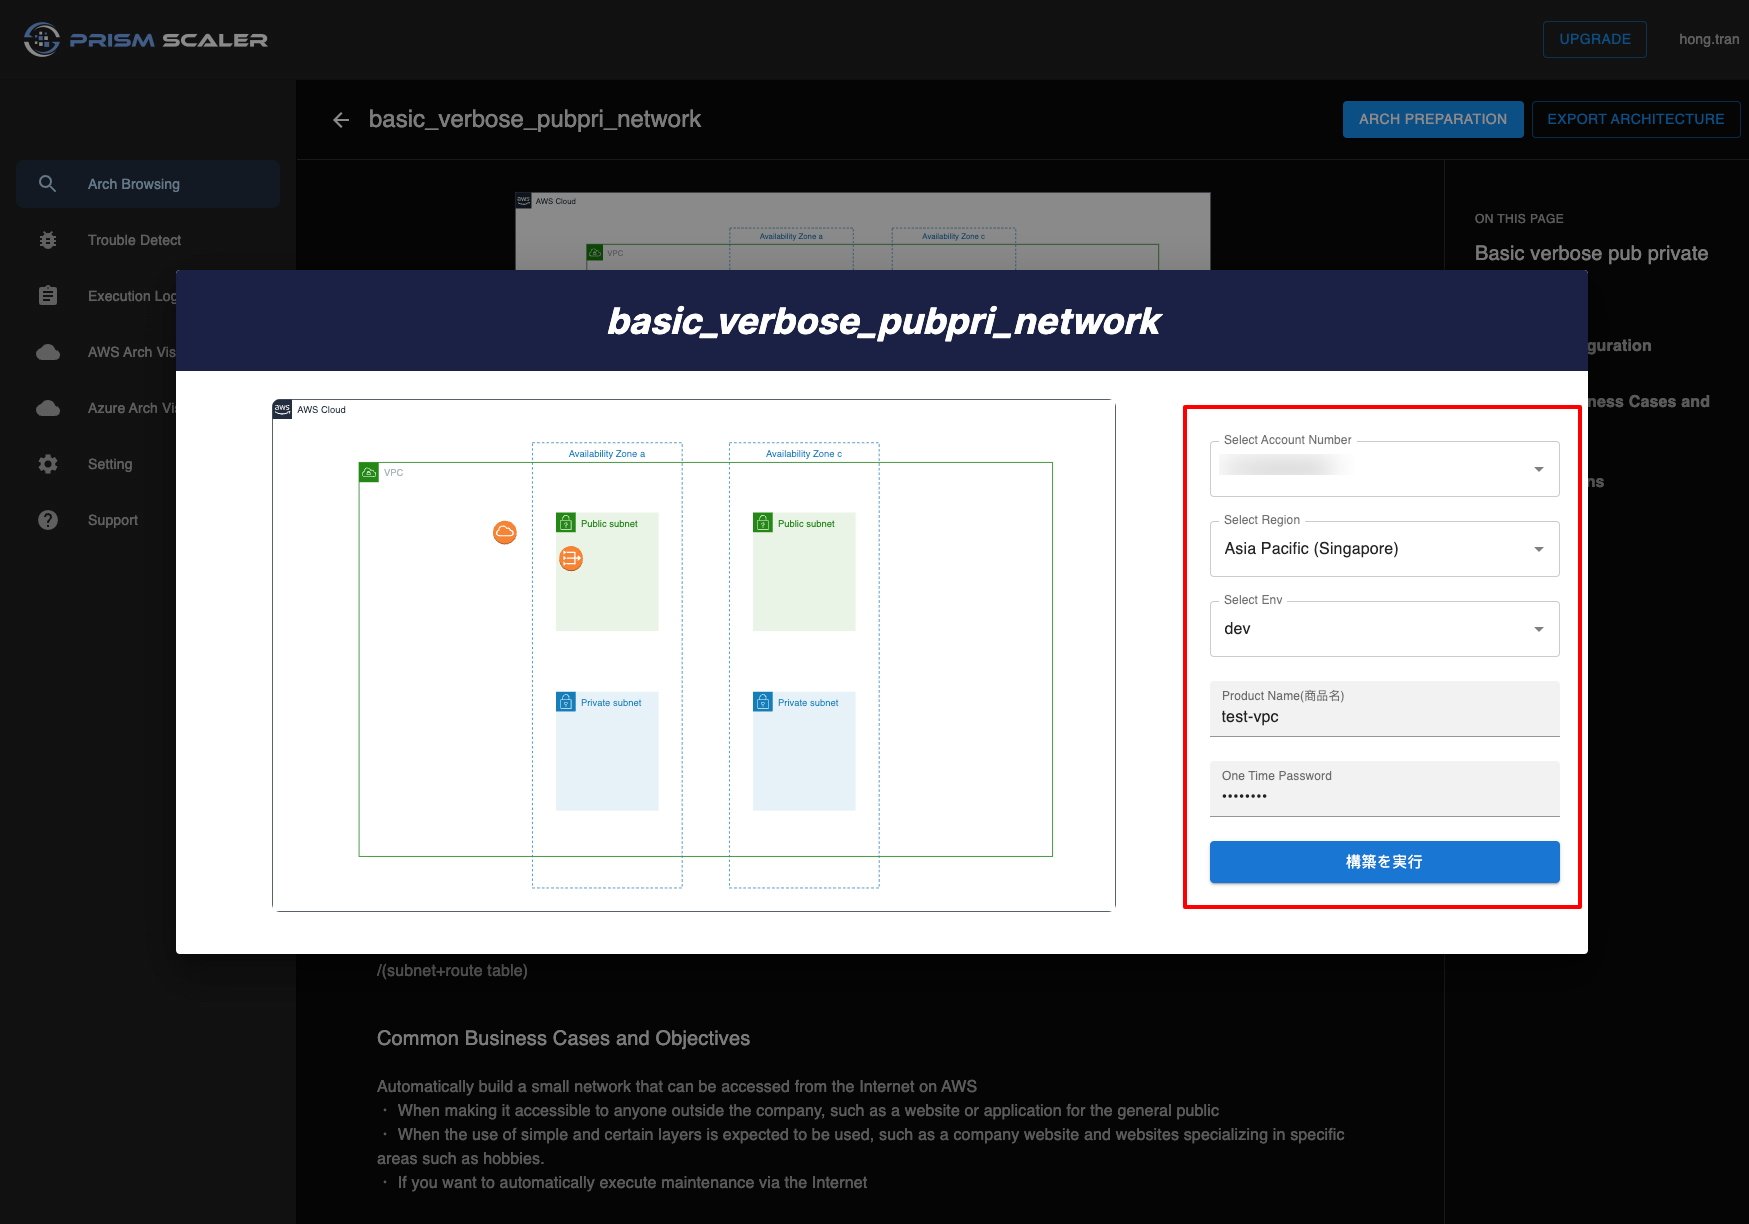
PrismScaler automatically build a small network that can be accessed from the Internet on AWS for you. You don’t need to think about how to create Internet gateway, NAT gateway or how to associate subnets to route table, we will help you to do that. All you need to prepare is a AWS account. And all you need to do when creating network on PrismScaler is choosing which region you want to place the network.
Estimated time: 5 minutes (without DevOps knowledge)
6. Network variation (standard, minimum, complex)
7. Reference
Links to official AWS documentation and other relevant resources for further reading.