1. Introduction
Hello! We are a writer team from Definer Inc.
Amplify is a powerful framework provided by AWS (Amazon Web Services) that simplifies the process of building full-stack applications, including Single-Page Applications (SPAs). SPAs are web applications that dynamically update and render content on a single web page without requiring page reloads. Amplify makes it easy for developers to create modern, serverless SPAs by providing a set of tools and libraries to handle backend tasks seamlessly.
In this issue, you are wondering how to use a single page application with Amplify.
Let's take a look at the actual screens and resources to explain in detail.
2. Purpose/Use Cases
The purpose of "Single-Page Application with Amplify" is to showcase how developers can leverage Amplify to build feature-rich SPAs quickly and efficiently. Amplify abstracts away the complexities of backend development, enabling developers to focus on creating engaging user interfaces and frontend functionalities without the need to manage servers or infrastructure.
Key Concepts and Benefits of "Single-Page Application with Amplify":
(1) Rapid Development
(2) Serverless Architecture
(3) Authentication and Security
(4) Data Storage and APIs
(5) Real-time Functionality
(6) Continuous Deployment
(7) Scalability and Performance
3. Back-end setup
In this project, we are building the backend for a Single-Page Application (SPA) using AWS Lambda and DynamoDB as the database. This backend will handle the business logic, data storage, and API integration for the SPA.
(1) Creating DynamoDB:
To create the database, we use AWS DynamoDB, a fully managed NoSQL database service provided by AWS.
- Access the DynamoDB console in the AWS Management Console.
- Click on "Create Table" to start creating a new table.
- Define the table name as "employee" and set "id" as the partition key. The partition key is used to uniquely identify each item in the table.
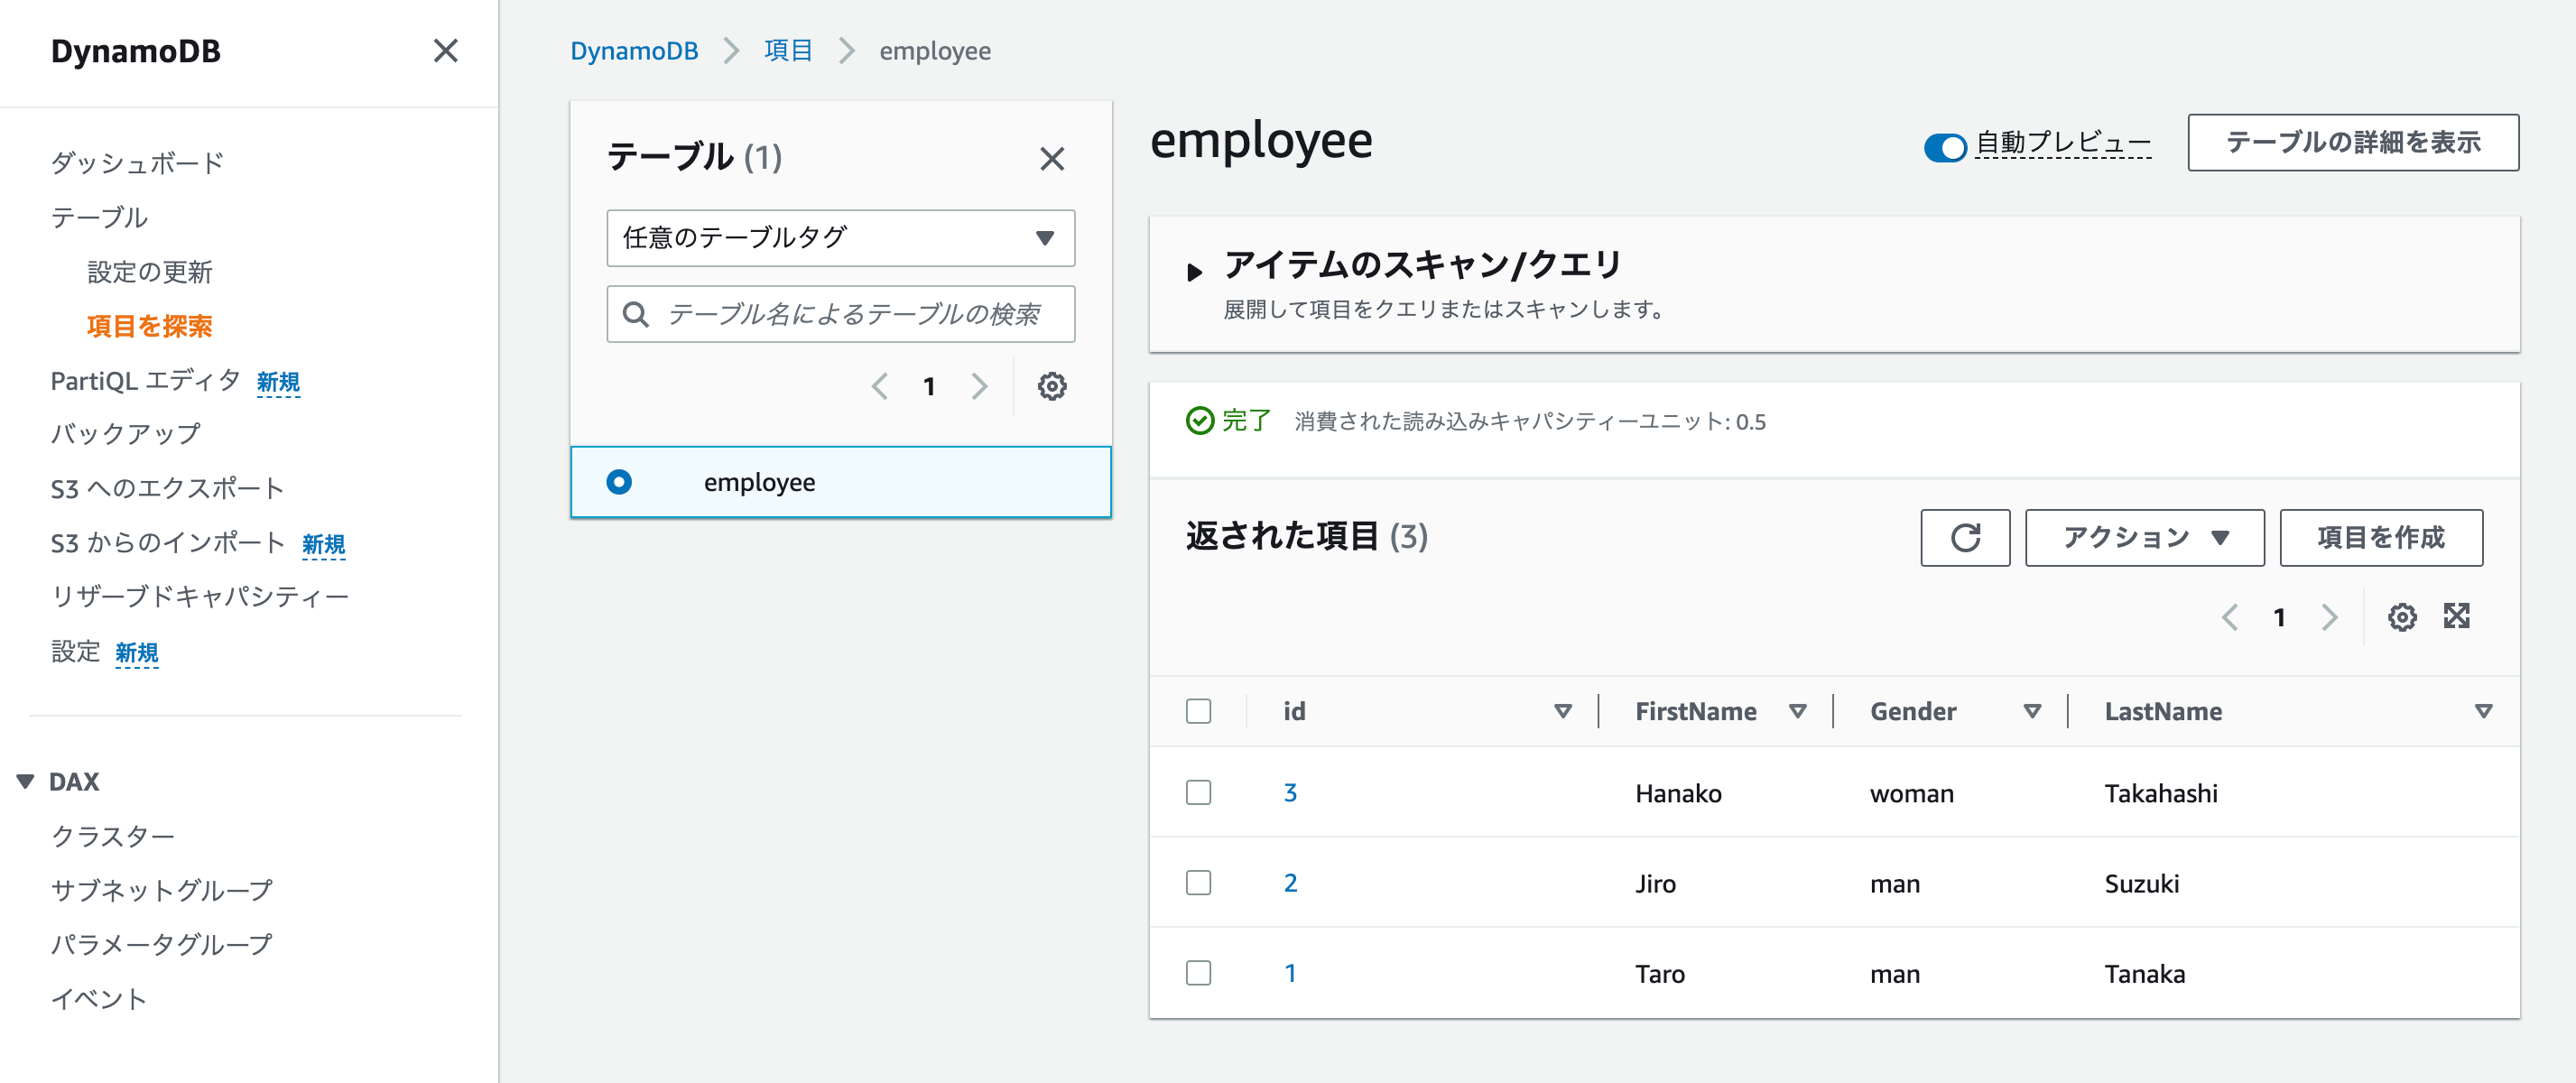
- From the DynamoDB console, click on "Explore Items" to start adding items and sample data to the "employee" table. Each item in the table will represent an employee's record with attributes like "id," "name," "designation," and "department."
 (2) Creating Lambda Function:
We create an AWS Lambda function, which serves as the serverless backend for the SPA.
Access the Lambda console in the AWS Management Console.
- Click on "Create Function" to create a new Lambda function.
- Select "Python 3.9" as the runtime and provide the function code. The code will contain the business logic to handle API requests and interact with DynamoDB to perform CRUD operations on the "employee" table.
- Additionally, the Lambda function needs permissions to access DynamoDB, which is achieved by attaching an IAM (Identity and Access Management) role to the function with the appropriate permissions.
For API Gateway integration, the Lambda function must return responses in the expected format so that the API Gateway can handle them correctly.
(3) Integration of API Gateway and Lambda:
After creating the Lambda function, we integrate it with Amazon API Gateway to expose it as an API endpoint for the SPA.
In the Lambda function details screen, go to "Settings" → "Triggers" → "Add Trigger."
- Select "API Gateway" as the trigger type and choose "REST API."
- Click "Add" to create the API Gateway integration with the Lambda function.
- Next, go to the API Gateway details screen and click on the "Stage" tab. Here, you will find the API URL in the "Call URL" section. This URL serves as the endpoint through which the SPA will interact with the Lambda function.
By following these steps, we have successfully built the backend for our Single-Page Application using AWS Lambda as the serverless compute platform and DynamoDB as the data storage. The integration with API Gateway allows us to expose the Lambda function as a RESTful API, which can be accessed from the SPA frontend.
(2) Creating Lambda Function:
We create an AWS Lambda function, which serves as the serverless backend for the SPA.
Access the Lambda console in the AWS Management Console.
- Click on "Create Function" to create a new Lambda function.
- Select "Python 3.9" as the runtime and provide the function code. The code will contain the business logic to handle API requests and interact with DynamoDB to perform CRUD operations on the "employee" table.
- Additionally, the Lambda function needs permissions to access DynamoDB, which is achieved by attaching an IAM (Identity and Access Management) role to the function with the appropriate permissions.
For API Gateway integration, the Lambda function must return responses in the expected format so that the API Gateway can handle them correctly.
(3) Integration of API Gateway and Lambda:
After creating the Lambda function, we integrate it with Amazon API Gateway to expose it as an API endpoint for the SPA.
In the Lambda function details screen, go to "Settings" → "Triggers" → "Add Trigger."
- Select "API Gateway" as the trigger type and choose "REST API."
- Click "Add" to create the API Gateway integration with the Lambda function.
- Next, go to the API Gateway details screen and click on the "Stage" tab. Here, you will find the API URL in the "Call URL" section. This URL serves as the endpoint through which the SPA will interact with the Lambda function.
By following these steps, we have successfully built the backend for our Single-Page Application using AWS Lambda as the serverless compute platform and DynamoDB as the data storage. The integration with API Gateway allows us to expose the Lambda function as a RESTful API, which can be accessed from the SPA frontend. import json
import boto3
from boto3.dynamodb.conditions import Key,Attr
def lambda_handler(event,context):
__TableName__ = "employee"
Primary_Column_Name = 'id'
lambda_body=json.loads(event['body'])
Primary_Key=lambda_body['primaryKey']
columns=["LastName","FirstName","Gender"]
client = boto3.client('dynamodb')
DB=boto3.resource('dynamodb')
table=DB.Table(__TableName__)
response=table.get_item(
Key={
Primary_Column_Name:Primary_Key
})
return {
'isBase64Encoded': False,
'statusCode': 200,
'headers': {
"Access-Control-Allow-Headers" : "Content-Type",
"Access-Control-Allow-Origin": "*",
"Access-Control-Allow-Methods": "OPTIONS,POST,GET,PUT"
},
'body': json.dumps(response["Item"])
} 4. Implementation of SPA in Amplify
In the next phase of the project, we will proceed with building the Single-Page Application (SPA) using AWS Amplify, which provides a set of tools and services to simplify frontend development and seamlessly integrate it with the backend we created earlier.
Here's a more detailed explanation of the steps involved in building the SPA with Amplify:
(1) Start Amplify Hosting:
- To start using Amplify Hosting, access the Amplify console in the AWS Management Console.
- Click on "Start Using" for Amplify Hosting to initiate the process of hosting the SPA.
- Since we selected "No Git provider," we are opting to manually deploy the SPA without integrating it with a Git repository.
- Next, you need to upload the zipped file containing the SPA code and assets. You can do this by drag & drop or any other preferred method.
- After uploading the files, click on "Save and Deploy" to deploy the SPA to Amplify Hosting.
(2) Access the SPA Screen:
- Upon successful deployment, Amplify Hosting will provide a unique URL where the SPA is now hosted and accessible.
- You can access the provided URL from a web browser to load the SPA frontend.
- The SPA will interact with the API Gateway, which, in turn, will trigger the Lambda function, leading to a response from the backend Lambda function.
- By calling the API, you can observe the response from the Lambda function, confirming that the SPA is correctly connected to the serverless backend.
At this stage, you have completed the construction of the SPA with AWS Amplify. The SPA is now hosted and accessible through the Amplify Hosting URL. Users can access the application, and when they interact with it, the frontend will make API requests to the API Gateway, which invokes the Lambda function. The Lambda function processes the requests, interacts with DynamoDB, and responds to the frontend accordingly. This seamless integration between the frontend and the serverless backend enables you to build a fully functional SPA with efficient data management and real-time capabilities.
<!DOCTYPE html>
<html>
<head>
    <meta charset="UTF-8">
    <title>test amplify</title>
    <style>
    body {
        background-color: #0b6de4;
        }
    label, button {
        color: #140d03;
        font-family: Arial;
        font-size: 24px;
        margin-left: 40px;
        }
     input {
        color: #010710;
        font-family: Arial;
        font-size: 24px;
        margin-left: 20px;
        }
    </style>
    <script>
        var callAPI = (Primary_Key)=>{
            var optHeader = new Headers();
            optHeader.append("Content-Type", "application/json");
            var raw = JSON.stringify({"Primary_Key":Primary_Key});
            console.log(raw)
            var requestOptions = {
                method: 'POST',
                headers: optHeader,
                body: raw,
                redirect: 'follow'
            };
            fetch("https://pkxs3esd9a.execute-api.ap-northeast-1.amazonaws.com/default/test-dynamo", requestOptions)
            .then(response => response.text())
            .then(result => alert(JSON.parse(result).body))
            .catch(error => console.log('error', error));
        }
    </script>
</head>
<body>
    <form>
        <label>First Name :</label>
        <input type="text" id="Primary_Key">
        <button type="button" onclick="callAPI(document.getElementById('Primary_Key').value)">Call API</button>
    </form>
</body>
</html>
5. Cited/Referenced Articles
6. About the proprietary solution "PrismScaler"
・PrismScaler is a web service that enables the construction of multi-cloud infrastructures such as AWS, Azure, and GCP in just three steps, without requiring development and operation.
・PrismScaler is a web service that enables multi-cloud infrastructure construction such as AWS, Azure, GCP, etc. in just 3 steps without development and operation.
・The solution is designed for a wide range of usage scenarios such as cloud infrastructure construction/cloud migration, cloud maintenance and operation, and cost optimization, and can easily realize more than several hundred high-quality general-purpose cloud infrastructures by appropriately combining IaaS and PaaS.

7. Contact us
This article provides useful introductory information free of charge. For consultation and inquiries, please contact "Definer Inc".
8. Regarding Definer
・Definer Inc. provides one-stop solutions from upstream to downstream of IT.
・We are committed to providing integrated support for advanced IT technologies such as AI and cloud IT infrastructure, from consulting to requirement definition/design development/implementation, and maintenance and operation.
・We are committed to providing integrated support for advanced IT technologies such as AI and cloud IT infrastructure, from consulting to requirement definition, design development, implementation, maintenance, and operation.
・PrismScaler is a high-quality, rapid, "auto-configuration," "auto-monitoring," "problem detection," and "configuration visualization" for multi-cloud/IT infrastructure such as AWS, Azure, and GCP.