1. Introduction
Hello! We are a writer team from Definer Inc.
In this issue, you are wondering how to build AWS.
Let's take a look at the actual screens and resources to explain in detail.
2. Purpose/Use Cases
This article is intended to help you "build basic resources using AWS" and utilize basic AWS services such as VPC.
This is a collection of information and practices that can be helpful for IT professionals who want to "get started with basic development using AWS".
3. What is Terraform?
Terraform is an Infrastructure as Code (IaC) service provided by HashiCorp.
It allows you to define and provision infrastructure resources across various cloud platforms and service providers in a declarative manner. With Terraform, you can define your infrastructure requirements using a simple and human-readable configuration language, and it takes care of provisioning and managing the resources for you.
IaC is a method of managing infrastructure construction in code.
Terraform uses the AWS SDK, which is written in the GO language.
One of the features of Terraform is its multi-cloud support, including AWS, Azure, and GCP.
Characteristics of Terraform:
- Declarative Configuration: Terraform uses a declarative approach, where you define the desired state of your infrastructure rather than scripting the steps to achieve it.
- Infrastructure as Code (IaC): Terraform treats infrastructure as code, which means you can version, share, and collaborate on your infrastructure configurations using source control systems like Git.
- Multi-Cloud and Cross-Provider Support: Terraform supports multiple cloud providers, including Amazon Web Services (AWS), Microsoft Azure, Google Cloud Platform (GCP), and many others.
Benefits of using Terraform:
- Automation and Infrastructure Consistency: Terraform enables you to automate the provisioning and management of infrastructure resources. This eliminates manual and error-prone processes, ensuring consistency and reproducibility across different environments.
- Scalability and Flexibility: With Terraform, you can easily scale your infrastructure up or down as your needs evolve.
- Infrastructure Versioning and Auditing: Since Terraform configurations are stored as code, you can track changes, apply version control practices, and perform audits on your infrastructure.
- Cloud-agnosticism: Terraform's support for multiple cloud providers and infrastructure technologies makes it ideal for organizations with a multi-cloud or hybrid cloud strategy.
4. How to use?
(1) Installation: To install Terraform, follow these steps:
Download the appropriate Terraform package for your operating system from the official Terraform website (https://www.terraform.io/downloads.html).
Extract the downloaded package to a directory.
Add the directory to your system's PATH environment variable.
(2) Execution:
Create a new directory for your Terraform configuration files.
Create a new file with the
.tf extension (e.g., main.tf) and write your Terraform configuration in it.
Open a terminal or command prompt and navigate to the directory where your Terraform configuration file is located.
Run terraform init to initialize the working directory.
Run terraform plan to see the execution plan and verify the changes that will be made.
Run terraform apply to apply the changes and provision the infrastructure resources.
You can use terraform destroy to tear down the infrastructure when it's no longer needed.
Terraform uses its own configuration language called HashiCorp Configuration Language (HCL). HCL is designed to be human-readable and easy to write. It follows a block and argument syntax, where blocks represent resources or modules, and arguments define their attributes and values. Here's an example of HCL syntax: resource "aws_instance" "example" {
ami = "ami-0c55b159cbfafe1f0"
instance_type = "t2.micro"
tags = {
Name = "example-instance"
}
} Terraform has a few key components:
- Providers: Providers are plugins that define and interact with specific infrastructure platforms or services. They allow Terraform to provision and manage resources in different cloud providers or systems.
- Resources: Resources represent the infrastructure components you want to create or manage. Examples include virtual machines, storage buckets, databases, and more. Each resource has its own configuration block with specific attributes.
- Modules: Modules are reusable components that encapsulate a set of resources and their configurations. They promote modularity and reusability in your Terraform code.
- State: Terraform keeps track of the current state of your infrastructure in a state file. This file is used to plan and apply changes, and it stores important information about the resources managed by Terraform.
5. Create VPC and EC2 with Terraform
We will create the resource in Terraform as soon as possible.
The following Terraform file is used.
(1) Specify credentials
Specify credentials in the provider block.
Enter the IAM user key.
Also, specify the region, etc. here.
(2) Specify resources
This is where AWS resources are defined.
# For Tokyo region, specify ap-northeast-1 from the AWS support rating
provider "aws" {
  access_key = "${access_key_here}"
  secret_key = "${secret_access_key_here}"
  region     = "ap-northeast-1"
}

# Define VPC construction information
resource "aws_vpc" "my_vpc" {
  cidr_block = "10.0.0.0/16"

  tags = {
    Name = "vpc-example"
  }
}

# Define Subnet information
resource "aws_subnet" "my_subnet" {
  vpc_id            = aws_vpc.my_vpc.id
  cidr_block        = "10.0.1.0/24"
  availability_zone = "ap-northeast-1"

  tags = {
    Name = "subnet-example"
  }
}

# Define network_interface
resource "aws_network_interface" "foo" {
  subnet_id   = aws_subnet.my_subnet.id
  private_ips = ["172.16.10.100"]

  tags = {
    Name = "primary_network_interface"
  }
}

# Define search logic for AWS Ami
data "aws_ami" "ubuntu" {
  most_recent = true

  filter {
    name   = "name"
    values = ["ubuntu/images/hvm-ssd/ubuntu-focal-20.04-amd64-server-*"]
  }

  filter {
    name   = "virtualization-type"
    values = ["hvm"]
  }

  owners = ["099720109477"] # Canonical
}

# Define Ec2
resource "aws_instance" "foo" {
  ami           = data.aws_ami.ubuntu.id
  instance_type = "t2.micro"

  network_interface {
    network_interface_id = aws_network_interface.foo.id
    device_index         = 0
  }

  credit_specification {
    cpu_credits = "unlimited"
  }
}
Let's break down the above code:
The first block specifies the AWS provider, which is responsible for interacting with AWS services. It requires access and secret keys to authenticate with AWS and sets the desired AWS region to "ap-northeast-1" (Tokyo region).
VPC Resource: The next block defines the creation of an AWS Virtual Private Cloud (VPC). It specifies the CIDR block for the VPC (10.0.0.0/16) and assigns a tag to it.
Subnet Resource: The following block defines an AWS subnet within the previously created VPC. It assigns the subnet to the VPC using its ID, specifies the CIDR block for the subnet (10.0.1.0/24), sets the availability zone to "ap-northeast-1," and assigns a tag to the subnet.
Network Interface Resource: The next block defines an AWS network interface. It associates the network interface with the previously created subnet and assigns a private IP address (172.16.10.100) to it. Additionally, it assigns a tag to the network interface.
Data Block for AMI Search: This block defines a data block to search for the most recent Ubuntu AMI. It specifies filters to narrow down the search based on the AMI name and virtualization type. The resulting AMI is used later to create an EC2 instance.
EC2 Instance Resource: The final block defines the creation of an AWS EC2 instance. It uses the AMI ID obtained from the previous data block and specifies the instance type as "t2.micro." It also associates the EC2 instance with the previously created network interface and sets the CPU credit specification to "unlimited."
Check more about parameters in these resource and other resources in Terraform AWS provider documentation
(3) Terraform execution
First, execute the "terraform init" command.
Next, formulate an execution plan with the "terraform plan" command.
Then, create resources with the "terraform apply" command.
terraform init
terraform plan
terraform apply
6. Check the resources created in the AWS Console
(1) Log in to the AWSConsole screen.
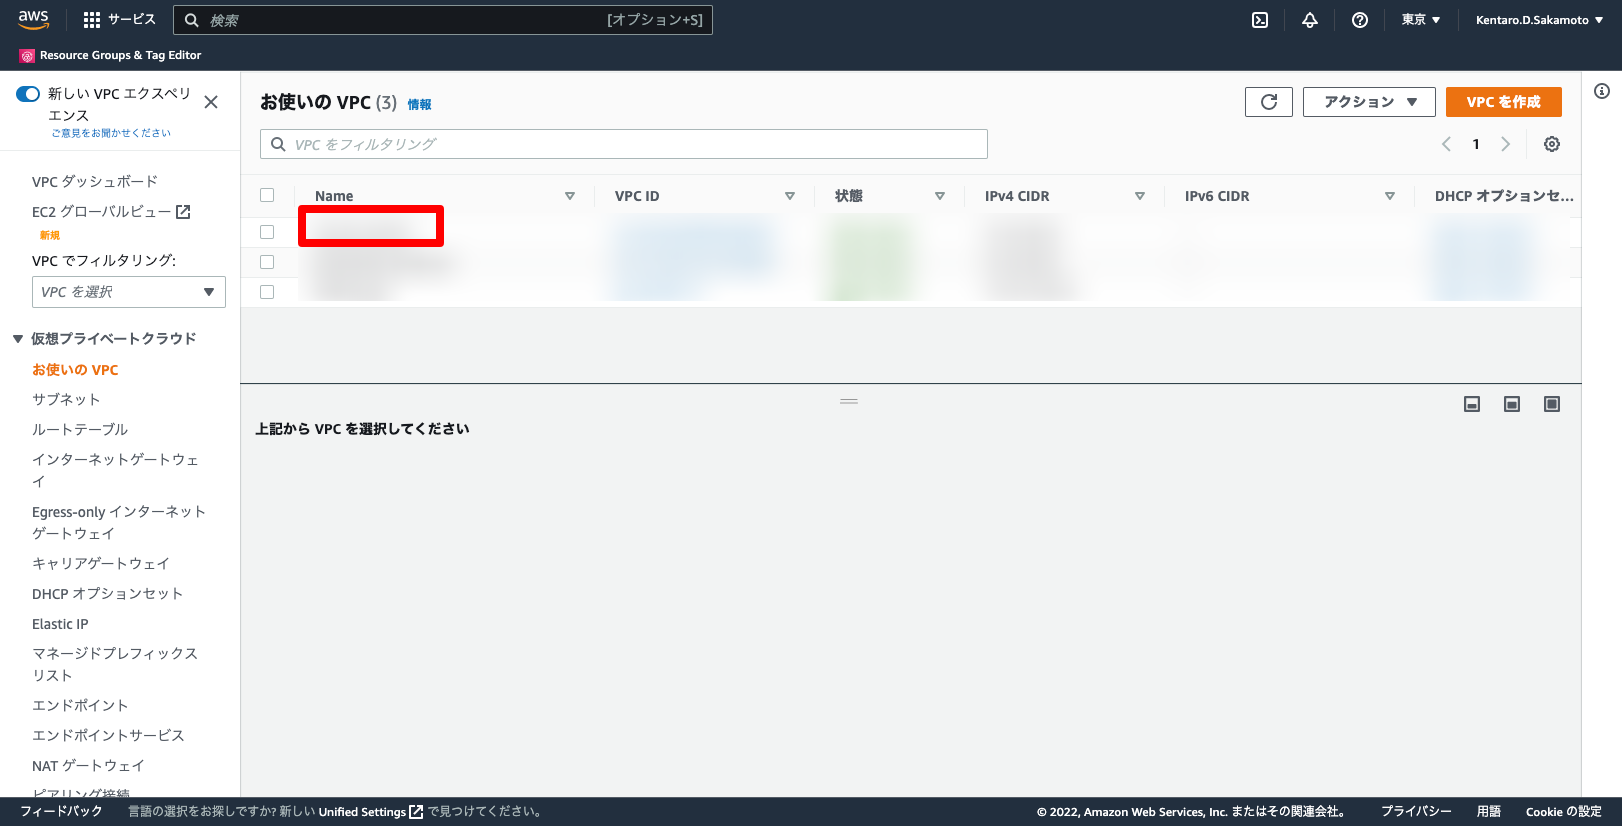
(2) Search for VPC and open the VPC screen.
 (3) Search for Ec2 and open the Ec2 screen.
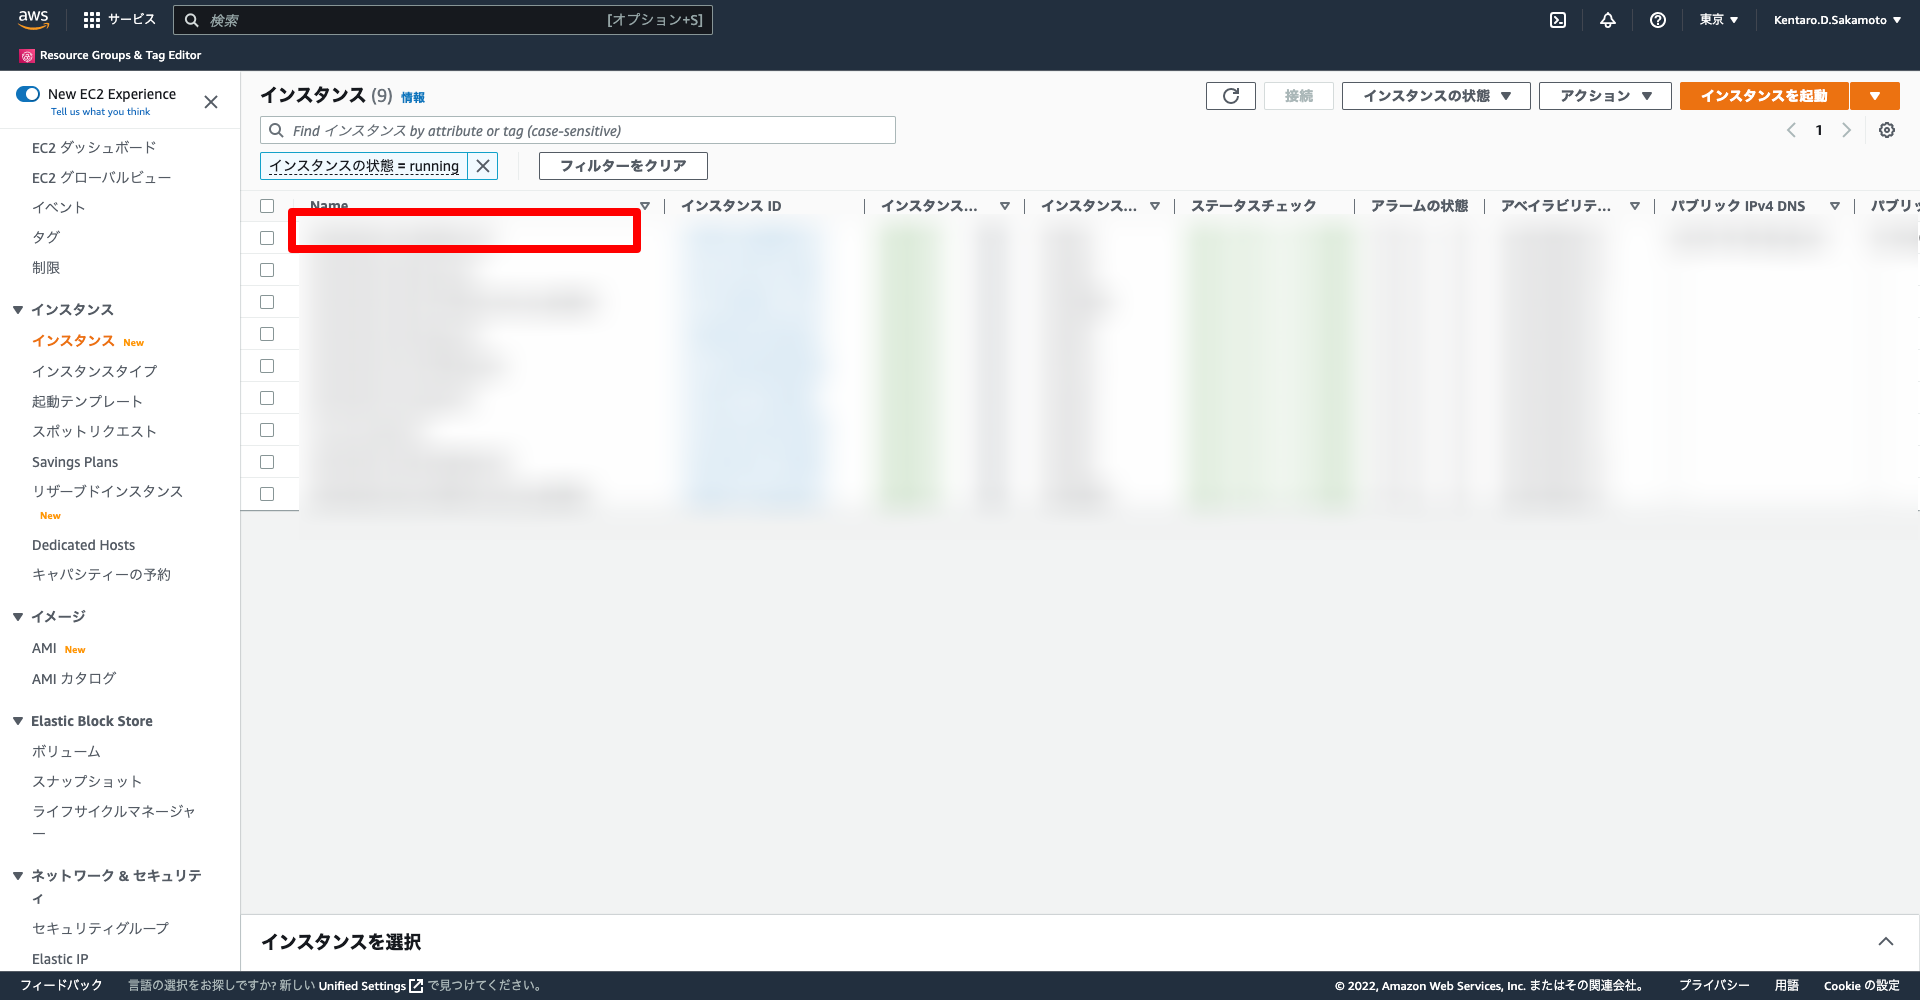 We have confirmed that the resource has been created!
(3) Search for Ec2 and open the Ec2 screen.
We have confirmed that the resource has been created! 7. Cited/Referenced Articles
Learn at home! 6 steps to study AWS for beginners! | Amazon ...
Amazon EKS: How to use Amazon EKS for beginners
How to create an HPC cluster with AWS ParallelCluster
[How to Create a VPC and Launch an EC2 Instance
How to build an HPC cluster with AWS ParallelCluster
[How to Create a VPC and Launch an EC2 Instance
How to create an AWS server - AWS - Amazon
IoT Update for Debugging and Troubleshooting!
AWS Support
8. About the proprietary solution "PrismScaler"
・PrismScaler is a web service that enables the construction of multi-cloud infrastructures such as AWS, Azure, and GCP in just three steps, without requiring development and operation.
・PrismScaler is a web service that enables multi-cloud infrastructure construction such as AWS, Azure, GCP, etc. in just 3 steps without development and operation.
・The solution is designed for a wide range of usage scenarios such as cloud infrastructure construction/cloud migration, cloud maintenance and operation, and cost optimization, and can easily realize more than several hundred high-quality general-purpose cloud infrastructures by appropriately combining IaaS and PaaS.

9. Contact us
This article provides useful introductory information free of charge. For consultation and inquiries, please contact "Definer Inc".
10. Regarding Definer
・Definer Inc. provides one-stop solutions from upstream to downstream of IT.
・We are committed to providing integrated support for advanced IT technologies such as AI and cloud IT infrastructure, from consulting to requirement definition/design development/implementation, and maintenance and operation.
・We are committed to providing integrated support for advanced IT technologies such as AI and cloud IT infrastructure, from consulting to requirement definition, design development, implementation, maintenance, and operation.
・PrismScaler is a high-quality, rapid, "auto-configuration," "auto-monitoring," "problem detection," and "configuration visualization" for multi-cloud/IT infrastructure such as AWS, Azure, and GCP.