1. Introduction
In the ever-evolving landscape of cloud computing, Azure Virtual Machines (VMs) stand as pillars of versatility and functionality. As cloud adoption continues to soar, mastering the art of creating and configuring Azure VMs becomes an indispensable skill for modern IT professionals. This guide is your pathway to understanding the intricacies of Azure VMs, from their creation to fine-tuning their configurations, all in pursuit of harnessing the full power of cloud-based computing.
2. Purpose
The purpose of this guide is simple yet profound: to equip you with the knowledge and skills necessary to confidently create and configure Azure Virtual Machines. As organizations increasingly shift their infrastructure to the cloud, being adept at creating and managing VMs within the Azure ecosystem is a skill that not only enhances your professional portfolio but also contributes significantly to operational efficiency and scalability.
3. What is Azure Network?
Before we delve into the world of Azure VMs, let's set the stage by understanding Azure Network. Azure Network forms the bedrock of communication within the Azure cloud environment. It encompasses a range of networking components and services that enable the seamless exchange of data between Azure resources. This knowledge serves as a cornerstone as we venture into the realm of VM creation and configuration.
4. Creating Azure VM with Azure Console
Creating an Azure Virtual Machine (VM) using the Azure Management Console involves a series of steps to configure and deploy your VM. Below is a detailed step-by-step guide, including code snippets and console commands where applicable:
- Log into Azure Portal:
- Navigate to the Azure Portal and log in with your Azure account credentials.
- Navigate to Virtual Machines:
- Click on "Create a resource" in the upper-left corner.
- Search for "Virtual Machine" and select the appropriate result.
- Click "Create" to initiate the VM creation process.
- Basic Settings:
- Provide a unique name for your VM using alphanumeric characters.
- Choose an Azure subscription from the dropdown menu.
- Create a new or select an existing resource group to organize your resources.
- Select a region for deployment, ideally choosing the one closest to your target audience.
- Choose the appropriate operating system image (Windows, Linux, etc.).
- Select the VM size based on your performance and resource requirements.
- Administrator Account:
- Specify an administrator username and password for accessing the VM.
- This is crucial for managing and configuring the VM remotely.
- Inbound Port Rules:
- Configure inbound port rules to allow specific network traffic to the VM.
- Common ports include 22 for SSH (Linux) or 3389 for RDP (Windows).
- Disk Settings:
- Choose between a managed disk or a traditional storage account for VM storage.
- Define the disk type and size according to your application's needs.
- Networking:
- Select an existing virtual network or create a new one.
- Choose a subnet within the virtual network to place the VM.
- Configure public IP settings if your VM needs direct internet access.
- Management:
- Configure advanced settings, such as enabling or disabling boot diagnostics.
- You can also specify extensions for additional functionality.
- Review and Create:
- Review the configuration details to ensure accuracy.
- Click "Create" to start the VM deployment process.
- Deployment Progress:
- Azure will begin provisioning the VM based on your specified settings.
- You can monitor the deployment progress in the Azure Portal.
- Access and Management:
- Once the VM is successfully deployed, access it using SSH (Linux) or RDP (Windows).
- Use the provided administrator credentials to establish a remote connection.
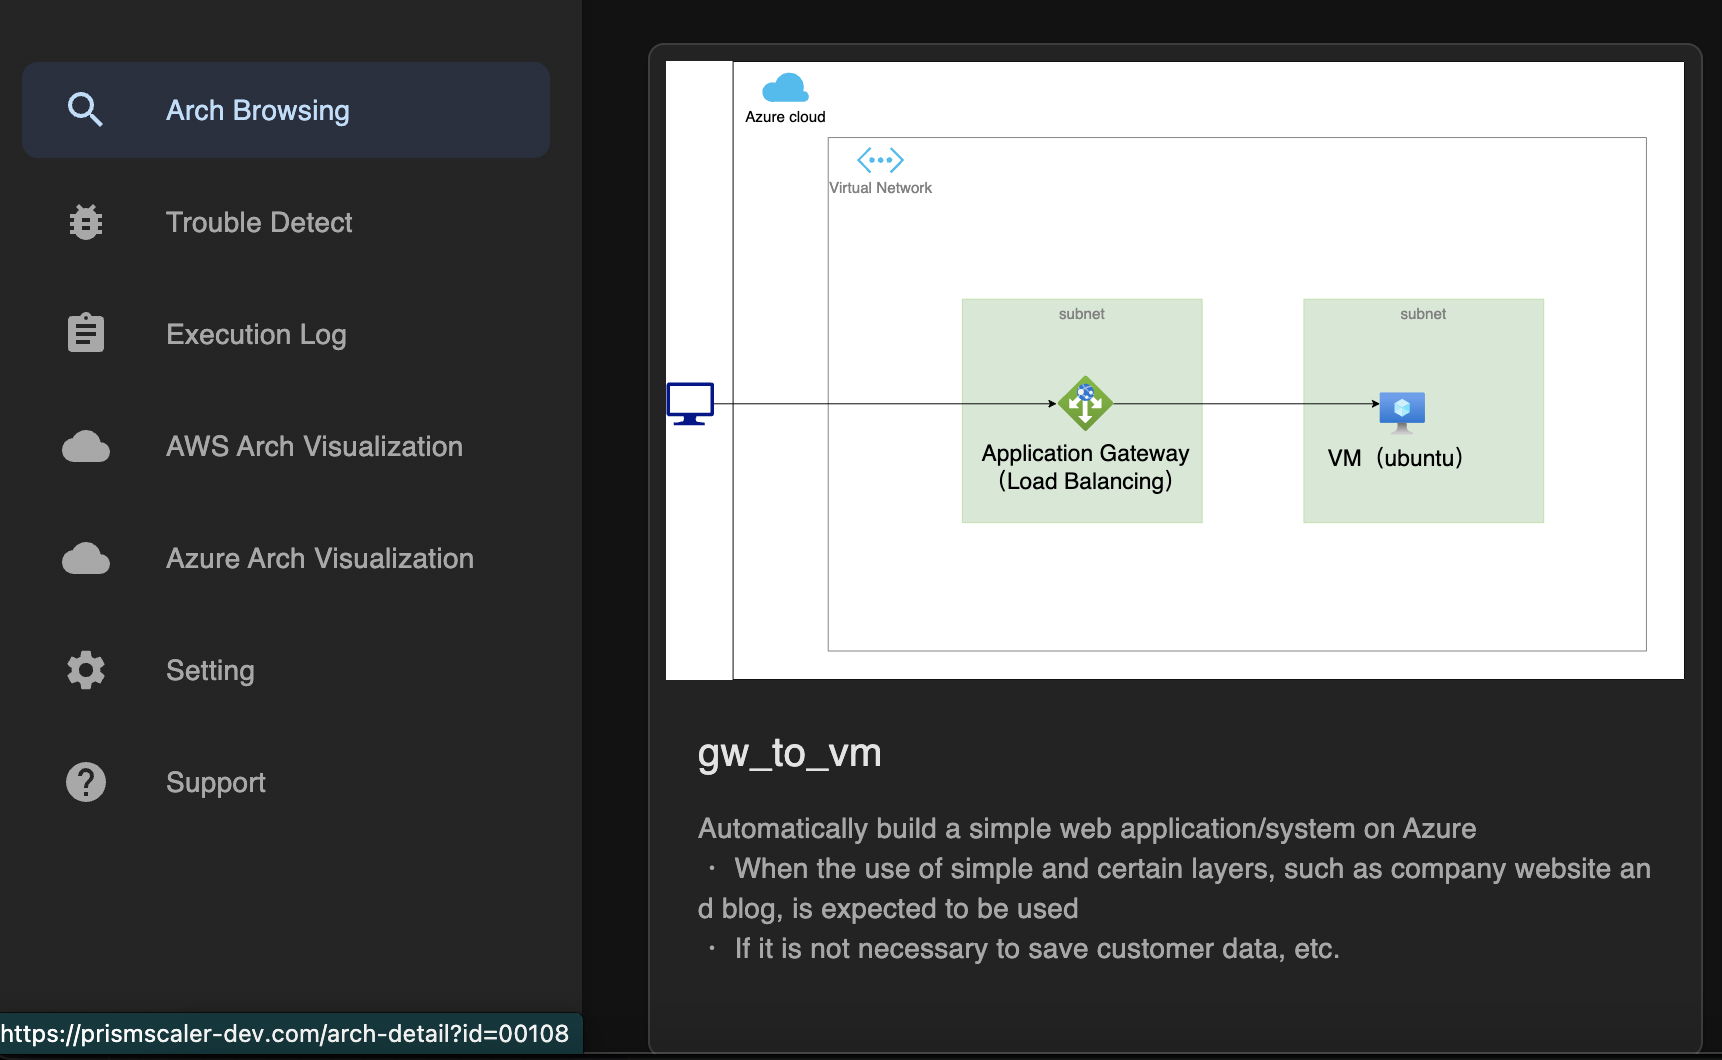
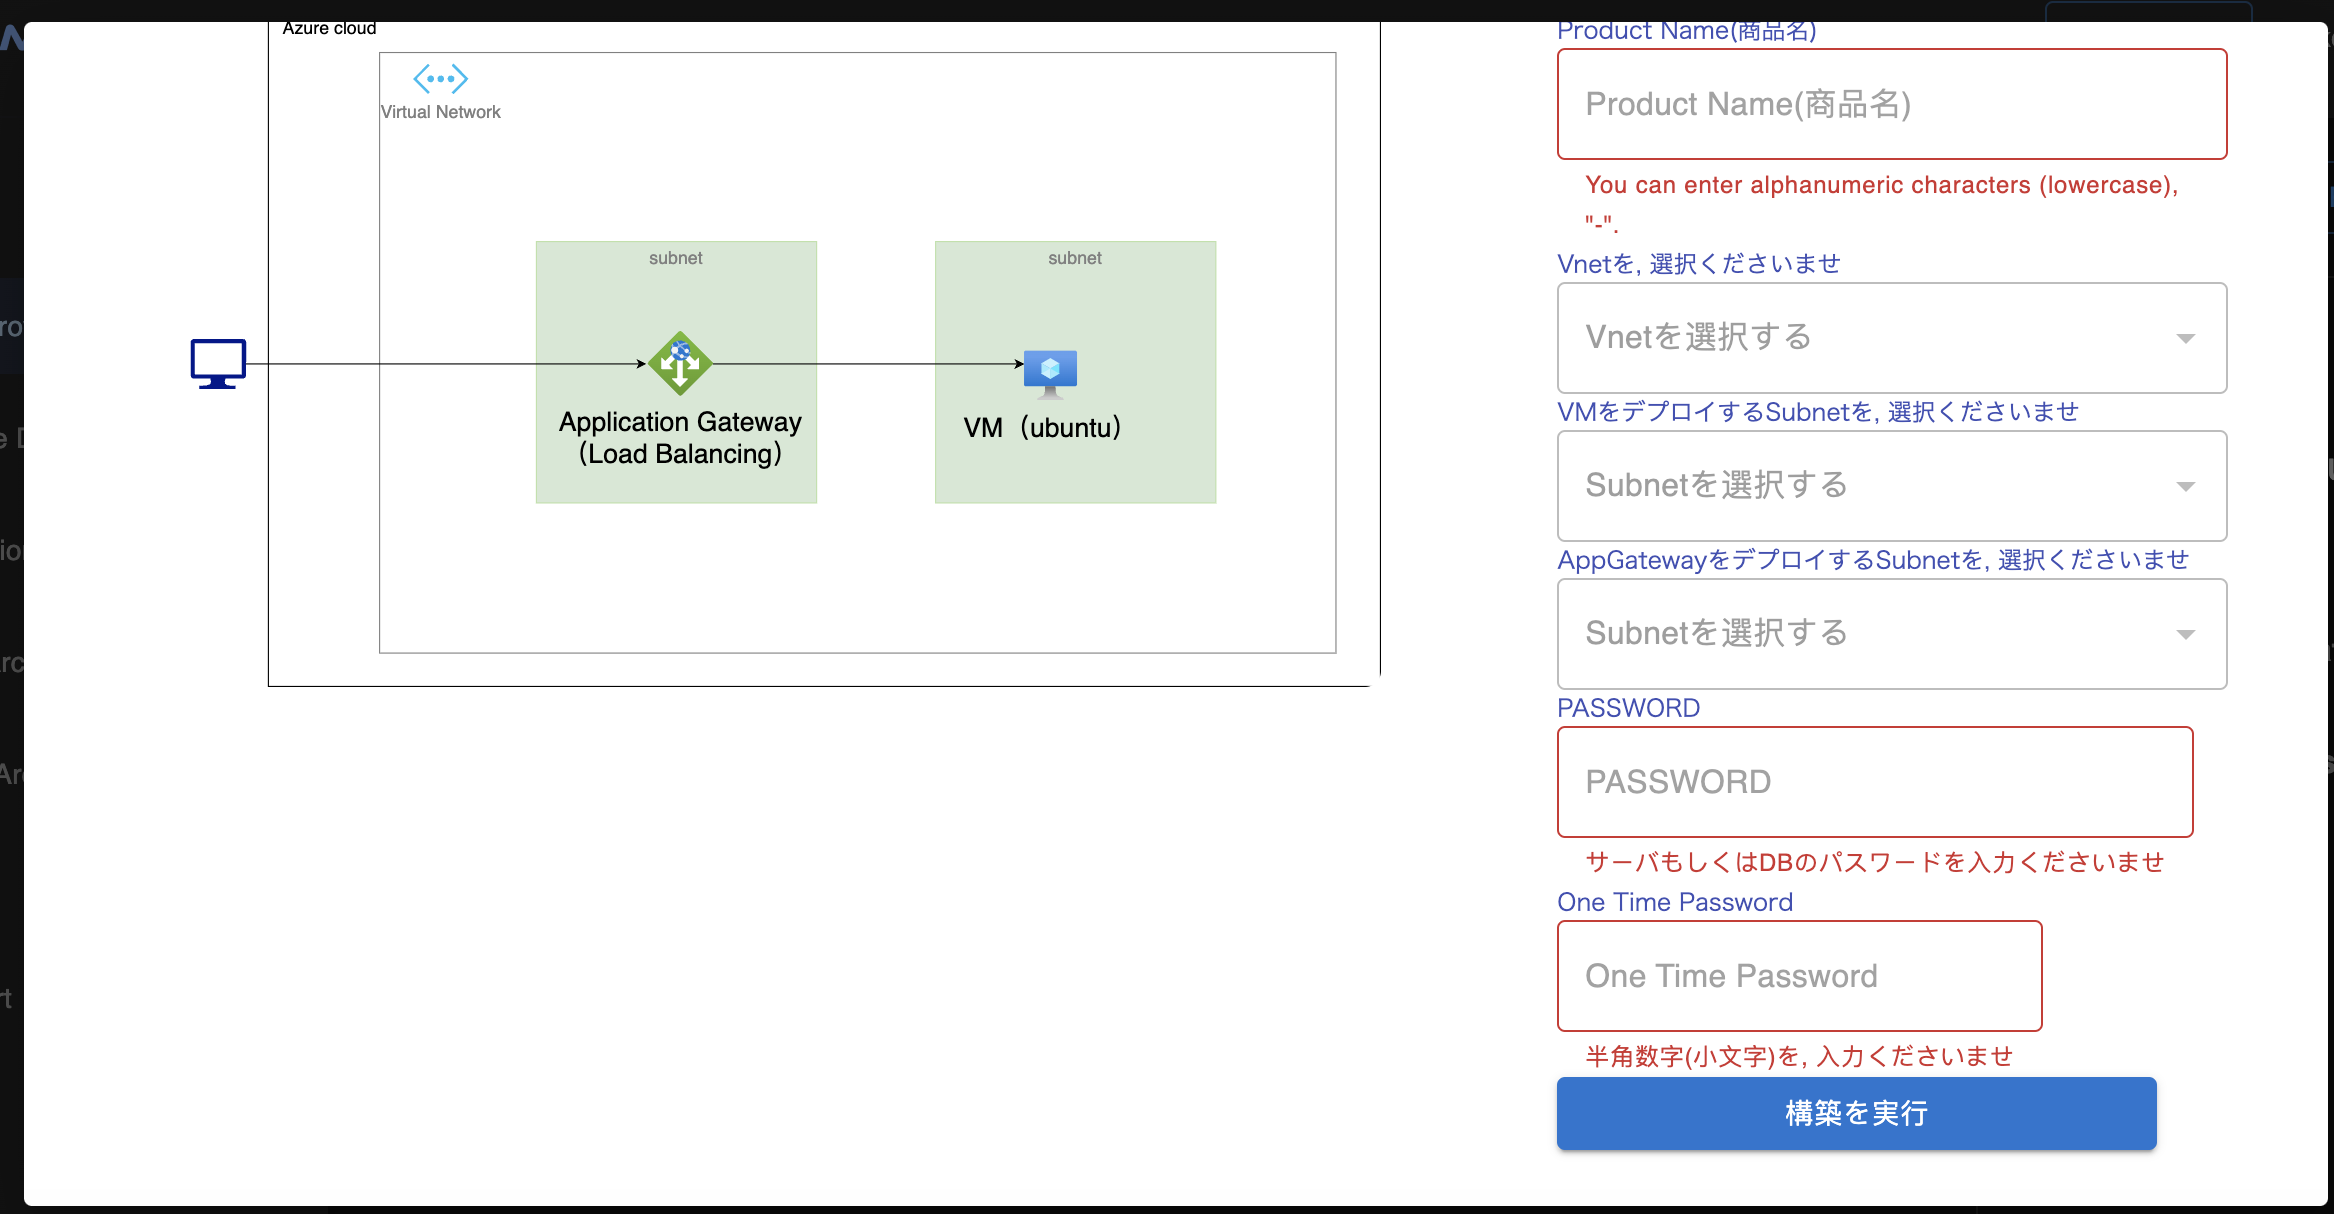
5. Creating Azure VM with PrismScaler
For those seeking efficiency without compromising simplicity, we present an alternative: PrismScaler. This streamlined method allows you to create an Azure VM in a matter of minutes, even if you lack extensive DevOps knowledge. With an estimated setup time of just 10 minutes, PrismScaler brings the power of VM deployment to your fingertips.
- Login to your prismscaler account
- Choose VM architecture to create:
 - Input all the necessary info
 - Process and wait around 10 mins for the arch to deploy
- Check azure console to complete the architecture.
- Process and wait around 10 mins for the arch to deploy
- Check azure console to complete the architecture.
- Input all the necessary info
- Process and wait around 10 mins for the arch to deploy
- Check azure console to complete the architecture. 6. VM Configuration
Creating an Azure VM is only the beginning. The true potential of a VM lies in its configuration. In this segment, we delve into the key configurations required to optimize your VM's performance and ensure it aligns with your intended use case. From setting up remote access to configuring security groups and managing storage, we cover it all. By the end of this section, you'll have a fully functional Azure VM tailored to your needs.
7. Reference
To continue your journey into the realm of Azure VMs and network configurations, we've compiled a comprehensive list of references and resources. Explore official documentation, insightful blogs, and tutorials that delve into advanced topics. These resources are your gateway to unlocking the full potential of Azure VMs and mastering the art of cloud-based infrastructure.
In conclusion, this guide serves as your compass to navigate the world of Azure Virtual Machines. As cloud computing becomes increasingly integral to modern IT landscapes, understanding how to create and configure Azure VMs is a skill that transcends roles and industries. By following this guide, you're not only acquiring practical knowledge but also positioning yourself at the forefront of the cloud revolution.